


5.
Install the microprocessor:
a.
Touch the static-protective package containing the new microprocessor to
any
unpainted
metal surface on the server; then, remove the microprocessor
from the package.
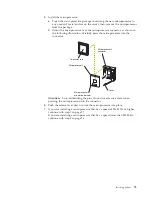
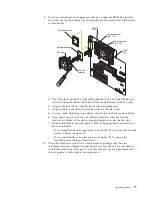
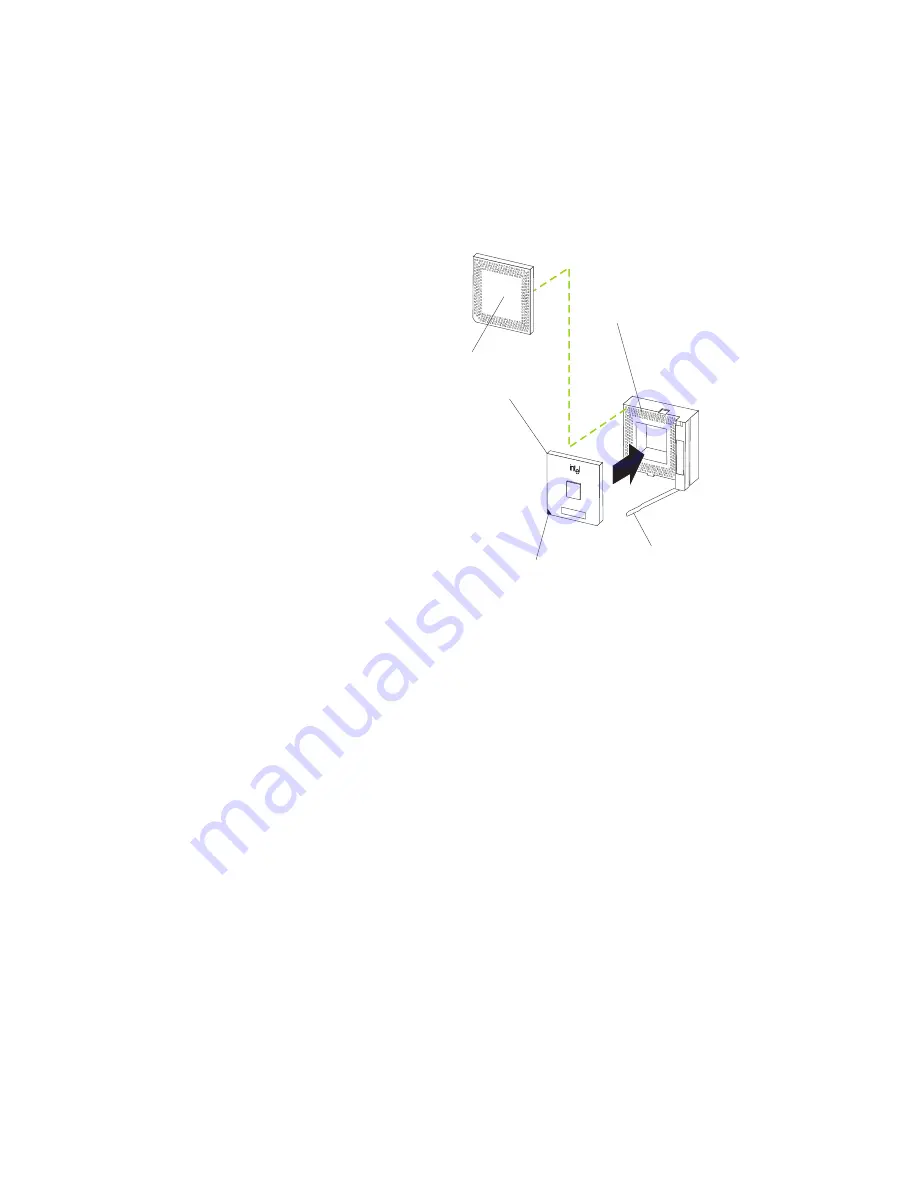
b.
Orient the microprocessor over the microprocessor connector, as shown in
the following illustration. Carefully press the microprocessor into the
connector.
Microprocessor 2
Terminator card
Microprocessor 2
connector
Microprocessor
orientation indicator
Lever
Attention:
To avoid bending the pins, do not use excessive force when
pressing the microprocessor into the connector.
6.
Push the release lever down to lock the microprocessor into place.
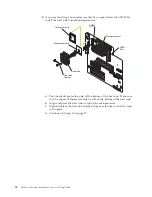
7.
If you are installing a microprocessor that has a speed of 933 MHz or higher,
continue with step 9 on page 77.
If you are installing a microprocessor that has a speed lower than 933 MHz,
continue with step 8 on page 76.
Installing options
75
Summary of Contents for 8645 - Eserver xSeries 220
Page 1: ...Hardware Maintenance Manual xSeries 220 Type 8645...
Page 2: ......
Page 3: ...Hardware Maintenance Manual xSeries 220 Type 8645...
Page 18: ...10 Hardware Maintenance Manual xSeries 220 Type 8645...
Page 36: ...28 Hardware Maintenance Manual xSeries 220 Type 8645...
Page 58: ...50 Hardware Maintenance Manual xSeries 220 Type 8645...
Page 102: ...94 Hardware Maintenance Manual xSeries 220 Type 8645...
Page 141: ...Related service information 133...
Page 142: ...134 Hardware Maintenance Manual xSeries 220 Type 8645...
Page 143: ...Related service information 135...
Page 144: ...136 Hardware Maintenance Manual xSeries 220 Type 8645...
Page 145: ...Related service information 137...
Page 146: ...138 Hardware Maintenance Manual xSeries 220 Type 8645...
Page 147: ...Related service information 139...
Page 148: ...140 Hardware Maintenance Manual xSeries 220 Type 8645...
Page 158: ...150 Hardware Maintenance Manual xSeries 220 Type 8645...
Page 159: ...Related service information 151...
Page 160: ...152 Hardware Maintenance Manual xSeries 220 Type 8645...
Page 167: ......


