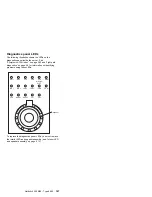
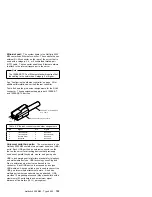
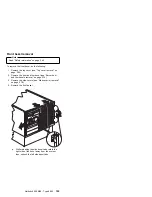

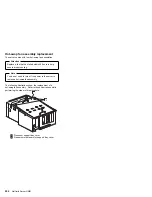
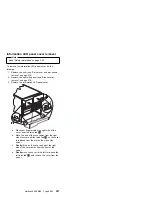
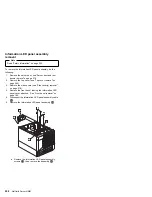
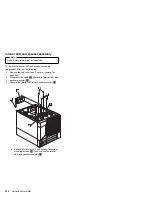

c. Grasp the handle
.6/
on the power supply and
pull the handle toward the center of the server;
then, slide the power supply out of the chassis.
Note
During normal operation, each power supply
bay should have either a power supply or
filler panel installed for proper cooling.
3. If you are not installing a replacement power supply:
a. Disconnect the power cord for the power supply
that you removed.
b. Install a power supply filler panel; then go to step
4.
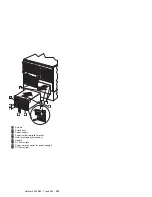
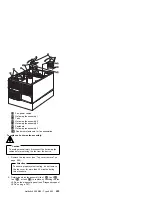
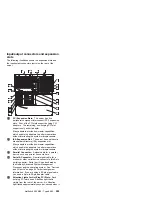
If you are replacing the power supply:
a. Place the handle
.6/
on the power supply in the
open position, and slide the power supply into
the chassis.
b. Gently close the handle
.6/
on the power supply
to seat the power supply in the bay.
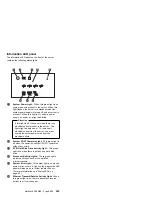
c. Verify that the ac Power light
.7/
and dc Power
light
.9/
are lit, indicating that the power supply
is operating correctly.
Caution
If you install a strain-relief bracket option
over the end of the power cord that is
connected to the device, you must connect
the other end of the power cord to an easily
accessible power source.
d. Install a power-cord strain-relief bracket
.4/
, if
desired.
4. If you have other options to install or remove, do so
now; otherwise, go to “Completing the installation” on
page 178.
Netfinity 5500 M20 - Type 8662
201
Summary of Contents for 866251Y - Netfinity 5500 M20
Page 2: ......
Page 8: ...vi Netfinity Server HMM...
Page 336: ...32 33 33 34 35 36 37 38 39 40 41 42 43 328 Netfinity Server HMM...
Page 346: ...338 Netfinity Server HMM...
Page 354: ...346 Netfinity Server HMM...
Page 355: ...Related service information 347...
Page 356: ...348 Netfinity Server HMM...
Page 357: ...Related service information 349...
Page 368: ...360 Netfinity Server HMM...
Page 369: ...Related service information 361...
Page 385: ......
Page 386: ...IBM Part Number 09N1015 Printed in U S A S37L 2 2 1...


