


Installing a hard disk drive
The following notes describe the types of hard disk drives that your server supports
and other information that you must consider when installing hard disk drives:
v
Your server supports six 1-inch (26 mm) slim 3.5-inch low-voltage differential
(LVD) hard disk drives.
v
All hot-swap drives being used in the server should have the same throughput
speed rating. Mixing hard drives with different speed ratings will cause all drives
to operate at the lower throughput speed.
v
The SCSI ID assigned to each bay is printed on the bezel.
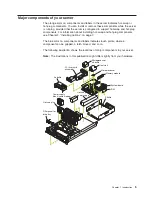
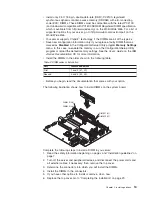
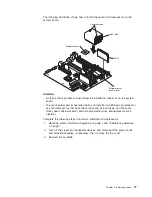
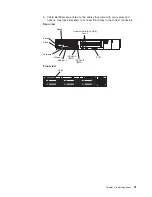
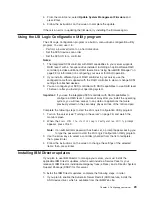
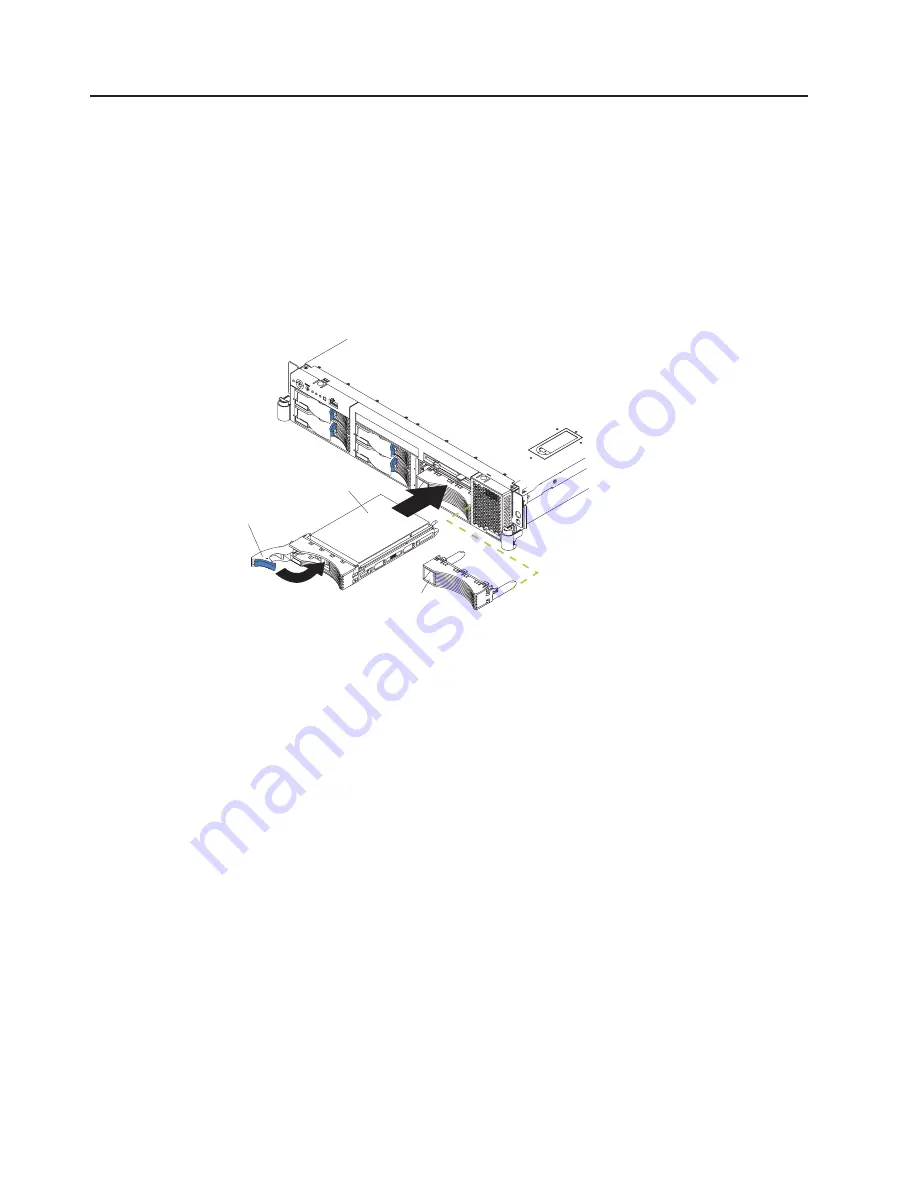
The following illustration shows how to install a hot-swap hard disk drive.
Filler panel
Drive-tray assembly
Drive handle
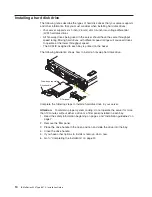
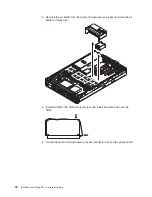
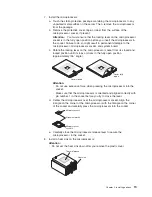
Complete the following steps to install a hard disk drive in your server.
Attention:
To maintain proper system cooling, do not operate the server for more
than 10 minutes without either a drive or a filler panel installed in each bay.
1. Read the safety information beginning on page v and “Installation guidelines” on
page 7.
2. Remove the filler panel.
3. Place the drive handle in the open position and slide the drive into the bay.
4. Close the drive handle.
5. If you have other options to install or remove, do so now.
6. Go to “Completing the installation” on page 20.
14
IBM xSeries 345 Type 8670: Installation Guide
Summary of Contents for 8670 - Eserver xSeries 345
Page 3: ...IBM xSeries 345 Type 8670 Installation Guide SC88 P918 70...
Page 18: ...6 IBM xSeries 345 Type 8670 Installation Guide...
Page 34: ...22 IBM xSeries 345 Type 8670 Installation Guide...
Page 50: ...38 IBM xSeries 345 Type 8670 Installation Guide...
Page 72: ...60 IBM xSeries 345 Type 8670 Installation Guide...
Page 76: ......
Page 77: ...IBM Part Number 88P9187 Printed in the United States of America 88P9187...


