4.
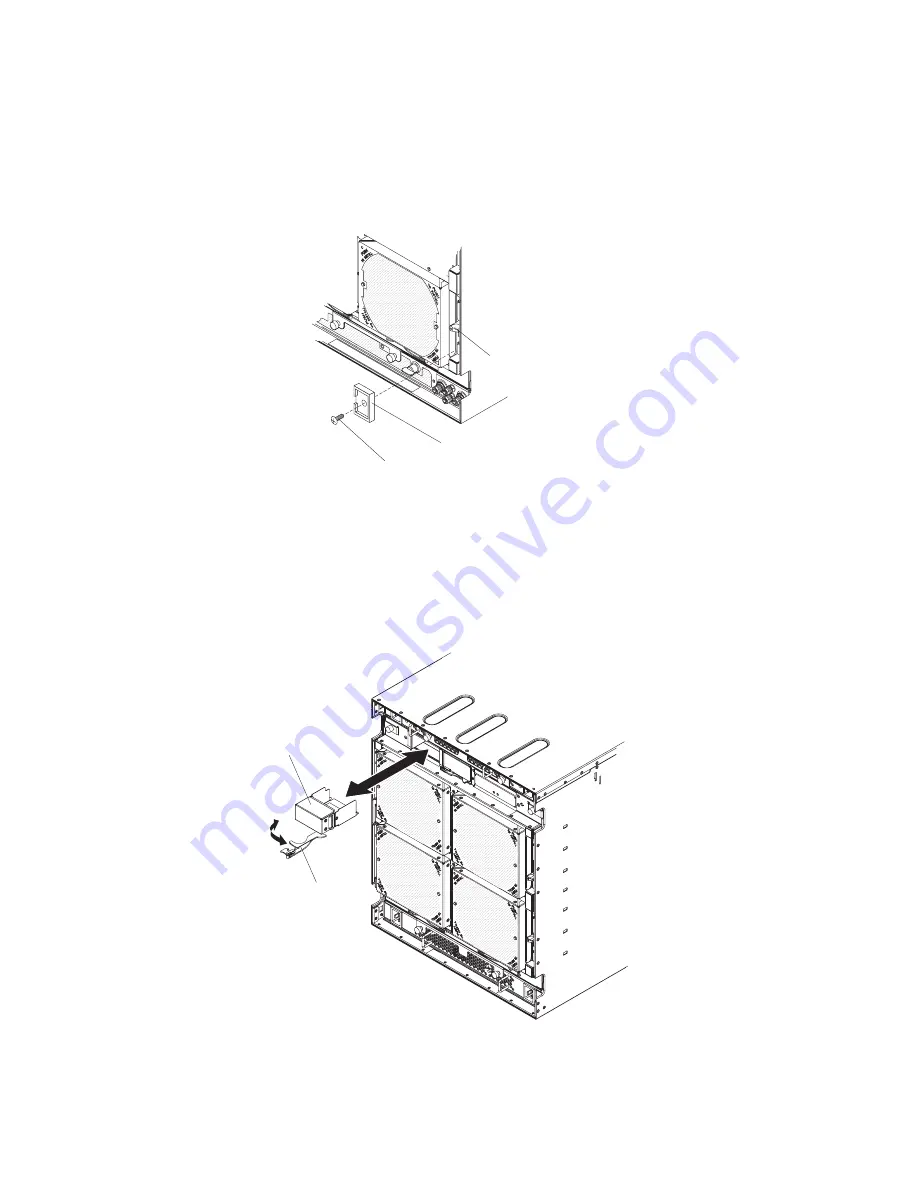
If
you
are
shipping
the
BladeCenter
HT
unit
to
another
location,
install
the
shipping
block
that
came
with
the
BladeCenter
HT
unit.
Note:
When
the
BladeCenter
HT
unit
is
shipped,
a
shipping
block
must
be
installed
for
each
fan
module.
The
shipping
block
is
installed
below
the
release
lever
that
is
on
the
same
side
as
the
fan
module
orientation
mark.
Release lever
Shipping block
Screw
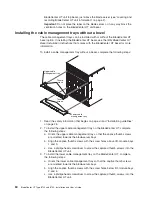
a.
Orient
the
shipping
block
below
the
release
lever
on
the
same
side
as
the
orientation
mark
on
the
fan
module.
b.
Push
the
shipping
block
into
the
slot
below
the
release
lever.
c.
Install
the
phillips-head
screw
that
attaches
the
shipping
block
to
the
BladeCenter
HT
unit.
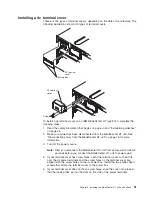
Installing
a
network
clock
filler
To
install
a
network
clock
filler,
complete
the
following
steps.
Network
clock-module filler
Release handle
(open)
1.
Read
the
safety
information
that
begins
on
page
vii
and
“Installation
guidelines”
on
page
26.
2.
Make
sure
that
the
release
handle
on
the
filler
is
in
the
open
position.
Chapter
3.
Installing
the
BladeCenter
HT
unit
and
options
47
Summary of Contents for 87401RU
Page 3: ...BladeCenter HT Type 8740 and 8750 Installation and User s Guide...
Page 8: ...vi BladeCenter HT Type 8740 and 8750 Installation and User s Guide...
Page 82: ...66 BladeCenter HT Type 8740 and 8750 Installation and User s Guide...
Page 92: ...76 BladeCenter HT Type 8740 and 8750 Installation and User s Guide...
Page 108: ...92 BladeCenter HT Type 8740 and 8750 Installation and User s Guide...
Page 109: ......
Page 110: ...Part Number 44R5188 Printed in USA 1P P N 44R5188...


