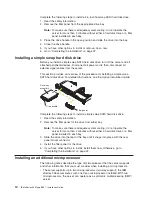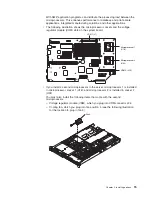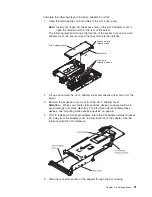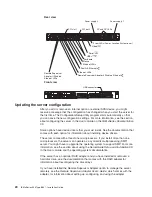
6.
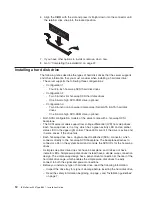
Align
the
DIMM
with
the
slot
and
press
it
straight
down
into
the
connector
until
the
retainer
clips
snap
into
the
locked
position.
7.
If
you
have
other
options
to
install
or
remove,
do
so
now.
8.
Go
to
“Completing
the
installation”
on
page
22.
Installing
a
hard
disk
drive
The
following
notes
describe
the
types
of
hard
disk
drives
that
the
server
supports
and
other
information
that
you
must
consider
when
installing
a
hard
disk
drive:
v
The
server
supports
the
following
three
configurations:
–
Configuration
1
-
Four
2.5-inch
hot-swap
SCSI
hard
disk
drives
–
Configuration
2
-
Two
3.5-inch
slim
hot-swap
SCSI
hard
disk
drives
-
One
9.5-mm-high
DVD-ROM
drive
(optional)
–
Configuration
3
-
Two
3.5-inch
non-hot-swap
(simple
swap)
Serial
ATA
(SATA)
hard
disk
drives
-
One
9.5-mm-high
DVD-ROM
drive
(optional)
v
Both
SCSI
configuration
models
of
the
server
come
with
a
hot-swap
SCSI
backplane.
v
The
SCSI
server
models
support
low
voltage
differential
(LVD)
hot-swap
drives.
Each
hot-swap
drive
is
in
a
tray,
which
has
a
green
activity
LED
and
an
amber
status
LED
in
the
upper-right
corner.
These
LEDs
are
lit
if
the
drive
is
active
and,
in
some
cases,
if
the
drive
fails.
v
Each
hot-swap
drive
has
a
single-connector-attached
(SCA)
connector,
which
connects
directly
to
the
hot-swap
SCSI
backplane.
The
backplane
attaches
to
connector
J-35
on
the
system
board
and
controls
the
SCSI
IDs
for
the
hot-swap
drives.
v
A
simple
swap
disk
drive
does
not
have
a
backplane,
and
it
does
not
have
indicator
LEDs.
Simple
swap
disk
drives
instead
have
a
simple
swap
connection
design.
The
simple
swap
design
has
a
panel-mount
connection
at
the
rear
of
the
hard
disk
drive
cage,
which
enables
the
simple
swap
disk
drives
to
easily
connect
to
both
the
signal
and
power
connections.
v
Before
you
install
any
type
of
hard
disk
drive,
read
the
following
information:
–
Inspect
the
drive
tray
for
signs
of
damage
before
inserting
the
hard
disk
drive.
–
Read
the
safety
information
beginning
on
page
v
and
“Installation
guidelines”
on
page
7.
12
IBM
xSeries
336
Type
8837:
Installation
Guide
Summary of Contents for 883725U
Page 3: ...IBM xSeries 336 Type 8837 Installation Guide ERserver...
Page 18: ...6 IBM xSeries 336 Type 8837 Installation Guide...
Page 38: ...26 IBM xSeries 336 Type 8837 Installation Guide...
Page 46: ...34 IBM xSeries 336 Type 8837 Installation Guide...
Page 64: ...52 IBM xSeries 336 Type 8837 Installation Guide...
Page 66: ...54 IBM xSeries 336 Type 8837 Installation Guide...
Page 112: ...100 IBM xSeries 336 Type 8837 Installation Guide...
Page 113: ......
Page 114: ...Part Number 25R4613 Printed in USA 1P P N 25R4613...

