


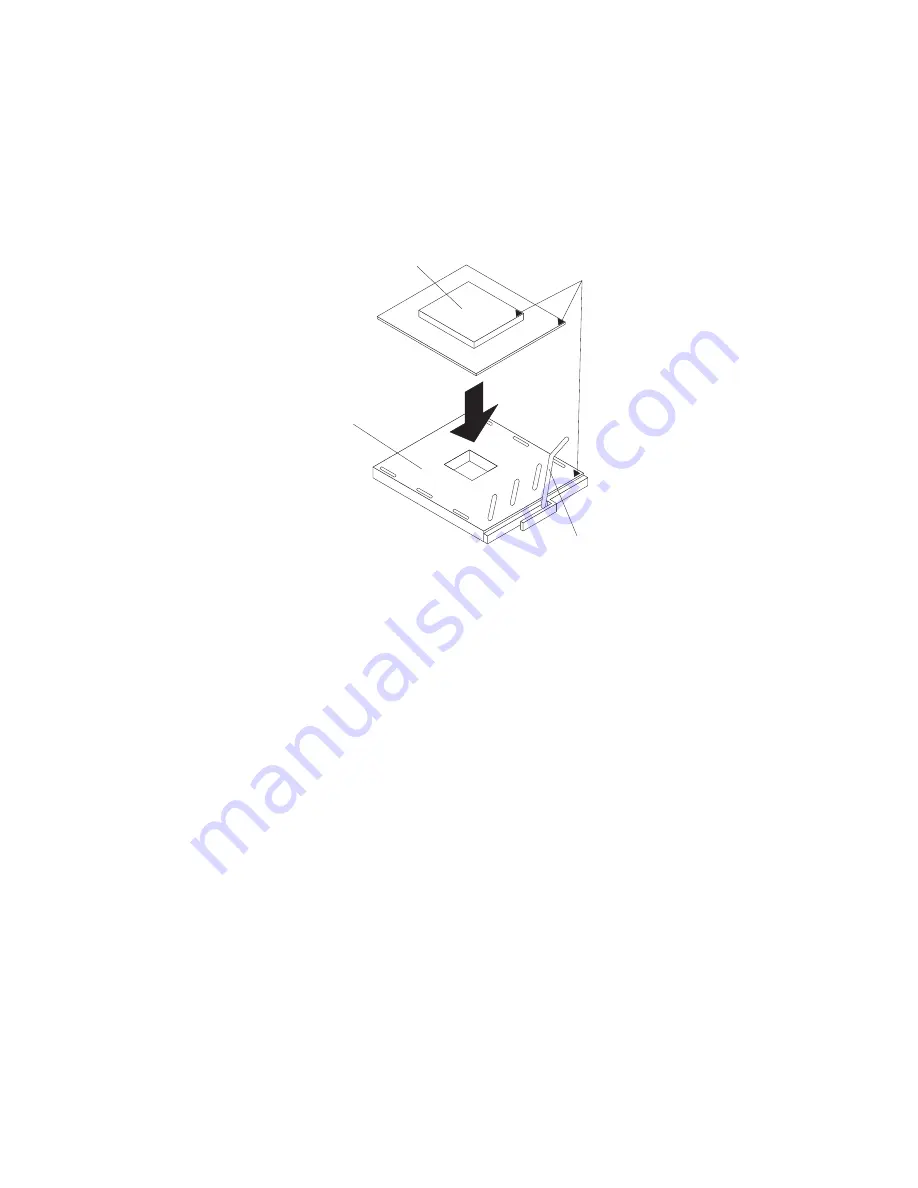
Attention:
v
Do
not
use
excessive
force
when
pressing
the
microprocessor
into
the
socket.
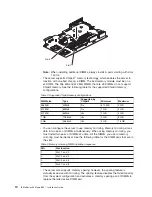
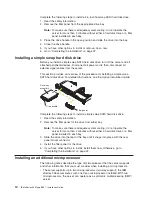
v
Center
the
microprocessor
over
the
microprocessor
socket.
Align
the
triangle
on
the
corner
of
the
microprocessor
with
the
triangle
on
the
corner
of
the
socket
and
carefully
press
the
microprocessor
into
the
socket
before
you
try
to
close
the
lever.
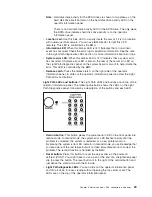
Microprocessor
orientation indicator
Microprocessor-
release lever
Microprocessor
connector
Microprocessor
7.
Close
the
microprocessor-release
lever
to
secure
the
microprocessor.
Attention:
v
Do
not
set
the
heat
sink
down
after
you
remove
the
plastic
cover.
v
Do
not
touch
or
contaminate
the
thermal
grease
on
the
bottom
of
the
new
heat
sink.
Doing
so
damages
its
heat-conducting
capability
and
exposes
the
new
microprocessor
to
overheating.
v
If
you
must
remove
the
heat
sink
after
installing
it,
note
that
the
thermal
grease
might
have
formed
a
strong
bond
between
the
heat
sink
and
the
microprocessor.
Do
not
force
the
heat
sink
and
microprocessor
apart;
doing
so
can
damage
the
microprocessor
pins.
Loosen
one
captive
screw
fully
before
loosening
the
other
captive
screw
to
help
break
the
bond
between
the
components
without
damaging
them.
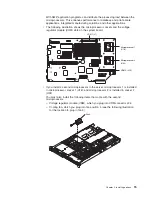
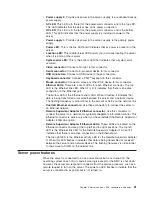
8.
Remove
the
cover
from
the
bottom
of
the
heat
sink
and
make
sure
that
the
thermal
grease
is
still
on
the
bottom
of
the
heat
sink.
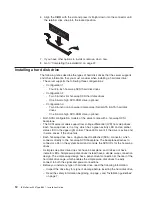
9.
Install
the
heat
sink
on
top
of
the
microprocessor,
and
tighten
the
captive
screws.
Alternate
between
the
screws
until
they
are
tight,
making
sure
that
you
do
not
overtighten
them.
Chapter
2.
Installing
options
17
Summary of Contents for 883725U
Page 3: ...IBM xSeries 336 Type 8837 Installation Guide ERserver...
Page 18: ...6 IBM xSeries 336 Type 8837 Installation Guide...
Page 38: ...26 IBM xSeries 336 Type 8837 Installation Guide...
Page 46: ...34 IBM xSeries 336 Type 8837 Installation Guide...
Page 64: ...52 IBM xSeries 336 Type 8837 Installation Guide...
Page 66: ...54 IBM xSeries 336 Type 8837 Installation Guide...
Page 112: ...100 IBM xSeries 336 Type 8837 Installation Guide...
Page 113: ......
Page 114: ...Part Number 25R4613 Printed in USA 1P P N 25R4613...


