


v
You
do
not
have
to
save
new
configuration
information
when
installing
or
removing
DIMMs.
The
only
exception
is
if
you
replace
a
faulty
DIMM
that
was
marked
as
Disabled
in
the
Memory
Settings
menu.
In
this
case,
you
must
re-enable
that
memory
row
in
the
Configuration/Setup
Utility
program
or
reload
the
default
memory
settings.
See
the
User’s
Guide
on
the
IBM
xSeries
Documentation
CD
for
more
information.
v
When
you
restart
the
server
after
adding
or
removing
a
DIMM,
the
server
displays
a
message
that
the
memory
configuration
has
changed.
v
See
the
Option
Installation
Guide
on
the
IBM
xSeries
Documentation
CD
for
more
information
about
memory
mirroring
and
the
on-line
spare
feature.
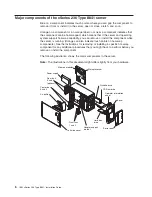
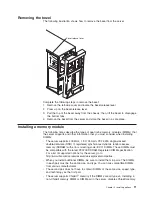
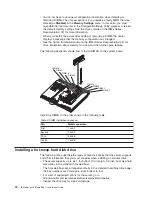
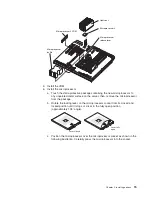
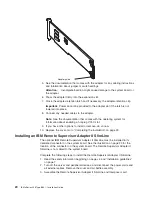
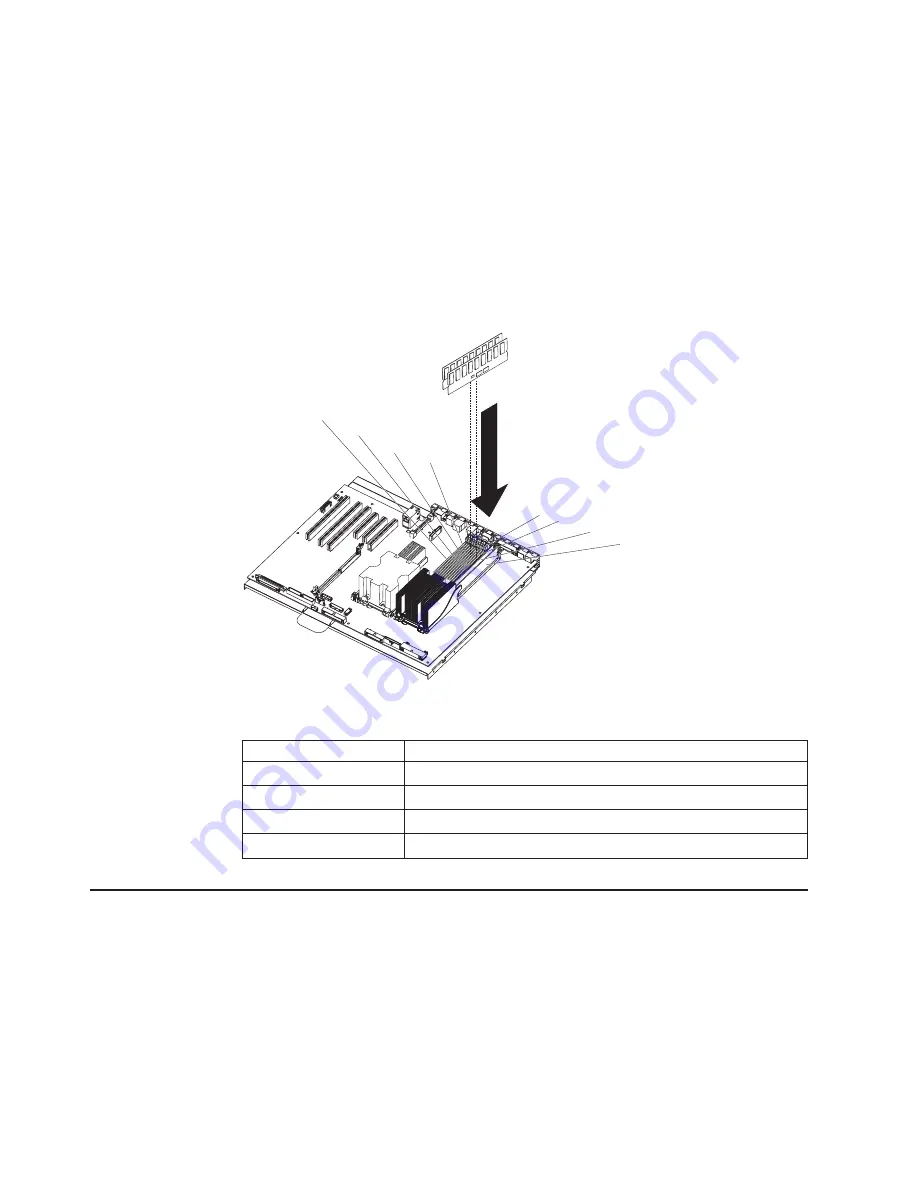
The
following
illustration
shows
how
to
install
DIMMs
on
the
system
board.
DIMM 8
DIMM 7
DIMM 6
DIMM 5
DIMM 4
DIMM 3
DIMM 2
DIMM 1
Install
the
DIMMs
in
the
order
shown
in
the
following
table.
Table
2.
DIMM
installation
sequence
Pair
DIMM
connectors
First
1
and
2
Second
3
and
4
Third
5
and
6
Fourth
7
and
8
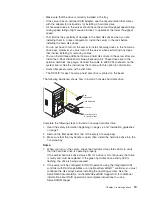
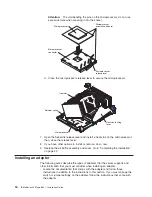
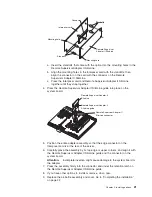
Installing
a
hot-swap
hard
disk
drive
The
following
notes
describe
the
types
of
hard
disk
drives
that
the
server
supports
and
other
information
that
you
must
consider
when
installing
a
hard
disk
drive:
v
The
server
supports
up
to
six
1-inch
(26
mm)
slim-high,
3.5-inch,
hot-swap
hard
disk
drives
in
the
standard
hot-swap
bays.
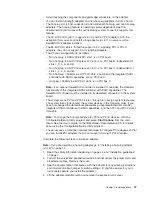
v
The
hot-swap
bays
are
arranged
vertically
in
the
standard
hard
disk
drive
cage;
the
bay
numbers
are
0
through
5
(from
bottom
to
top).
v
For
a
list
of
supported
options
for
the
server,
go
to
http://www.ibm.com/servers/eserver/serverproven/compat/us.
v
Inspect
the
drive
tray
for
signs
of
damage.
12
IBM
xSeries
236
Type
8841:
Installation
Guide
Summary of Contents for 8841 - eServer xSeries 236
Page 3: ...IBM xSeries 236 Type 8841 Installation Guide...
Page 7: ...Japanese Voluntary Control Council for Interference VCCI statement 80 Index 81 Contents v...
Page 8: ...vi IBM xSeries 236 Type 8841 Installation Guide...
Page 56: ...42 IBM xSeries 236 Type 8841 Installation Guide...
Page 98: ...84 IBM xSeries 236 Type 8841 Installation Guide...
Page 99: ......
Page 100: ...Part Number 31R1188 Printed in USA 1P P N 31R1188...


