
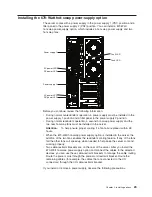


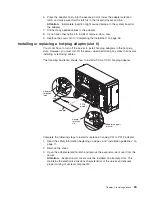
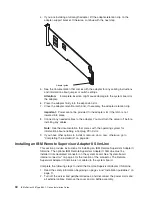
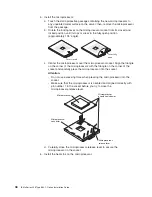

b.
Slide
the
power
supply
into
the
power
supply
2
opening
until
it
stops;
then,
push
the
handle
down
into
the
closed
position.
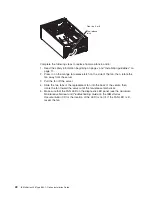
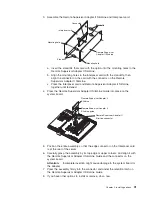
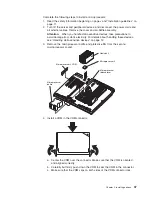
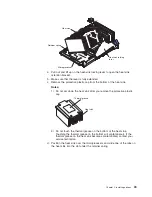
4.
Install
the
fans
on
the
back
of
the
server:
a.
Position
the
first
fan
so
that
the
notched
area
is
facing
up
and
the
mounting
surface
is
toward
the
server.
b.
Tilt
the
bottom
of
the
fan
toward
the
server
and
insert
the
tabs
into
the
corresponding
holes.
c.
Press
in
on
the
top
half
of
the
fan
until
it
clicks
into
place.
d.
Position
the
second
fan
so
that
the
notched
area
is
facing
down
and
the
mounting
surface
is
toward
the
server.
e.
Repeat
steps
5b
and
5c;
then,
continue
to
step
6.
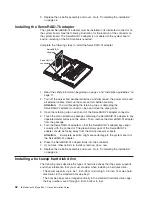
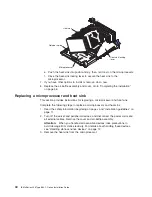
5.
Connect
one
end
of
each
power
cord
to
the
corresponding
connector
on
each
power
supply;
then,
connect
the
other
end
of
each
power
cord
to
a
properly
grounded
electrical
outlet.
Note:
You
can
route
the
power
cords
through
the
power-cord
restraint
bracket
on
the
rear
of
the
server.
6.
Make
sure
that
the
dc
power
LED
and
the
ac
power
LED
on
each
power
supply
is
lit,
indicating
that
the
power
supplies
are
operating
properly.
Chapter
2.
Installing
options
25
Summary of Contents for 8841 - eServer xSeries 236
Page 1: ...IBM xSeries 236 Type 8841 Option Installation Guide ERserver...
Page 2: ......
Page 3: ...IBM xSeries 236 Type 8841 Option Installation Guide ERserver...
Page 22: ...10 IBM xSeries 236 Type 8841 Option Installation Guide...
Page 64: ...52 IBM xSeries 236 Type 8841 Option Installation Guide...
Page 73: ......
Page 74: ...Part Number 31R1191 Printed in USA 1P P N 31R1191...


