


5.
Install
the
microprocessor:
a.
Touch
the
static-protective
package
containing
the
new
microprocessor
to
any
unpainted
metal
surface
on
the
server;
then,
remove
the
microprocessor
from
the
package.
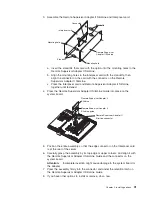
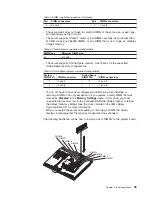
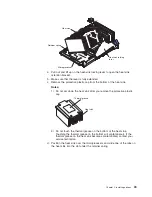
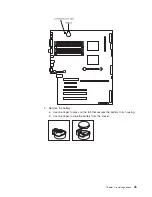
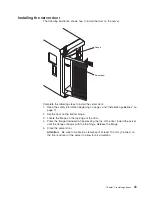
b.
Rotate
the
locking
lever
on
the
microprocessor
socket
from
its
closed
and
locked
position
until
it
stops
or
clicks
in
the
fully
open
position
(approximately
135°
angle).
Lever closed
Lever fully
open
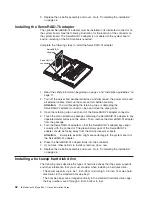
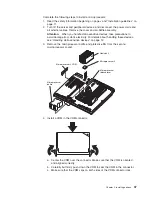
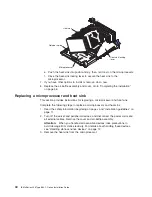
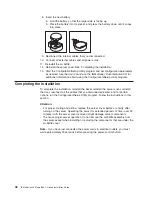
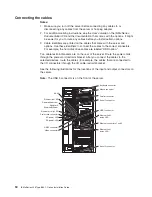
c.
Center
the
microprocessor
over
the
microprocessor
socket.
Align
the
triangle
on
the
corner
of
the
microprocessor
with
the
triangle
on
the
corner
of
the
socket
and
carefully
press
the
microprocessor
into
the
socket.
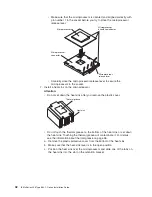
Attention:
v
Do
not
use
excessing
force
when
pressing
the
microprocessor
into
the
socket.
v
Make
sure
that
the
microprocessor
is
oriented
and
aligned
correctly
with
pin
number
1
in
the
socket
before
you
try
to
close
the
microprocessor-release
lever.
Microprocessor
orientation indicator
Microprocessor-
release lever
Microprocessor
connector
Microprocessor
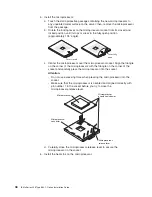
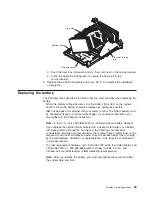
d.
Carefully
close
the
microprocessor-release
lever
to
secure
the
microprocessor
in
the
socket.
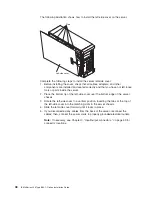
6.
Install
the
heat
sink
on
the
microprocessor:
38
IBM
xSeries
236
Type
8841:
Option
Installation
Guide
Summary of Contents for 8841 - eServer xSeries 236
Page 1: ...IBM xSeries 236 Type 8841 Option Installation Guide ERserver...
Page 2: ......
Page 3: ...IBM xSeries 236 Type 8841 Option Installation Guide ERserver...
Page 22: ...10 IBM xSeries 236 Type 8841 Option Installation Guide...
Page 64: ...52 IBM xSeries 236 Type 8841 Option Installation Guide...
Page 73: ......
Page 74: ...Part Number 31R1191 Printed in USA 1P P N 31R1191...


