background image

Notices


and


statements


in


this


document


The


caution


and


danger


statements


that


appear


in


this


document


are


also


in


the


multilingual


Safety


Information


document,


which


is


on


the


IBM


Documentation


CD.


Each


statement


is


numbered


for


reference


to


the


corresponding


statement


in


the


Safety


Information


document.


The


following


notices


and


statements


are


used


in


this


document:


v


Note:


These


notices


provide


important


tips,


guidance,


or


advice.


v


Important:


These


notices


provide


information


or


advice


that


might


help


you


avoid


inconvenient


or


problem


situations.


v


Attention:


These


notices


indicate


possible


damage


to


programs,


devices,


or


data.


An


attention


notice


is


placed


just


before


the


instruction


or


situation


in


which


damage


could


occur.


v


Caution:


These


statements


indicate


situations


that


can


be


potentially


hazardous


to


you.


A


caution


statement


is


placed


just


before


the


description


of


a


potentially


hazardous


procedure


step


or


situation.


v


Danger:


These


statements


indicate


situations


that


can


be


potentially


lethal


or


extremely


hazardous


to


you.


A


danger


statement


is


placed


just


before


the


description


of


a


potentially


lethal


or


extremely


hazardous


procedure


step


or


situation.


Chapter


1.


Introduction


5

Summary of Contents for 8853C2U

Page 1: ...lade server on the IBM Support Web site Before installing the BladeCenter HS21 Type 8853 blade server in a BladeCenter unit complete the following procedures Install and configure the rack according t...

Page 2: ...ify that all optional devices you installed are on the ServerProven list at http www ibm com servers eserver serverproven compat us Is the server working correctly Is the problem solved Hardware or so...

Page 3: ...BladeCenter HS21 Type 8853 Installation and User s Guide...

Page 4: ...the Warranty and Support Information document for your blade server type on the IBM Documentation CD Fourth Edition August 2007 Copyright International Business Machines Corporation 2007 All rights re...

Page 5: ...blade server bezel assembly 20 Installing a SAS hard disk drive 20 Removing a SAS hard disk drive 22 Installing memory modules 22 Installing an additional microprocessor 25 Installing a Concurrent KVM...

Page 6: ...you call 53 Using the documentation 53 Getting help and information from the World Wide Web 54 Software service and support 54 Hardware service and support 54 IBM Taiwan product service 54 Appendix B...

Page 7: ...alleert eerst de veiligheidsvoorschriften Ennen kuin asennat t m n tuotteen lue turvaohjeet kohdasta Safety Information Avant d installer ce produit lisez les consignes de s curit Vor der Installation...

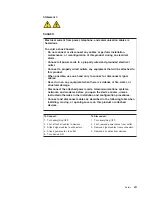
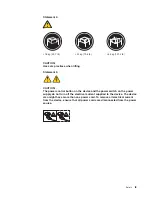
Page 8: ...ions of the caution or danger statement in the IBM Safety Information book For example if a caution statement begins with a number 1 translations for that caution statement appear in the IBM Safety In...

Page 9: ...quipment when there is evidence of fire water or structural damage v Disconnect the attached power cords telecommunications systems networks and modems before you open the device covers unless instruc...

Page 10: ...VD drives fiber optic devices or transmitters are installed note the following v Do not remove the covers Removing the covers of the laser product could result in exposure to hazardous laser radiation...

Page 11: ...power control button on the device and the power switch on the power supply do not turn off the electrical current supplied to the device The device also might have more than one power cord To remove...

Page 12: ...Statement 13 DANGER Overloading a branch circuit is potentially a fire hazard and a shock hazard under certain conditions To avoid these hazards ensure that your system electrical requirements do not...

Page 13: ...and device drivers 4 Click BladeCenter HS21 8853 1885 to display the matrix of downloadable files for the blade server The blade server comes with a limited warranty For information about the terms o...

Page 14: ...f the blade server and on a label on the side of the blade server that is visible when the blade server is not in the BladeCenter unit Note The illustrations in this document might differ slightly fro...

Page 15: ...e IBM BladeCenter Planning and Installation Guide for your BladeCenter unit for information to help you prepare for system installation and configuration To check for updated documentation and technic...

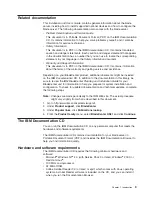
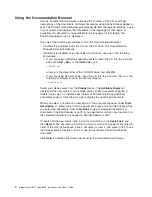
Page 16: ...e following command from the mnt cdrom directory sh runlinux sh Select your blade server from the Product menu The Available Topics list displays all the documents for your blade server Some documents...

Page 17: ...t help you avoid inconvenient or problem situations v Attention These notices indicate possible damage to programs devices or data An attention notice is placed just before the instruction or situatio...

Page 18: ...PMI firmware v ATI RN 50 ES1000 video controller v LSI 1064E Serial Attached SCSI SAS controller v Light path diagnostics v RS 485 interface for communication with the management module v Automatic se...

Page 19: ...ful scalable and reliable For more information see http www ibm com servers eserver xseries xarchitecture enterprise index html v IBM ServerGuide Setup and Installation CD The ServerGuide Setup and In...

Page 20: ...cient power for each device in the BladeCenter unit This policy is enforced when the initial power is applied to the BladeCenter unit or when a blade server is inserted into the BladeCenter unit The f...

Page 21: ...e usage and performance of critical components such as microprocessors disks and memory v Centrally manage individual or large groups of IBM and non IBM x86 processor based servers desktop computers w...

Page 22: ...p publib boulder ibm com infocenter eserver v1r2 topic diricinfo fqm0_main html and the IBM xSeries Systems Management Web page at http www ibm com servers eserver xseries systems_management which pre...

Page 23: ...art automatically when power is restored if the blade server is configured through the management module to do so v You can turn on the blade server remotely by using the management module v If the bl...

Page 24: ...error LED Media tray select button Power control button Power on LED Keyboard video mouse KVM select button Press this button to associate the shared BladeCenter unit keyboard port video port and mous...

Page 25: ...placed in the management module event log The information LED can be turned off through the management module Web interface or through IBM Director Console Blade error LED When this amber LED is lit i...

Page 26: ...devices for the blade server Note Some system boards are not equipped with power connector J164 Microprocessor 1 U6 Microprocessor 2 U7 SAS hard disk drive 0 J136 SAS hard disk drive 1 J137 Concurrent...

Page 27: ...S21 8853 1885 to display the matrix of downloadable files for the blade server v Observe good housekeeping in the area where you are working Place removed covers and other parts in a safe place v Back...

Page 28: ...rge ESD connector use a wrist strap especially when you handle modules optional devices or blade servers To work correctly the wrist strap must have a good contact at both ends touching your skin at o...

Page 29: ...a different bay you might need to reconfigure the blade server To remove the blade server complete the following steps 1 If the blade server is operating shut down the operating system then press the...

Page 30: ...led in a BladeCenter unit remove it see Removing the blade server from the BladeCenter unit on page 17 for instructions 3 Carefully lay the blade server on a flat static protective surface with the co...

Page 31: ...unit on page 17 for instructions 3 Carefully lay the blade server on a flat static protective surface with the cover side up 4 Open the blade server cover if one is installed see Opening the blade ser...

Page 32: ...e Removing an expansion unit on page 19 5 Press the bezel assembly release and pull the bezel assembly away from the blade server approximately 1 2 cm 0 5 inch 6 Disconnect the control panel cable fro...

Page 33: ...ver cover on page 18 for instructions 5 If a Memory and I O Expansion Blade is installed remove it see Removing an expansion unit on page 19 6 Locate SAS connector 0 J136 or SAS connector 1 J137 7 If...

Page 34: ...k drive tray away from the hard disk drive to disengage the drive from its tray 7 From the rear edge of the drive slide the drive out of the SAS connector Installing memory modules The following notes...

Page 35: ...ion Blade J21 v To set up a mirrored memory configuration in a blade server with a Memory and I O Expansion Blade when you install memory you must install matched DIMMs in groups of four Install the D...

Page 36: ...h the DIMMs 3 If the blade server is installed in a BladeCenter unit remove it see Removing the blade server from the BladeCenter unit on page 17 for instructions 4 Carefully lay the blade server on a...

Page 37: ...ribe the type of microprocessor that the server supports and other information that you must consider when installing a microprocessor v You cannot remove the single microprocessor and replace it with...

Page 38: ...rver bezel assembly on page 20 for instructions 7 Locate the microprocessor socket on the system board 8 Remove the heat sink filler from the microprocessor socket Attention Do not touch the pins in t...

Page 39: ...ou try to close the microprocessor retainer 15 Carefully close the microprocessor retainer 16 Rotate the locking lever on the microprocessor socket to the closed and locked position Make sure that the...

Page 40: ...instructions 3 Carefully lay the blade server on a flat static protective surface 4 Open the blade server cover see Opening the blade server cover on page 18 for instructions 5 If a Memory and I O Exp...

Page 41: ...re installed in the blade server you can install only a small form factor expansion card or a high speed expansion card If only one drive is installed in the blade server you can install any type of e...

Page 42: ...surface 4 Open the blade server cover see Opening the blade server cover on page 18 for instructions 5 If a Memory and I O Expansion Blade is installed remove it see Removing an expansion unit on pag...

Page 43: ...expansion card PR ES S HE RE W HE N IN ST AL LI NG CA RD Expansion card bracket To install a standard form factor expansion card Complete the following steps 1 Read the safety information that begins...

Page 44: ...eed expansion cards are not supported by all BladeCenter unit types If an expansion unit is installed on the blade server you cannot install a high speed expansion card on the blade server it must be...

Page 45: ...o install an expansion unit on a blade server Blade cover release Blade cover release Memory and I O expansion blade To install an expansion unit complete the following steps 1 Read the safety informa...

Page 46: ...e blade server bezel assembly if you removed it see Installing the blade server bezel assembly on page 35 for information on installing the bezel assembly 2 Reinstall the Memory and I O Expansion Blad...

Page 47: ...ade server into the BladeCenter unit until the cover is installed and closed or an expansion unit is installed Do not attempt to override this protection The following illustration shows how to close...

Page 48: ...nter unit for additional information Release handles open To install a blade server in a BladeCenter unit complete the following steps Statement 21 CAUTION Hazardous energy is present when the blade s...

Page 49: ...r is receiving power and is turned on 10 Optional Write identifying information on one of the labels that come with the blade servers and place the label on a BladeCenter unit bezel See the documentat...

Page 50: ...5 Chapter 5 Installing the operating system on page 49 on page 49 and your operating system documentation for additional information Input output connectors and devices The input output connectors th...

Page 51: ...part of the BIOS Use it to select the boot protocol and other boot options and to select a power management option For information about using this utility program see Using the PXE boot agent utilit...

Page 52: ...de server the serial number and the revision level or issue date of the BIOS and diagnostics code that are stored in electrically erasable programmable ROM EEPROM v Devices and I O Ports Select this c...

Page 53: ...this choice to change settings for advanced hardware features Important The blade server might malfunction if these settings are incorrectly configured Follow the instructions on the screen carefully...

Page 54: ...C event log entries v Save Settings Select this choice to save the changes that you have made in the settings v Restore Settings Select this choice to cancel the changes that you have made in the sett...

Page 55: ...erating system partition size and file system type that are selectable during setup ServerGuide features Features and functions can vary slightly with different versions of the ServerGuide program To...

Page 56: ...ram checks the CD for newer device drivers This information is stored and then passed to the operating system installation program 3 The ServerGuide program presents operating system partition options...

Page 57: ...l the updates using the instructions that are included with the downloaded files Important To avoid problems and to maintain system performance always make sure that the BIOS code service processor BM...

Page 58: ...enumeration of the Ethernet controllers in a blade server is operating system dependent You can verify the Ethernet controller designations that a blade server uses through the operating system setti...

Page 59: ...ility program see Configuration Setup Utility menu choices on page 40 for information and instructions Using the LSI Logic Configuration Utility program You can use the LSI Logic Configuration Utility...

Page 60: ...48 BladeCenter HS21 Type 8853 Installation and User s Guide...

Page 61: ...uses USB for internal communication with these devices 2 Some operating systems such as Red Hat Linux 7 3 enable you to select the type of mouse that is being used If you are offered this choice selec...

Page 62: ...rvers eserver xseries systems_management Downloading installation instructions To download operating system installation instructions complete the following steps 1 Go to http www ibm com systems supp...

Page 63: ...er If the blade server does not start after you have performed the preceding actions see the Problem Determination and Service Guide for your blade server on the IBM Documentation CD Diagnostic tools...

Page 64: ...d suggested solutions Symptom Suggested action The ServerGuide Setup and Installation CD will not start v Make sure that the CD drive is associated with the blade server that you are configuring v Mak...

Page 65: ...by following the troubleshooting procedures that IBM provides in the online help or in the documentation that is provided with your IBM product The documentation that comes with IBM systems also desc...

Page 66: ...cts are supported by Support Line in your country or region see http www ibm com services sl products For more information about Support Line and other IBM services see http www ibm com services or se...

Page 67: ...Y 10504 1785 U S A INTERNATIONAL BUSINESS MACHINES CORPORATION PROVIDES THIS PUBLICATION AS IS WITHOUT WARRANTY OF ANY KIND EITHER EXPRESS OR IMPLIED INCLUDING BUT NOT LIMITED TO THE IMPLIED WARRANTIE...

Page 68: ...United States other countries or both Adobe and PostScript are either registered trademarks or trademarks of Adobe Systems Incorporated in the United States other countries or both UNIX is a registere...

Page 69: ...s no representations or warranties with respect to non IBM products Support if any for the non IBM products is provided by the third party not IBM Some software might differ from its retail version if...

Page 70: ...e retour et de recyclage applicables aux syst mes utilis s travers l Union europ enne Conform ment la directive ladite tiquette pr cise que le produit sur lequel elle est appos e ne doit pas tre jet m...

Page 71: ...an Union Notice This mark applies only to countries within the European Union EU Batteries or packaging for batteries are labeled in accordance with European Directive 2006 66 EC concerning batteries...

Page 72: ...notices Federal Communications Commission FCC statement Note This equipment has been tested and found to comply with the limits for a Class A digital device pursuant to Part 15 of the FCC Rules These...

Page 73: ...Directive 2004 108 EC on the approximation of the laws of the Member States relating to electromagnetic compatibility IBM cannot accept responsibility for any failure to satisfy the protection requir...

Page 74: ...Taiwanese Class A warning statement Chinese Class A warning statement Japanese Voluntary Control Council for Interference VCCI statement 62 BladeCenter HS21 Type 8853 Installation and User s Guide...

Page 75: ...14 system board 14 controller enable or disable Ethernet 40 enable or disable SCSI 40 Ethernet 45 memory 8 Serial Attached SCSI SAS 20 controller enumeration 46 cover closing 35 cover continued openin...

Page 76: ...cription 39 M major components system board 10 media tray select button 13 memory configuration changes 24 25 memory continued hot spare 41 specifications 6 Memory and I O Expansion Blade connectors 1...

Page 77: ...0 software service and support 54 specifications BladeCenter HS21 6 standard form factor expansion card installing 31 standard form factor expansion card requirements 31 start options 41 starting the...

Page 78: ...66 BladeCenter HS21 Type 8853 Installation and User s Guide...

Page 79: ......

Page 80: ...Part Number 44W1496 Printed in USA 1P P N 44W1496...

Reviews: