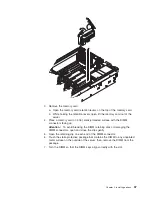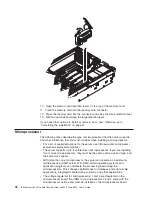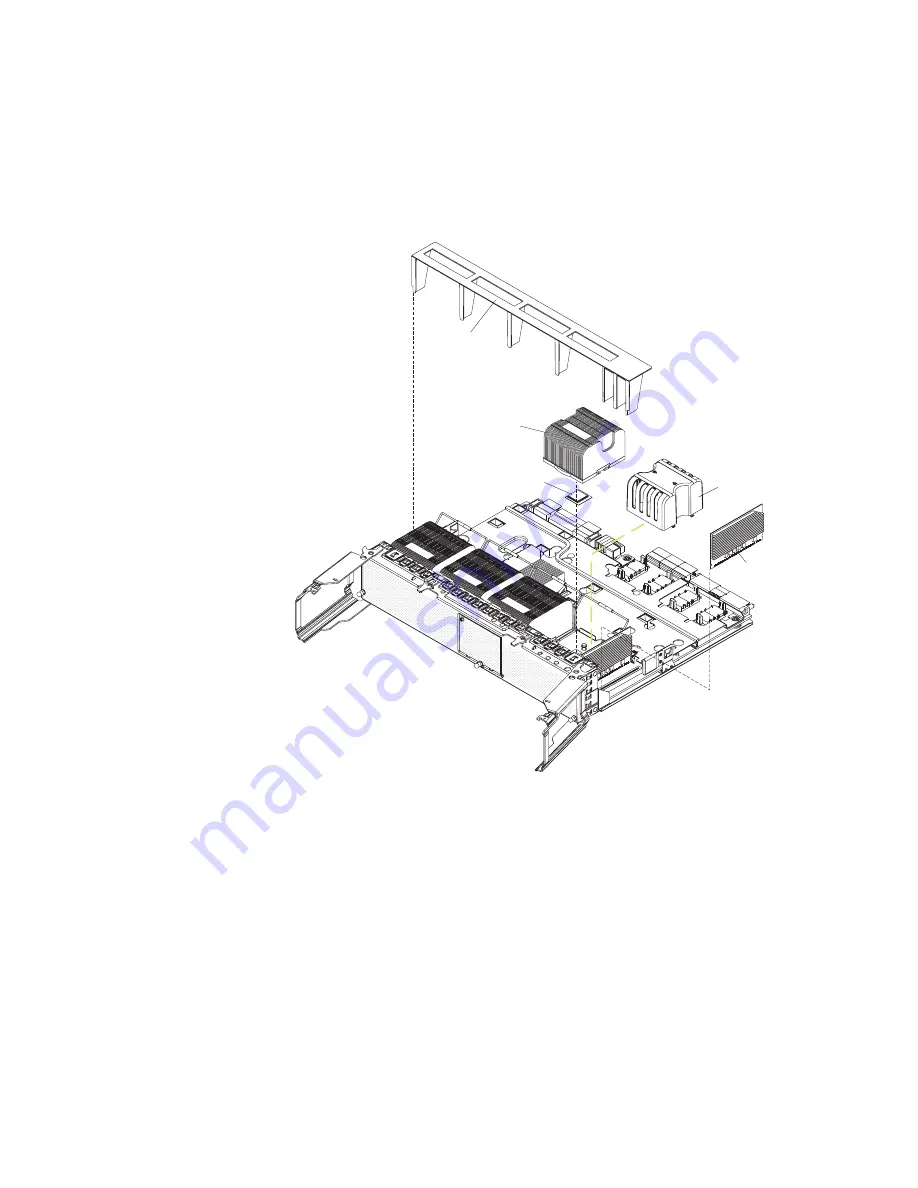
e.
Pull
out
the
microprocessor
tray
until
it
stops;
then,
push
in
on
the
microprocessor
tray
retention
latches
on
each
side
of
the
tray
and
pull
the
tray
out
of
the
server.
Attention:
The
microprocessor
tray
is
heavy.
Pull
the
tray
partially
out
of
the
server,
reposition
your
hands
to
grasp
the
body
of
the
tray,
and
press
in
on
the
release
latches
on
each
side
of
the
tray;
then,
pull
the
tray
out
the
rest
of
the
way.
FR
ONT
Heat sink
Microprocessor
Microprocessor
baffle
VRM 4
Air baffle
FR
ONT
FR
ONT
FR
ONT
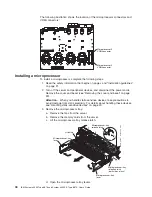
Note:
The
new
microprocessor
comes
in
a
kit
with
a
VRM
and
a
heat
sink.
The
VRM
is
used
only
with
a
microprocessor
that
is
installed
in
socket
3
or
4.
4.
Lift
the
air
baffle
out
of
the
microprocessor
tray.
5.
Remove
the
microprocessor
baffle
from
a
microprocessor
socket
and
store
it
for
future
use.
6.
Remove
the
protective
cover,
tape,
or
label
from
the
surface
of
the
microprocessor
socket,
if
any
is
present.
7.
Lift
the
microprocessor-release
lever
to
the
fully
open
position
(approximately
135°
angle).
Chapter
2.
Installing
options
45
Summary of Contents for 88743RU - System x3950 E
Page 1: ...IBM System x3950 Type 8878 and System x3950 E Type 8879 User s Guide...
Page 2: ......
Page 3: ...IBM System x3950 Type 8878 and System x3950 E Type 8879 User s Guide...
Page 68: ...56 IBM System x3950 Type 8878 and System x3950 E Type 8879 User s Guide...
Page 98: ...86 IBM System x3950 Type 8878 and System x3950 E Type 8879 User s Guide...
Page 100: ...88 IBM System x3950 Type 8878 and System x3950 E Type 8879 User s Guide...
Page 109: ......
Page 110: ...Part Number 31R1871 Printed in USA 1P P N 31R1871...


