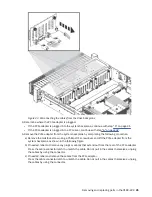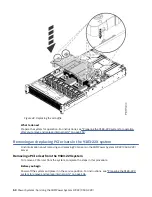
Figure 47. Removing a PCIe adapter from a PCIe riser
6. Place the PCIe adapter on an ESD mat.
7. Repeat steps “5” on page 54 - “6” on page 55 for the remaining PCIe adapters.
Replacing a PCIe riser in the 9183-22X system
To replace a PCIe riser in the system, complete the steps in this procedure.
About this task
Attention: For safety and airflow purposes, if you remove parts from the system, you must ensure
that:
• PCIe tailstock fillers are present.
• System airflow baffle is present.
Procedure
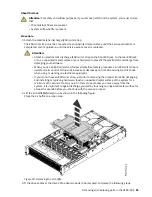
1. Ensure that you have the electrostatic discharge (ESD) wrist strap on and that the ESD clip is plugged
into a ground jack or connected to an unpainted metal surface. If not, do so now.
2. To replace a PCIe adapter in a PCIe riser, complete the following steps:
a) Using your labels, ensure that you are working with the correct PCIe riser.
b) Using your labels, insert the cables into the PCIe adapter.
Push the connector in until the latch clicks.
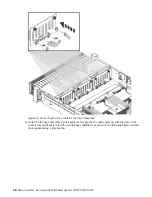
c) Using your label, replace the PCIe adapter (A) into the proper slot in the PCIe riser (B) as shown in
the following figure. Replace the tailstock screw to secure the PCIe adapter to the PCIe riser.
Removing and replacing parts in the 9183-22X 55

