h
Press the Esc key 3 times to exit.
i
Continue with Step 9.
9
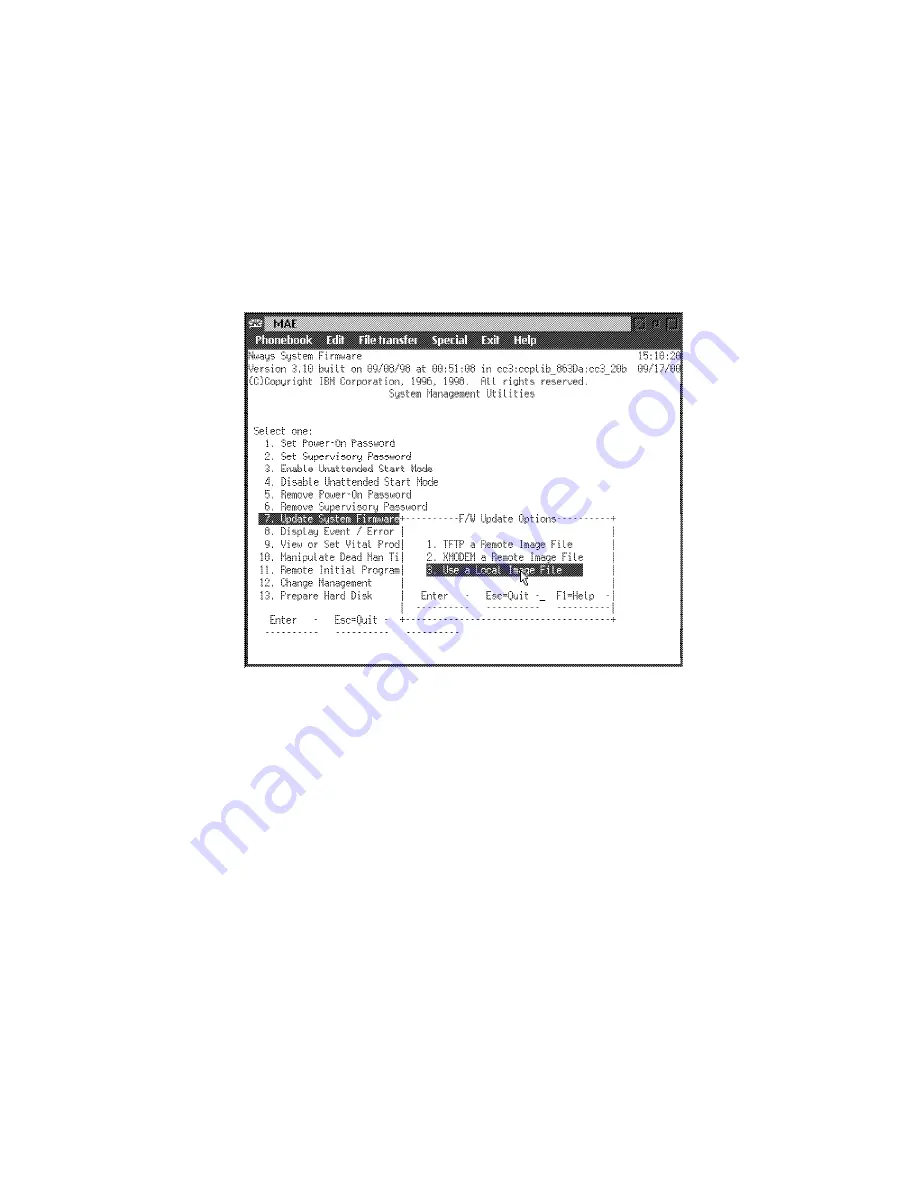
Update the system firmware:
a
Select 7. Update System Firmware and press Enter.
b
From the F/W Update Options menu, select 3. Use a Local Image
File then press Enter.
c
Follow the prompts, enter the Local File Name
c:\firm.ld
then press Enter.
d
When the System Firmware Update window is displayed, press Y.
e
In the System Firmware Update window, press Enter.
f
When the message "Firmware recovery image has been created
successfully" is displayed press Enter.
g
If a System Firmware Update confirmation window is displayed, type
Y.
h
The following window is displayed:
4-18
3746-9X0: MAE Installation and Maintenance
Summary of Contents for 950
Page 2: ......
Page 12: ...x 3746 9X0 MAE Installation and Maintenance ...
Page 22: ...xx 3746 9X0 MAE Installation and Maintenance ...
Page 28: ...xxvi 3746 9X0 MAE Installation and Maintenance ...
Page 48: ...Go to Step 6 Customizing the MAE on page 1 21 1 20 3746 9X0 MAE Installation and Maintenance ...
Page 176: ...4 58 3746 9X0 MAE Installation and Maintenance ...
Page 184: ...Figure 5 4 Current Boot Sequence 5 8 3746 9X0 MAE Installation and Maintenance ...
Page 243: ...Installing Options Programming None Chapter 6 Installing Options 6 7 ...
Page 254: ...Installing Options 6 18 3746 9X0 MAE Installation and Maintenance ...
Page 258: ...Installing Options 7 4 3746 9X0 MAE Installation and Maintenance ...
Page 264: ...B 4 3746 9X0 MAE Installation and Maintenance ...
Page 266: ...C 2 3746 9X0 MAE Installation and Maintenance ...
Page 278: ...D 12 3746 9X0 MAE Installation and Maintenance ...
Page 294: ...E 16 3746 9X0 MAE Installation and Maintenance ...
Page 300: ...F 6 3746 9X0 MAE Installation and Maintenance ...
Page 302: ...G 2 3746 9X0 MAE Installation and Maintenance ...
Page 306: ...H 4 3746 9X0 MAE Installation and Maintenance ...
Page 382: ...X 6 3746 9X0 MAE Installation and Maintenance ...
Page 389: ......


