6
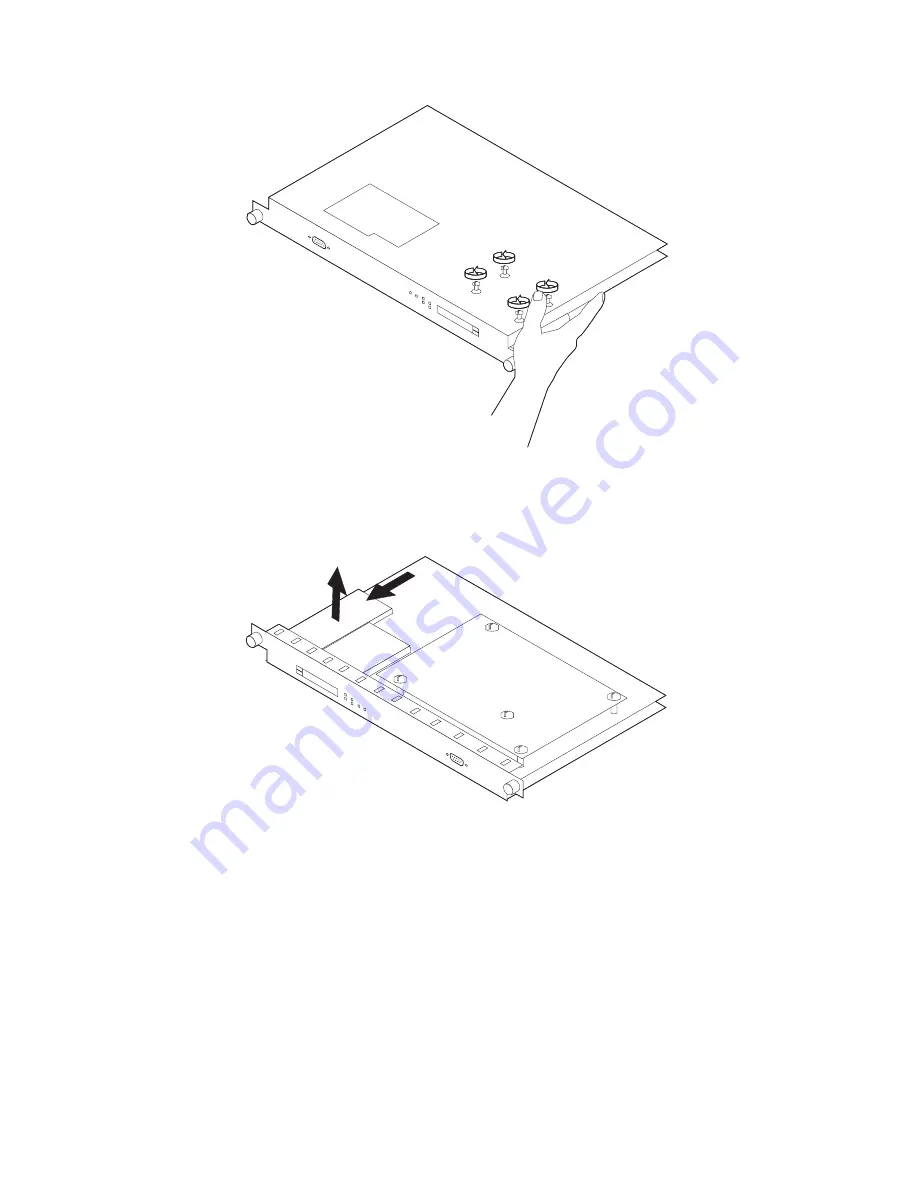
On the bottom of the system card, remove the four screws (with a screw
starter) while holding the hard drive in place.
7
On the reverse side of the system card, disconnect the drive from the
connector and lift it off the system card.
8
Center the new hard drive inside the lines on the system card.
Note: If you do not center the hard disk drive, the electrical pins on the hard
drive will be visible next to the hard drive connector on the system card.
Install the new hard drive by reversing Steps 6 and 7 above. Be sure to
support the hard drive while installing the screws.
4-26
3746-9X0: MAE Installation and Maintenance
Summary of Contents for 950
Page 2: ......
Page 12: ...x 3746 9X0 MAE Installation and Maintenance ...
Page 22: ...xx 3746 9X0 MAE Installation and Maintenance ...
Page 28: ...xxvi 3746 9X0 MAE Installation and Maintenance ...
Page 48: ...Go to Step 6 Customizing the MAE on page 1 21 1 20 3746 9X0 MAE Installation and Maintenance ...
Page 176: ...4 58 3746 9X0 MAE Installation and Maintenance ...
Page 184: ...Figure 5 4 Current Boot Sequence 5 8 3746 9X0 MAE Installation and Maintenance ...
Page 243: ...Installing Options Programming None Chapter 6 Installing Options 6 7 ...
Page 254: ...Installing Options 6 18 3746 9X0 MAE Installation and Maintenance ...
Page 258: ...Installing Options 7 4 3746 9X0 MAE Installation and Maintenance ...
Page 264: ...B 4 3746 9X0 MAE Installation and Maintenance ...
Page 266: ...C 2 3746 9X0 MAE Installation and Maintenance ...
Page 278: ...D 12 3746 9X0 MAE Installation and Maintenance ...
Page 294: ...E 16 3746 9X0 MAE Installation and Maintenance ...
Page 300: ...F 6 3746 9X0 MAE Installation and Maintenance ...
Page 302: ...G 2 3746 9X0 MAE Installation and Maintenance ...
Page 306: ...H 4 3746 9X0 MAE Installation and Maintenance ...
Page 382: ...X 6 3746 9X0 MAE Installation and Maintenance ...
Page 389: ......


