25
— The narrower signal cable has two connectors for attaching the diskette drive
to the diskette-drive connector on the system board.
Note:
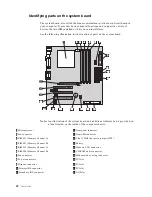
To locate connectors on the system board, see “Identifying parts on the system
board” on page 18.
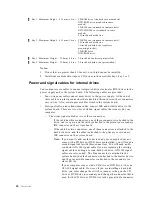
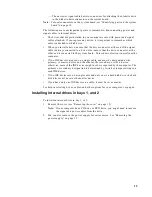
The following are some important points to remember when connecting power and
signal cables to internal drives:
•
The drives that are preinstalled in your computer come with power and signal
cables attached. If you replace any drives, it is important to remember which
cable is attached to which drive.
•
When you install a drive, ensure that the drive connector at the end of the signal
cable is always connected to a drive; also, ensure that the drive connector at the
other end is connected to the system board. This reduces electronic noise from the
computer.
•
If two IDE devices are used on a single cable, one must be designated as the
primary, or master, device and the other as the secondary, or slave, device;
otherwise, some of the IDE devices might not be recognized by the computer. The
primary or secondary designation is determined by switch or jumper settings on
each IDE device.
•
If two IDE devices are on a single cable and only one is a hard disk drive, the hard
disk drive must be set as the master device.
•
If you have only one IDE device on a cable, it must be set as master.
For help in selecting drives, cables, and other options for your computer, see page 6.
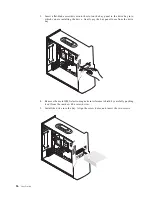
Installing internal drives in bays 1, and 2
To install an internal drive in bay 1, or 2:
1.
Remove the cover (see “Removing the cover” on page 15).
Note:
If your computer has a CD drive or DVD drive, you might need to remove
the signal and power cables from the drive.
2.
You can also remove the power supply for easier access. See “Removing the
power supply” on page 15.
Summary of Contents for A60 Type 6833
Page 1: ...IBM NetVista User Guide A60 Type 6833 A60i Type 6832...
Page 2: ......
Page 3: ...IBM NetVista User Guide A60 Type 6833 A60i Type 6832...
Page 6: ...vi User Guide...
Page 20: ...8 User Guide...
Page 44: ...32 User Guide...
Page 48: ...36 User Guide...
Page 50: ...38 User Guide...
Page 56: ...44 User Guide...
Page 57: ......

