


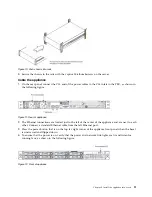


Chapter 3. Install the appliance into a rack
Many different racks are on the market, which means that the assembly procedure might differ slightly.
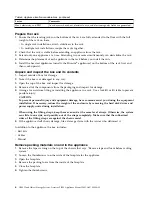
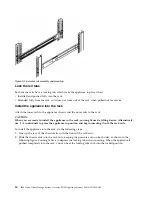
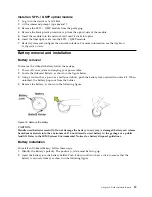
This rail fits a rack between 26.5" and 34.5" deep.
Prepare for installation
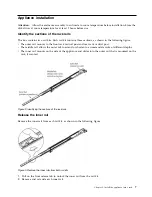
Assemble tools
A #2 Phillips screwdriver and a cage nut tool are needed to install and secure the rails to the appliance.
Wear a set of leather work gloves when you are racking the appliance. They help to grip the appliance
and to avoid injury from metal edges.
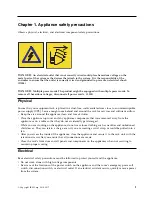
CAUTION:
Do not use of any sort of hammer to secure the rails on the appliance. A hammer might damage the
drives within the chassis and possibly void the warranty.
Choose a setup location
Decide on a suitable location for the rack unit that holds your appliance.
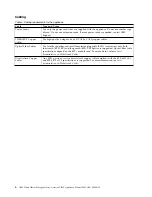
Table 5. Appliance location considerations
Factor
Comments
Restricted access location
Install this appliance in a physically secure, limited access location only, such as a
service closet or data center.
Clean environment
Situate it in a clean, well-ventilated, dust-free area.
Ambient operating temperature If installed in a closed or multi-unit rack assembly, the ambient operating
temperature of the rack environment might be greater than the ambient
temperature of the room. Install the equipment in an environment compatible with
the maximum rated ambient temperature (TMRA) for the appliance.
Sufficient airflow
Mount the equipment into a rack so that the amount of airflow that is needed for
safe operation is not compromised. Leave enough clearance in front of the rack to
open the front door completely (36 inches). Leave about 36 inches of clearance
behind the rack for sufficient airflow and ease in servicing.
Mechanical loading
Mount the equipment into a rack so that a hazardous condition does not arise due
to uneven mechanical loading. Install heavier items into the bottom of the
equipment rack to keep the rack stable. Mount equipment in a rack evenly to
prevent a later hazard.
Circuit overloading
Give consideration to the connection of the equipment to the power supply
circuitry and the effect that any possible overloading of circuits might have on
overcurrent protection and power supply wiring. Appropriate consideration of
equipment nameplate ratings should be used when addressing this concern.
Note:
The maximum current draw is printed on a label on the appliance power
supplies. The system might draw more than 15 Amps at startup (inrush current).
Reliable ground
A reliable ground must be maintained always. The rack itself must be grounded.
Give particular attention to the power supply connections other than the direct
connections to the branch circuit, such as the use of power strips.
Power supply
Use a regulating uninterruptible power supply (UPS) to protect the appliance from
power surges and voltage spikes, and to keep your system operating in a power
failure.
© Copyright IBM Corp. 2016, 2017
5
Summary of Contents for Accesser F5100 3401-A02
Page 4: ...iv IBM Cloud Object Storage System Accesser F5100 Appliance Manual 3401 A02 3403 A02...
Page 6: ...vi IBM Cloud Object Storage System Accesser F5100 Appliance Manual 3401 A02 3403 A02...
Page 8: ...viii IBM Cloud Object Storage System Accesser F5100 Appliance Manual 3401 A02 3403 A02...
Page 14: ...xiv IBM Cloud Object Storage System Accesser F5100 Appliance Manual 3401 A02 3403 A02...
Page 16: ...xvi IBM Cloud Object Storage System Accesser F5100 Appliance Manual 3401 A02 3403 A02...
Page 28: ...12 IBM Cloud Object Storage System Accesser F5100 Appliance Manual 3401 A02 3403 A02...
Page 40: ...24 IBM Cloud Object Storage System Accesser F5100 Appliance Manual 3401 A02 3403 A02...
Page 41: ......
Page 42: ...IBM Printed in USA...


