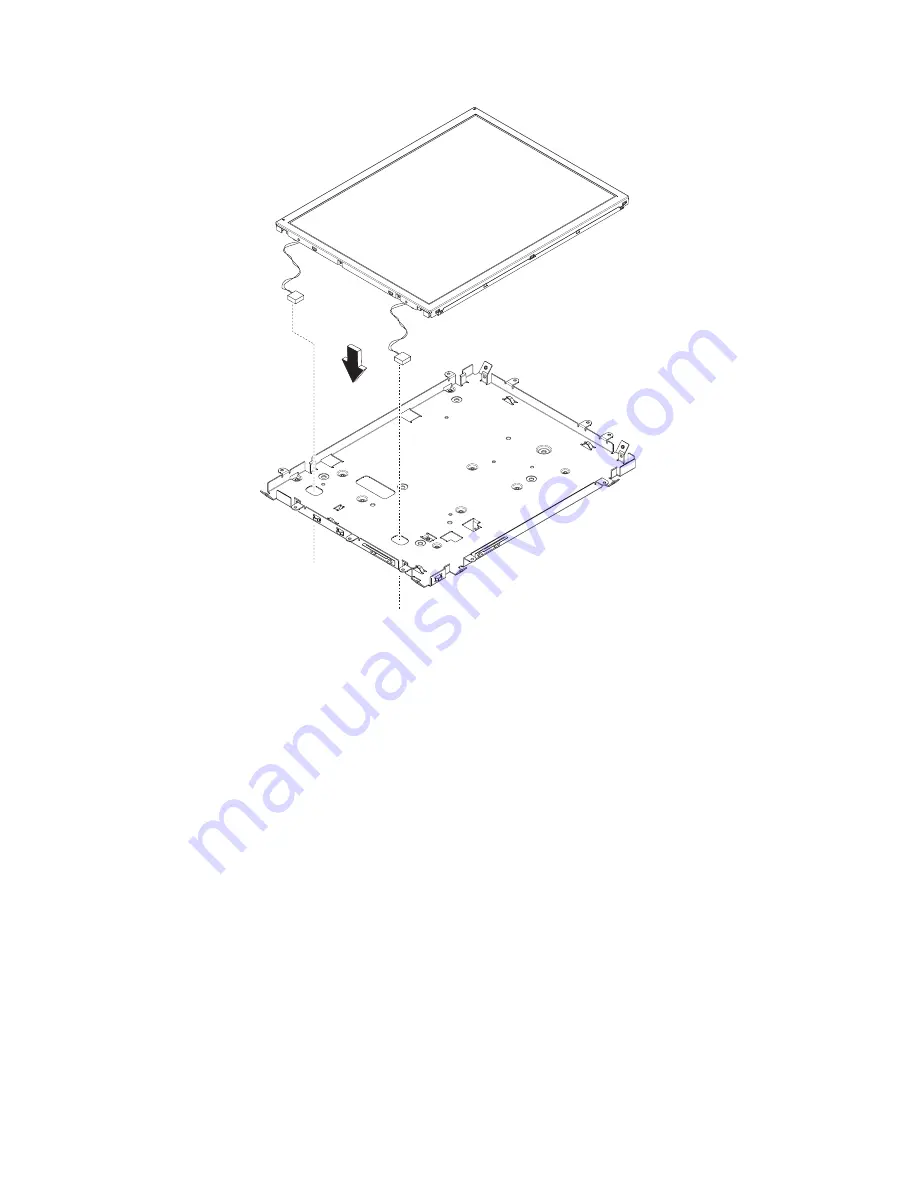
7.
To
replace,
see
Figure
30
and
follow
these
steps:
a.
Plug
the
signal
cable
to
LCD.
b.
Place
the
assembly
face
up
on
a
steady
surface.
c.
Align
the
LCD
with
the
LCD
shield
and
thread
the
backlight
cables
through
the
holes.
d.
Replace
the
four
screws
holding
the
LCD.
e.
Turn
the
LCD
assembly
over.
Replace
the
bezel
and
install
the
eight
screws.
f.
Connect
the
backlight
cables
into
the
backlight
inverter
card.
Figure
30.
Replacing
the
LED
assembly
Chapter
4.
Removing
and
replacing
FRUs
43
All manuals and user guides at all-guides.com
Summary of Contents for Anyplace Kiosk 4836
Page 2: ...All manuals and user guides at all guides com...
Page 8: ...vi Anyplace Kiosk 4836 All manuals and user guides at all guides com...
Page 10: ...viii Anyplace Kiosk 4836 All manuals and user guides at all guides com...
Page 14: ...xii Anyplace Kiosk 4836 All manuals and user guides at all guides com...
Page 16: ...xiv Anyplace Kiosk 4836 All manuals and user guides at all guides com...
Page 22: ...6 Anyplace Kiosk 4836 All manuals and user guides at all guides com...
Page 42: ...26 Anyplace Kiosk 4836 All manuals and user guides at all guides com...
Page 82: ...66 Anyplace Kiosk 4836 All manuals and user guides at all guides com...
Page 83: ...Appendix C Notices 67 All manuals and user guides at all guides com...
Page 84: ...Notice for users in Korea 68 Anyplace Kiosk 4836 All manuals and user guides at all guides com...
Page 100: ...84 Anyplace Kiosk 4836 All manuals and user guides at all guides com...
Page 104: ...88 Anyplace Kiosk 4836 All manuals and user guides at all guides com...
Page 107: ...All manuals and user guides at all guides com...
Page 108: ...Printed in USA GA27 4347 00 All manuals and user guides at all guides com...


