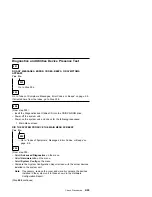


Monitor
First, review the “Display Self Test” on page 3-12, then follow step 001.
001
– Power-off the system unit and monitor.
– Remove all adapter cards.
– Make sure the monitor I/O signal cable is properly connected to the
system unit and monitor.
– Make sure the power cords are properly connected to the system unit and
monitor, and that the line voltage is correct. See “Power Supply” on
page 2-34.
– Make sure the monitor contrast and brightness controls are not adjusted
too low.
– Power-on the monitor, and wait 20 seconds.
– Power-on the system unit.
Note: Because monitor models might differ, review the Display Self Test
before attempting to answer the following questions. The test has
changed from previous levels. If the monitor was not sold together
with the system unit, you might need to refer to the service
information provided with the monitor.
– If you are not familiar with the self-test pattern produced by the Display
Self Test, refer to step 4 of “Display Self Test” on page 3-12 for a
description of the self-test pattern.
Note:
Do not run the Display Self Test. Do not unplug the monitor I/O
signal cable from the system unit.
DOES THE DISPLAY SELF-TEST PATTERN APPEAR ON THE SCREEN?
Yes No
002
Go to Step 006 on page 2-54.
003
Unplug the monitor I/O signal cable from the system unit.
DID THE DISPLAY SELF-TEST PATTERN REMAIN ON THE SCREEN
Yes No
004
(Step 004 continues)
Check Procedures
2-53
Summary of Contents for Aptiva 2140
Page 2: ......
Page 8: ...vi...
Page 24: ...xxii...
Page 26: ...xxiv...
Page 128: ...3 14...
Page 132: ...2010 Cover Do not lift the cover too high as the tabs might break 4 4...
Page 134: ...Figure 4 2 3 5 In Cage 4 6...
Page 136: ...JP7 JP6 JP4 J2 J1 Figure 4 4 Console cable removal 4 8...
Page 138: ...Figure 4 7 Removing the console 4 10...
Page 139: ...Figure 4 8 Removing the console bottom plate Figure 4 9 Console spring Repair Information 4 11...
Page 170: ...6 2...
Page 174: ...Assembly 2 Machine Type 2140 System Unit Interior SL A 1 3 4 5 6 2 7 4...
Page 178: ...Assembly 4 Machine Type 2142 System Unit Interior SL A 1 3 4 5 7 6 2 7 8...
Page 181: ...Assembly 5 Diskette Hard Disk Drives and Zip Drive 3 1 4 4 4 2 Parts Catalog 7 11...
Page 185: ...Assembly 7 CD DVD ROM Drive Modem and TV Cards 3 5 1 2 4 6 Parts Catalog 7 15...
Page 196: ...8 4...
Page 206: ...B 8...
Page 211: ......


