| Aspera Sync |
231
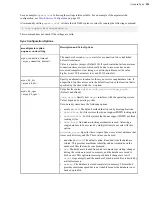
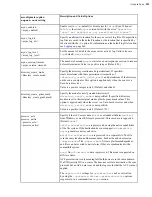
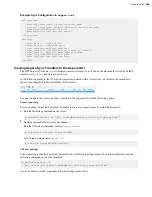
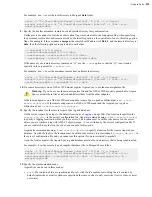
For example, name the session
job1
:
async -L "C:\Users\Morgan\Aspera jobs\log" -N job1
Once you name the session, you enter the session options. Session options define the transfer parameters including
authentication, transfer rate and policy, database storage, and the folders to synchronize.
5.
Provide authentication credentials.
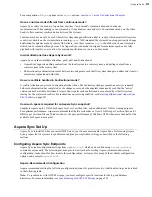
Aspera Sync supports three methods of authenticating to the server: SSH key, password, and basic token. Aspera
recommends using SSH keys, unless your server requires a basic token.
•
SSH key
: To use SSH key authentication, your SSH public key must be configured on the remote server. For
instructions on creating keys and setting them up on the server, see the
IBM Aspera High-Speed Transfer
. Specify the path to your private key file by using the
-i
file
(or
--private-key-
path=
file
) option.
•
Password
: The password is the one associated with the Aspera transfer user account on the server. You can
provide the password as an environment variable (ASPERA_SCP_PASS) or when prompted after starting the
command.
•
Basic token
: Basic tokens are used for synchronizing to Aspera products that require access key
authentication, such as IBM Aspera on Cloud transfer service (AoCts) or IBM Aspera Transfer
Cluster Manager (ATC Manager). For instructions on creating the basic token, see
with Basic Token Authorization
on page 256. You can provide the token as an environment
variable (ASPERA_SCP_TOKEN) or in the command line using the
-W
token_string
(or
--
token=
token_string
) option.
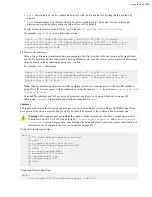
For example, use
-i
and specify the path to Morgan's SSH private key in their home folder:
async -L "C:\Users\Morgan\Aspera jobs\log" -N job1 -i c:/users/
morgan/.ssh/id_rsa
In this case, the path to the SSH key can use platform-agnostic path separators ( / ) and be entered without quotes
around it because it does not have a space in it.
6.
If the local data are stored on a mount or object storage, specify the locations for the local snapshot database.
The snapshot database cannot be located on CIFS, NFS, or other shared file systems mounted on Linux. If
the local files and directories specified in the previous step are on a mount, you must specify a local location
using
-b
db_dir
(or
--local-db-dir=
db_dir
). The database must not be in the directory that is being
synchronized.
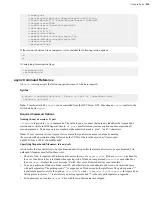
For example, use
-b
to store the local snapshot database in Morgan's "Aspera jobs" folder:
async -L "C:\Users\Morgan\Aspera jobs\log" -N job1 -i c:/users/
morgan/.ssh/id_rsa -b "C:\Users\Morgan\Aspera jobs\db"
7.
Set transfer parameters.
The same transfer rate and transfer policy options that are used to control
ascp
transfers can be applied to
async
sessions. Aspera recommends setting a target rate that is based on your available bandwidth and system
capabilities. Set the target (maximum) rate using
-l
rate
(or
--target-rate=
rate
).
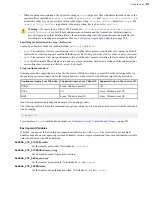
For example, use
-l
to set the target rate to 500 Mbps:
async -L "C:\Users\Morgan\Aspera jobs\log" -N job1 -i c:/users/
morgan/.ssh/id_rsa -b "C:\Users\Morgan\Aspera jobs\db" -l 500m
8.
Specify the local directory for synchronization.
Enter the local directory using
-d
ldir
(or
--local-dir=
ldir
).


