| Set up HST Server for Node API |
283
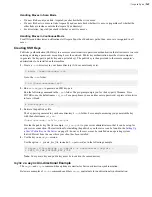
Restore Access Keys
Run the following command:
# /opt/aspera/bin/asnodeadmin [-u
username
] --access-key-restore
filename
Use the
-u
username
option to change the Node API user (and system user) associated with the restored access
key.
Backing up and Restoring a Node Database
These instructions describe how to back up and restore the entire Redis database of a node, which includes Node API
users, their access keys, and transfer history. If your transfer server is an IBM Aspera on Cloud (AoC) node, migrate
AoC data from one node to another by backing up the Redis database on the original node and restoring the database
on a new node.
If you only need to back up and restore Node API usernames and passwords (the Node API user database), use
asnodeadmin
Backing up and Restoring the Node User Database Records
on page 282. If you
also want to back up and restore access keys, see
Backing up and Restoring Access Keys (Tenant Data)
on page
282.
These instructions assume that the node is using the default port for the Redis database, port 31415. If your
deployment uses a different port for Redis, substitute it in the commands accordingly.
1.
Verify that the original node and new node are running the same version of Aspera software.
Run
ascp -A
on a command line to view the Aspera product and version.
2.
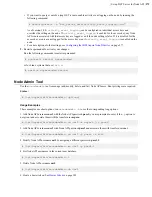
On the original node, back up the database.
Stop asperanoded and create the backup file by running the following commands:
# systemctl stop asperanoded
# /opt/aspera/bin/asredis -p 31415 BGREWRITEAOF
The backup is stored as
appendonly.aof
in the following location:
/opt/aspera/var/appendonly.aof
3.
If migrating the database, move the
appendonly.aof
to the same location on the new node.
4.
On the new node, stop asperanoded:
# systemctl stop asperanoded
5.
Flush existing data from the Redis database on the new node.
#/opt/aspera/bin/asredis -p 31415 FLUSHALL
6.
Load the backup database file into the new node database.
# cat appendonly.aof | /opt/aspera/bin/asredis --pipe -p 31415
7.
On both nodes, restart asperanoded.
# systemctl start asperanoded
8.
In AoC, confirm that the hostname matches the DNS entry for the new node.
To view the node URL, go to
Admin View > Nodes & Storage
.
9.
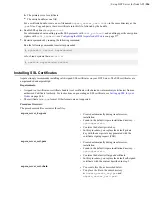
Confirm the database restoration succeeded.

