1.
Read “Safety” on page v and the “Installation guidelines” on page 23.
2.
Read the documentation that comes with the DIMMs.
3.
Shut down the operating system, turn off the blade server, and remove the
blade server from the BladeCenter unit. See “Removing the blade server from
a BladeCenter unit” on page 25.
4.
Carefully lay the blade server on a flat, static-protective surface, with the
cover side up.
5.
Open and remove the blade server cover. See “Removing the blade server
cover” on page 26.
6.
Locate the DIMM connectors on the system board. See the illustration in
“System-board connectors” on page 17. Determine the connector into which
you will install the DIMM.
7.
Touch the static-protective package that contains the part to any
unpainted
metal surface on the BladeCenter unit or any
unpainted
metal surface on any
other grounded rack component; then, remove the part from its package.
8.
Verify that both of the connector retaining clips are in the fully open position.
9.
Turn the DIMM so that the DIMM keys align correctly with the connector on
the system board.
Attention:
To avoid breaking the DIMM retaining clips or damaging the
DIMM connectors, handle the clips gently.
10.
Insert the DIMM by pressing the DIMM along the guides into the connector.
Verify that each retaining clip snaps into the closed position.
Important:
If there is a gap between the DIMM and the retaining clips, the
DIMM is not correctly installed. Open the retaining clips to remove and
reinsert the DIMM.
11.
Install and close the blade server cover. See “Installing and closing the blade
server cover” on page 43.
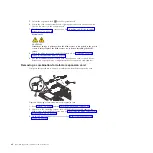
Statement 21
CAUTION:
Hazardous energy is present when the blade server is connected to the
power source. Always replace the blade server cover before installing the
blade server.
12.
Install the blade server into the BladeCenter unit. See “Installing the blade
server in a BladeCenter unit” on page 44.
Chapter 3. Installing and removing options
35
Summary of Contents for BladeCenter JS23
Page 3: ...BladeCenter JS23 and BladeCenter JS43 Type 7778 Installation and User s Guide ...
Page 6: ...iv JS23 JS43 Type 7778 Installation and User s Guide ...
Page 24: ...12 JS23 JS43 Type 7778 Installation and User s Guide ...
Page 86: ...74 JS23 JS43 Type 7778 Installation and User s Guide ...
Page 87: ......
Page 88: ... Part Number 44R5338 Printed in USA 1P P N 44R5338 ...


