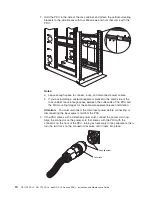
5.
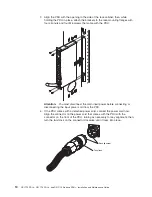
Route
the
power
cord
from
the
PDU
toward
the
rack
cabinet
side
braces;
then,
route
the
power
cord
along
a
side
brace
toward
the
back
of
the
rack
cabinet
and
secure
the
power
cord
with
the
cable
straps
that
come
with
the
PDU.
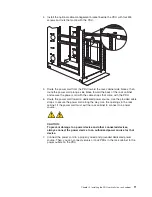
6.
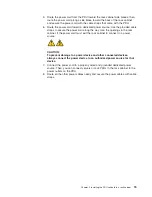
Route
the
power
cord
toward
a
dedicated
power
source.
Use
the
provided
cable
straps
to
secure
the
power
cord
along
the
way.
Use
the
openings
in
the
rack
cabinet,
if
the
power
cord
must
exit
the
rack
cabinet
to
connect
to
a
power
source.
CAUTION:
To
prevent
damage
to
a
power
device
and
other
connected
devices,
always
connect
the
power
device
to
an
authorized
power
source
for
that
device.
7.
Connect
the
power
cord
to
a
properly
wired
and
grounded
dedicated
power
source.
Then,
you
can
connect
servers
or
rack
PDUs
in
the
rack
cabinet
to
the
power
outlets
on
the
PDU.
8.
Route
all
the
other
power
cables
neatly
and
secure
the
power
cables
with
cable
straps.
Chapter
2.
Installing
the
PDU
vertically
in
a
rack
cabinet
15
Summary of Contents for DPI C13 PDU+
Page 1: ...DPI C13 PDU DPI C19 PDU and DPI C19 3 phase PDU Installation and Maintenance Guide...
Page 2: ......
Page 3: ...DPI C13 PDU DPI C19 PDU and DPI C19 3 phase PDU Installation and Maintenance Guide...
Page 20: ...8 DPI C13 PDU DPI C19 PDU and DPI C19 3 phase PDU Installation and Maintenance Guide...
Page 28: ...16 DPI C13 PDU DPI C19 PDU and DPI C19 3 phase PDU Installation and Maintenance Guide...
Page 48: ...36 DPI C13 PDU DPI C19 PDU and DPI C19 3 phase PDU Installation and Maintenance Guide...
Page 54: ...42 DPI C13 PDU DPI C19 PDU and DPI C19 3 phase PDU Installation and Maintenance Guide...
Page 58: ...46 DPI C13 PDU DPI C19 PDU and DPI C19 3 phase PDU Installation and Maintenance Guide...
Page 87: ......
Page 88: ...Part Number 40K9635 Printed in USA 1P P N 40K9635...

