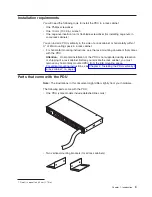
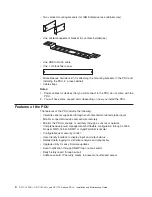

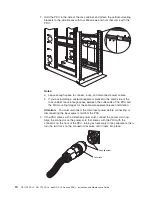
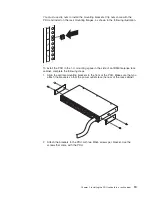


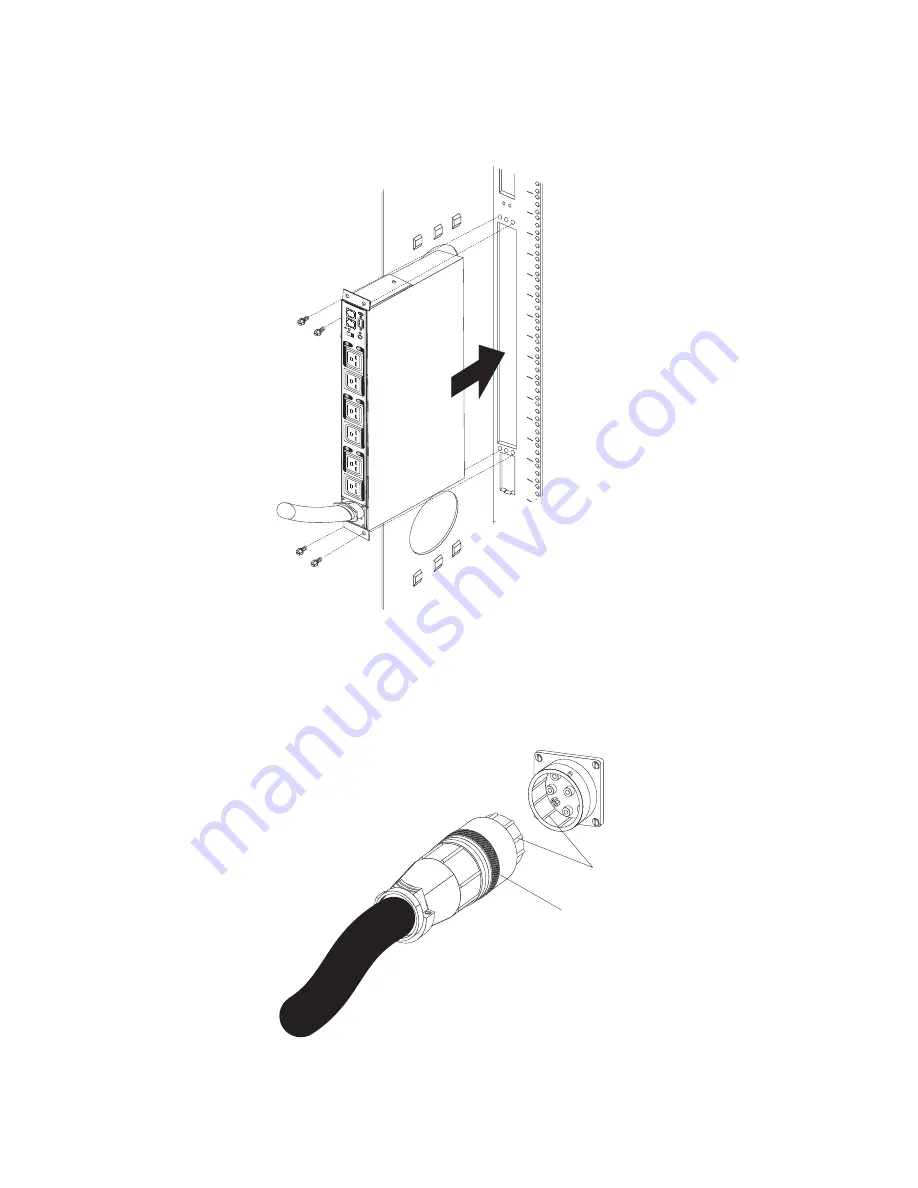
3.
Align
the
PDU
with
the
opening
in
the
side
of
the
rack
cabinet;
then,
while
holding
the
PDU
in
place,
attach
the
brackets
to
the
rack-mounting
flanges
with
four
clip
nuts
and
four
M6
screws
that
come
with
the
PDU.
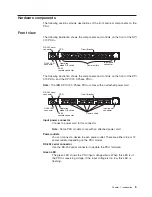
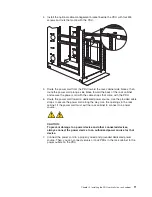
LA
N
4
3
2
1
6
5
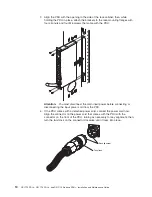
Attention:
You
must
disconnect
the
main
input
power
before
connecting
or
disconnecting
the
input
power
cord
from
the
PDU.
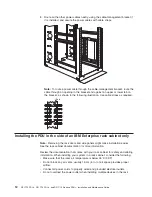
4.
If
the
PDU
comes
with
a
detached
power
cord,
connect
the
power
cord
now.
Align
the
connector
on
the
power
cord
that
comes
with
the
PDU
with
the
connector
on
the
front
of
the
PDU,
turning
as
necessary
for
key
alignment;
then,
turn
the
twist-lock
on
the
connector
clockwise
until
it
locks
into
place.
Key alignment
Twist lock
14
DPI
C13
PDU+,
DPI
C19
PDU+,
and
DPI
C19
3-phase
PDU+:
Installation
and
Maintenance
Guide
Summary of Contents for DPI C13 PDU+
Page 1: ...DPI C13 PDU DPI C19 PDU and DPI C19 3 phase PDU Installation and Maintenance Guide...
Page 2: ......
Page 3: ...DPI C13 PDU DPI C19 PDU and DPI C19 3 phase PDU Installation and Maintenance Guide...
Page 20: ...8 DPI C13 PDU DPI C19 PDU and DPI C19 3 phase PDU Installation and Maintenance Guide...
Page 28: ...16 DPI C13 PDU DPI C19 PDU and DPI C19 3 phase PDU Installation and Maintenance Guide...
Page 48: ...36 DPI C13 PDU DPI C19 PDU and DPI C19 3 phase PDU Installation and Maintenance Guide...
Page 54: ...42 DPI C13 PDU DPI C19 PDU and DPI C19 3 phase PDU Installation and Maintenance Guide...
Page 58: ...46 DPI C13 PDU DPI C19 PDU and DPI C19 3 phase PDU Installation and Maintenance Guide...
Page 87: ......
Page 88: ...Part Number 40K9635 Printed in USA 1P P N 40K9635...


