Notes:
v
You can also have multiple systems that are attached to a switch that is then connected to the
HMC. For instructions, see HMC network connections (http://www.ibm.com/support/
knowledgecenter/POWER8/p8hai/netconhmc.htm).
v
If you are using a switch, ensure that the speed in the switch is set to Autodetection. If the server
is directly attached to the HMC, ensure the Ethernet adapter speed on the HMC is set to
Autodetection
. For information about how to set media speeds, see Setting the media speed
(http://www.ibm.com/support/knowledgecenter/POWER8/p8hai/lanmediaspeed.htm).
3.
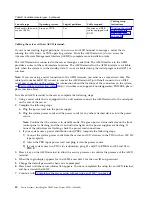
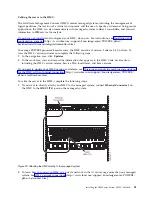
If you are connecting a second HMC to your managed server, connect it to the Ethernet port that is
labeled HMC2 (T5) on the managed server.
4.
Continue with “Routing cables through the cable-management arm and connecting expansion units”
on page 33.
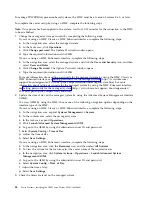
Cabling the server and accessing the IVM:
When you install the Virtual I/O Server (VIOS) in an environment where no Hardware Management
Console (HMC) is present, the VIOS automatically creates a management partition whose interface is the
Integrated Virtualization Manager (IVM).
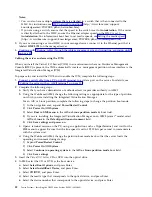
To prepare for and install the VIOS and to enable the IVM, complete the following steps:
1.
Connect a serial cable from a PC or ASCII terminal to a system port on the server. For details, see
“Cabling the server with an ASCII terminal” on page 30.
2.
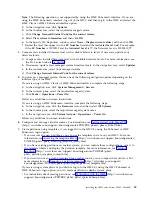
Complete the following steps:
a.
Verify that you have administrator or authorized service provider authority in ASMI.
b.
Using the Web-based ASMI, change the following settings as appropriate for the type of partition
on which you are installing the Integrated Virtualization Manager:
For an AIX or Linux partition, complete the following steps to change the partition boot mode:
1)
In the navigation area, expand Power/Restart Control.
2)
Click Power On/Off System.
3)
Select Boot to SMS menu in the AIX or Linux partition mode by boot field.
4)
If you are installing the Integrated Virtualization Manager on an IBM System i
®
model, select
AIX or Linux
in the Default partition environment field.
5)
Click Save settings and power on.
c.
Open a terminal session on the PC, using an application such as HyperTerminal, and wait for the
SMS menu to appear. Be sure that the line speed is set to 19,200 bits per second to communicate
with the system unit.
d.
Using the Web-based ASMI, change the partition boot mode back so that the server loads the
operating environment during startup:
1)
Expand Power/Restart Control.
2)
Click Power On/Off System.
3)
Select Continue to operating system in the AIX or Linux partition mode boot field.
4)
Click Save settings.
3.
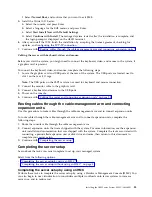
Insert the Virtual I/O Server CD or DVD into the optical drive.
4.
In SMS, select the CD or DVD as the boot device:
a.
Select Select Boot Options, and press Enter.
b.
Select Select Install/Boot Device, and press Enter.
c.
Select CD/DVD, and press Enter.
d.
Select the media type that corresponds to the optical device, and press Enter.
e.
Select the device number that corresponds to the optical device, and press Enter.
32
Power Systems: Installing the IBM Power System E850C (8408-44E)
Summary of Contents for E850C
Page 1: ...Power Systems Installing the IBM Power System E850C 8408 44E GI11 9920 00 IBM...
Page 2: ......
Page 3: ...Power Systems Installing the IBM Power System E850C 8408 44E GI11 9920 00 IBM...
Page 6: ...iv Power Systems Installing the IBM Power System E850C 8408 44E...
Page 16: ...xiv Power Systems Installing the IBM Power System E850C 8408 44E...
Page 54: ...38 Power Systems Installing the IBM Power System E850C 8408 44E...
Page 67: ...Notices 51...
Page 68: ...IBM Part Number 29R2425 Printed in USA GI11 9920 00 1P P N 29R2425...

