f.
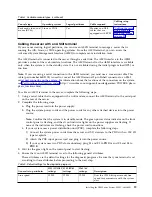
Select Normal Boot, and confirm that you want to exit SMS.
5.
Install the Virtual I/O Server:
a.
Select the console, and press Enter.
b.
Select a language for the BOS menus, and press Enter.
c.
Select Start Install Now with Default Settings.
d.
Select Continue with Install. The managed system restarts after the installation is complete, and
the login prompt is displayed on the ASCII terminal.
6.
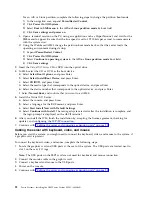
After you install the IVM, finish the installation by accepting the license agreement, checking for
updates, and configuring the TCP/IP connection.
7.
Continue with “Routing cables through the cable-management arm and connecting expansion units.”
Cabling the server with keyboard, video, and mouse:
Before you start the system, you might need to connect the keyboard, video, and mouse to the system, if
a graphics card is present.
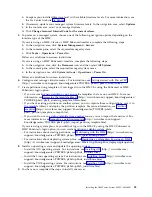
To connect the keyboard, video, and mouse, complete the following steps:
1.
Locate the graphics card and USB ports at the rear of the system. The USB ports are located next to
slot 1 on the rear I/O cage.
Note:
The USB ports on the FSP2 card are not used for keyboard and mouse connection.
2.
Connect the monitor cable to the graphics card.
3.
Connect a keyboard and mouse to the USB ports.
4.
Power on the console.
5.
Continue with “Cabling the server and connecting expansion units” on page 23.
Routing cables through the cable-management arm and connecting
expansion units
Use this procedure to route cables through the cable-management arm and to connect expansion units.
To route cables through the cable-management arm and to connect expansion units, complete the
following steps:
1.
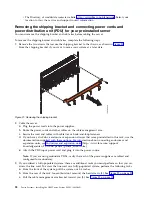
Route the console cable through the cable management arm.
2.
Connect expansion units that were shipped with the system. For more information, see the expansion
unit installation documentation that was shipped with the system. Complete the tasks associated with
connecting a preinstalled expansion unit or disk drive enclosure, then return to this document to
complete your server setup.
3.
Continue with “Completing the server setup.”
Completing the server setup
Learn about the tasks you must complete to set up your managed system.
Select from the following options:
v
“Completing the server setup by using an HMC”
v
“Completing the server setup without using an HMC” on page 36
Completing the server setup by using an HMC
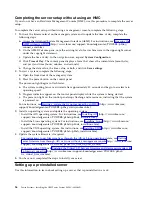
Perform these tasks to complete the server setup by using a Hardware Management Console (HMC). You
can also begin to use virtualization to consolidate multiple workloads onto fewer systems to increase
server use, and to reduce cost.
Installing the IBM Power System E850C (8408-44E)
33
Summary of Contents for E850C
Page 1: ...Power Systems Installing the IBM Power System E850C 8408 44E GI11 9920 00 IBM...
Page 2: ......
Page 3: ...Power Systems Installing the IBM Power System E850C 8408 44E GI11 9920 00 IBM...
Page 6: ...iv Power Systems Installing the IBM Power System E850C 8408 44E...
Page 16: ...xiv Power Systems Installing the IBM Power System E850C 8408 44E...
Page 54: ...38 Power Systems Installing the IBM Power System E850C 8408 44E...
Page 67: ...Notices 51...
Page 68: ...IBM Part Number 29R2425 Printed in USA GI11 9920 00 1P P N 29R2425...

