© Copyright IBM Corp. 2000
5
Chapter 2. Cabling the server
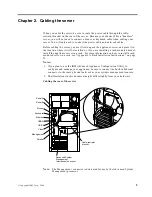
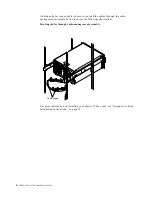
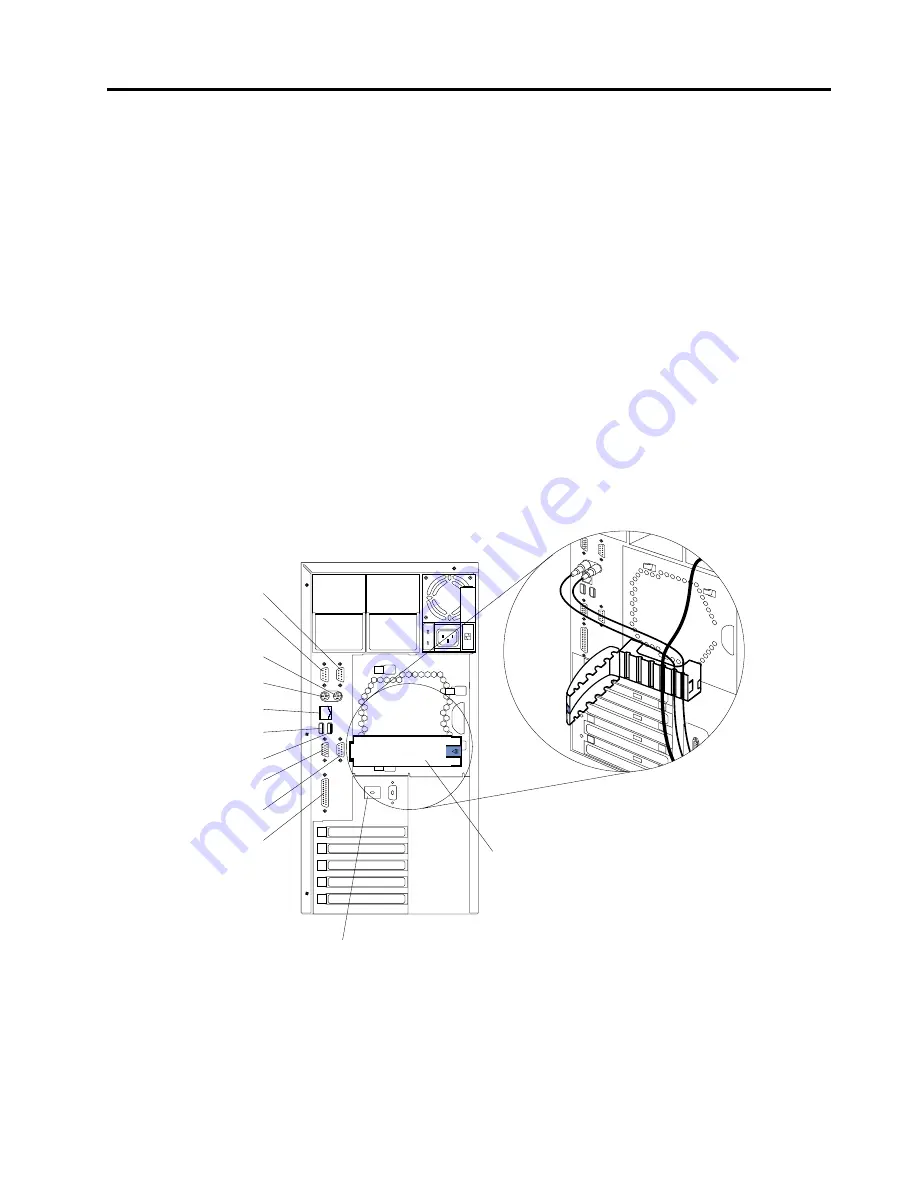
When you cable the server, be sure to route the power cable through the cable-
restraint bracket on the rear of the server. Because your xSeries 150 is a "headless"
server, you will not need to connect a mouse or keyboard cable when cabling your
server. You will only need to connect the power cable and network cables.
Before cabling the server, you must first unpack the appliance server and place it in
the location where it will be installed or, if you are installing a rack-mounted model,
install the appliance server in a rack. For more information on how to install a rack-
mounted server in a rack, see “Appendix A. Rack Installation Instructions,” on page
35.
Notes:
1. If you plan to use the IBM Advanced Appliance Configuration Utility to
configure and manage your appliance, be sure to connect the built-in Ethernet
connector to the same physical network as your systems management console.
2. The illustrations in this document might differ slightly from your hardware.
Cabling the rear of the server
Note:
The Management connector is dedicated for use by the Advanced System
Management processor.
Serial A
Serial B
Mouse
Keyboard
Ethernet
USB 1
USB 2
Video
Management
Parallel
Advanced System
Management
Interconnect knockout
Cable-restraint
bracket
Summary of Contents for eServer 150 xSeries
Page 1: ...IBM IBM xSeries 150 Installation Guide...
Page 2: ......
Page 3: ...IBM IBM xSeries 150 Installation Guide...
Page 10: ...viii IBM xSeries 150 Installation Guide...
Page 12: ...x IBM xSeries 150 Installation Guide...
Page 16: ...4 IBM xSeries 150 Installation Guide...
Page 24: ...12 IBM xSeries 150 Installation Guide...
Page 36: ...24 IBM xSeries 150 Installation Guide...
Page 40: ...28 IBM xSeries 150 Installation Guide...
Page 74: ...62 IBM xSeries 150 Installation Guide...
Page 75: ......


