Chapter 2. Installing options
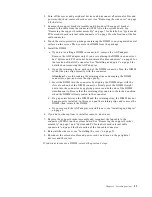
15
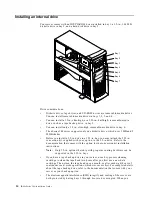
install a drive, save the filler panel and EMC shield from the bay, in case you
later remove the drive and do not replace it with another.
•
For a list of supported options for your server, refer to
http://www.ibm.com/pc/us/compat on the World Wide Web.
•
The illustrations in this document might differ slightly from your hardware.
Installing a drive in bay 2 or 4
Complete the following steps to install a drive in bay 2 or 4.
Attention:
When you handle ESD-sensitive devices, take precautions to avoid
damage from static electricity. For details on handling these devices, see “Handling
static-sensitive devices” on page x.
1. Review the safety precautions listed in “Safety” on page v.
2. Turn off the server and peripheral devices and disconnect the external cables and
power cords; then, remove the side cover (see “Removing the side cover” on page
6 for details).
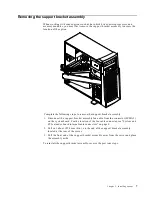
3. Remove the support bracket assembly and disconnect the fan cable from the
connector (SYSFA3) on the system board. See “Removing the support bracket
assembly” on page 7.
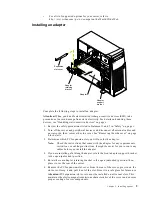
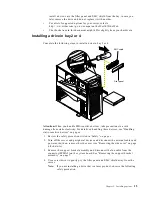
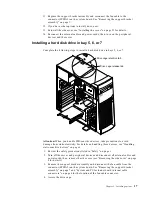
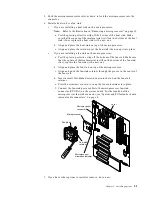
4. Use a screwdriver to gently pry the filler panel and EMC shield away from the
server.
Note:
If you are installing a drive that is a laser product, observe the following
safety precaution:
EMC shield
Filler panel

