10
IBM xSeries 232: Installation Guide
a.
If necessary, remove the adapter support bracket retaining clip.
b.
Carefully grasp the adapter by its top edge or upper corners, and align it with
the expansion slot on the system board.
c.
Press the adapter
firmly
into the expansion slot.
Attention:
When you install an adapter in the server, be sure that it is
completely and correctly seated in the system-board connector before you
apply power. Incomplete insertion might cause damage to the system board
or the adapter.
d.
Replace the retaining clip on the adapter support bracket, if you removed it.
e.
Align the bottom tabs of the adapter retention bracket with the holes at the top
of the expansion slots, and press the adapter retention bracket toward the
back of the server until it clicks into the locked position.
10. Connect any needed cables to the adapter.
Attention:
Route cables so that the flow of air from the fans is not blocked. In
addition, route any cables plugged into the PCI card under adjacent cards so they
are not pinched between the top of the card and the top cover.
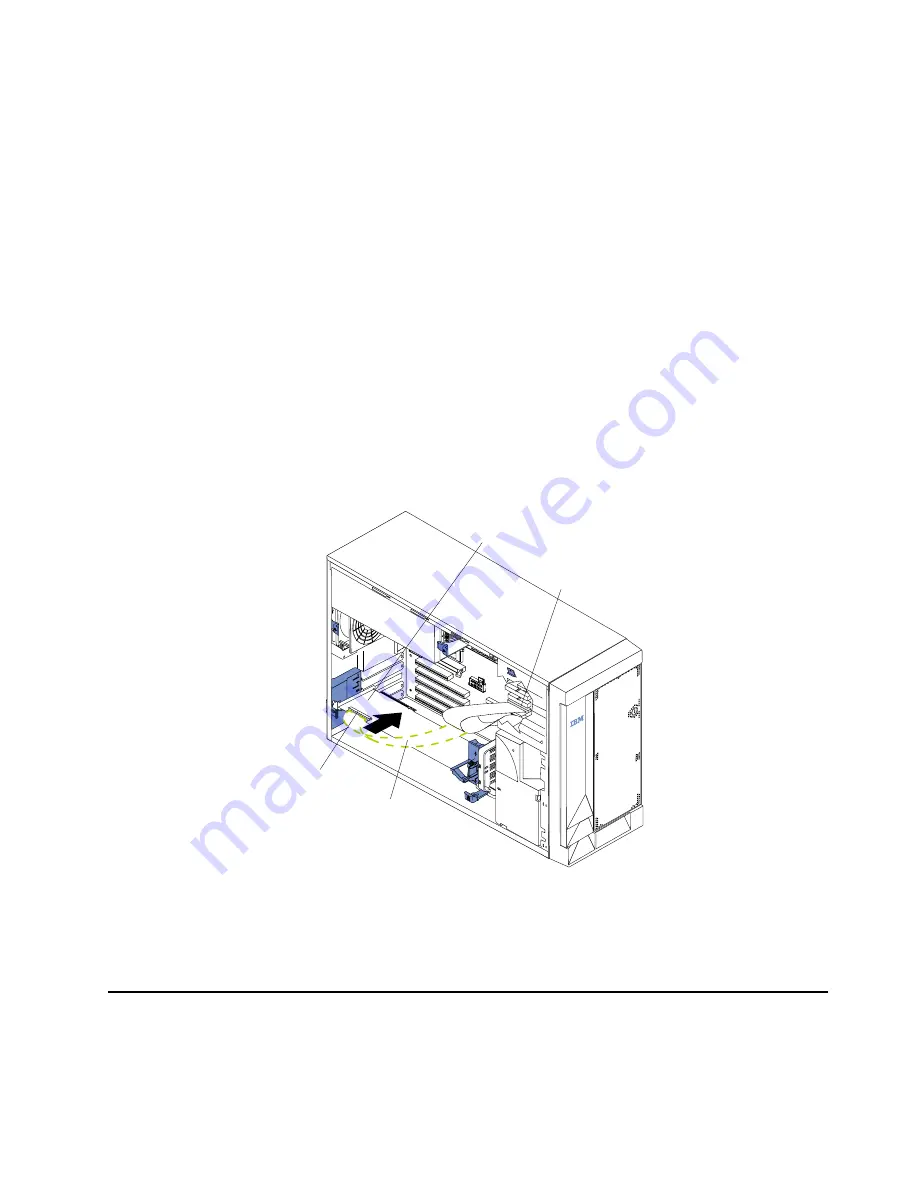
The following illustration shows the rerouting of the SCSI cable if you install a
ServeRAID™ adapter (remove the cable from SCSI connector A (J24) on the
system board and connect it to the RAID adapter).
Note:
The illustrations in this document might differ slightly from your hardware.
11. If you have other options to install or remove, do so now.
12. Install the cover.
13. Continue with “Cabling the server” on page 19.
Installing memory modules
Install
ing memor
y-module
s
Adding memory to your server is an easy way to make programs run faster. You can
increase the amount of memory in your server by installing options called
memory-
module kits
. Each kit contains one industry-standard, dual inline memory module
(DIMM). Your server supports a two-way interleaved memory configuration. You must
SCSI connector A
SCSI cable
SCSI card
New connector
location


