


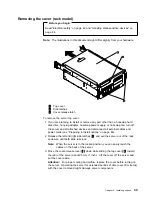
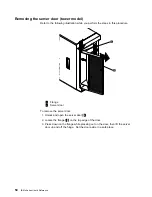
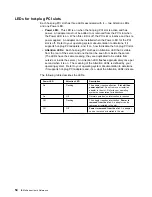

Removing the cover (rack model)
Before you begin:
Read “Electrical safety” on page 42 and “Handling static-sensitive devices” on
page 44.
Note: The illustrations in this document might differ slightly from your hardware.
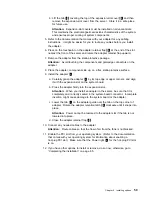
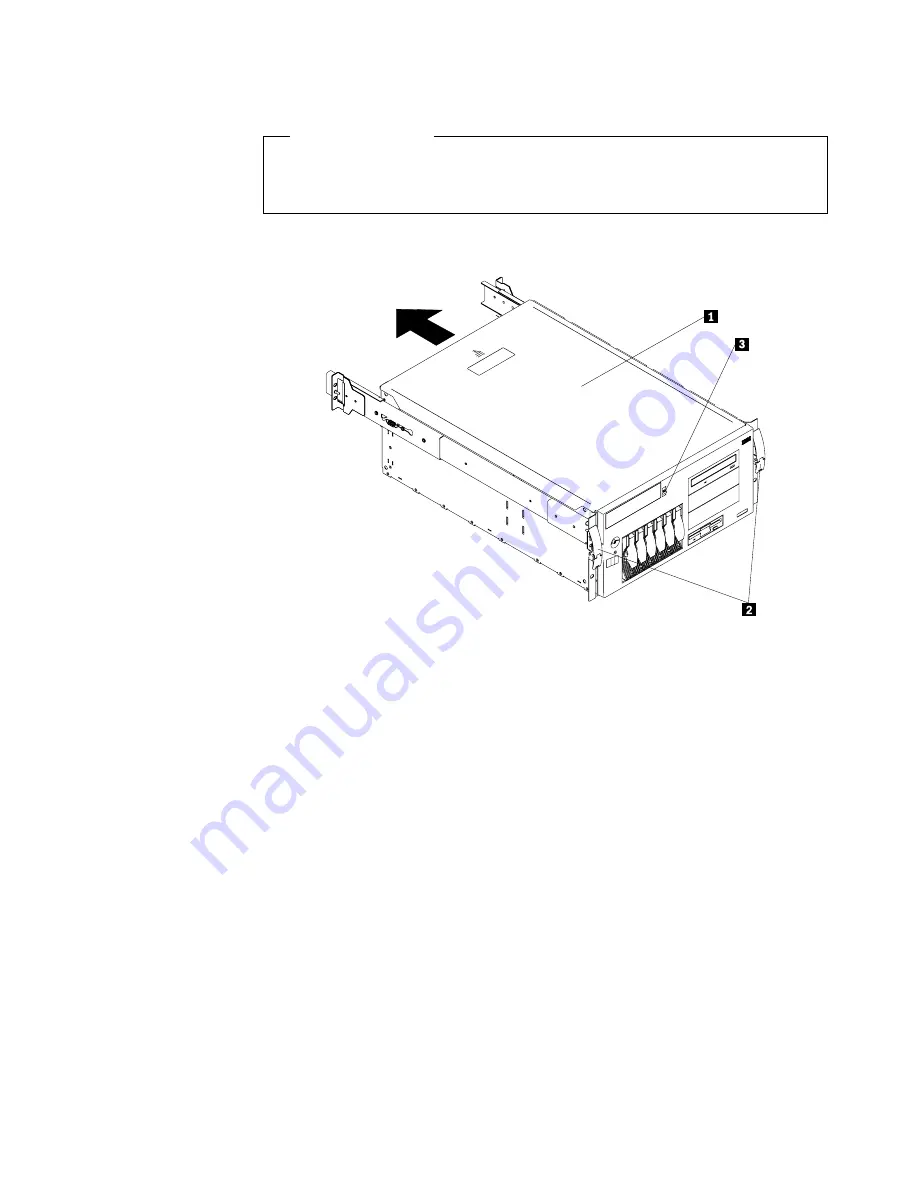
1
Top cover
2
Side latches
3
Cover-release latch
To remove the server top cover:
1. If you are planning to install or remove any part other than a hot-swap hard
disk drive, hot-plug adapter, hot-swap power supply, or hot-swap fan, turn off
the server and all attached devices and disconnect all external cables and
power cords (see “Preparing to install options” on page 46).
2. Release the left and right side latches
2
and pull the server out of the rack
enclosure until both slide rails lock.
Note: When the server is in the locked position, you can easily reach the
cables on the back of the server.
3. Move the cover-release lever
3
down while sliding the top cover
1
toward
the rear of the server about 25 mm (1 inch). Lift the cover off the server and
set the cover aside.
Attention: For proper cooling and airflow, replace the cover before turning on
the server. Operating the server for extended periods of time (over 30 minutes)
with the cover removed might damage server components.
Chapter 4. Installing options
49
Summary of Contents for eServer 240 xSeries
Page 1: ...User s Reference xSeries 240...
Page 26: ...16 IBM xSeries User s Reference...
Page 50: ...40 IBM xSeries User s Reference...
Page 116: ...106 IBM xSeries User s Reference...
Page 170: ...160 IBM xSeries User s Reference...
Page 180: ...170 IBM xSeries User s Reference...
Page 219: ...IBM Part Number 21P9014 Printed in the United States of America 21P9 14...


