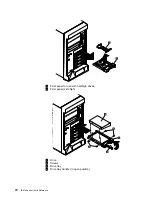
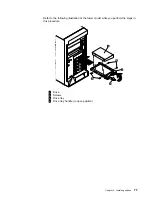

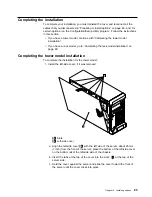
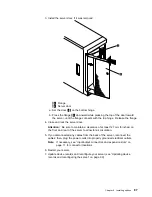
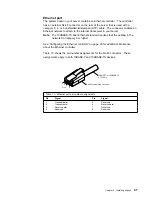

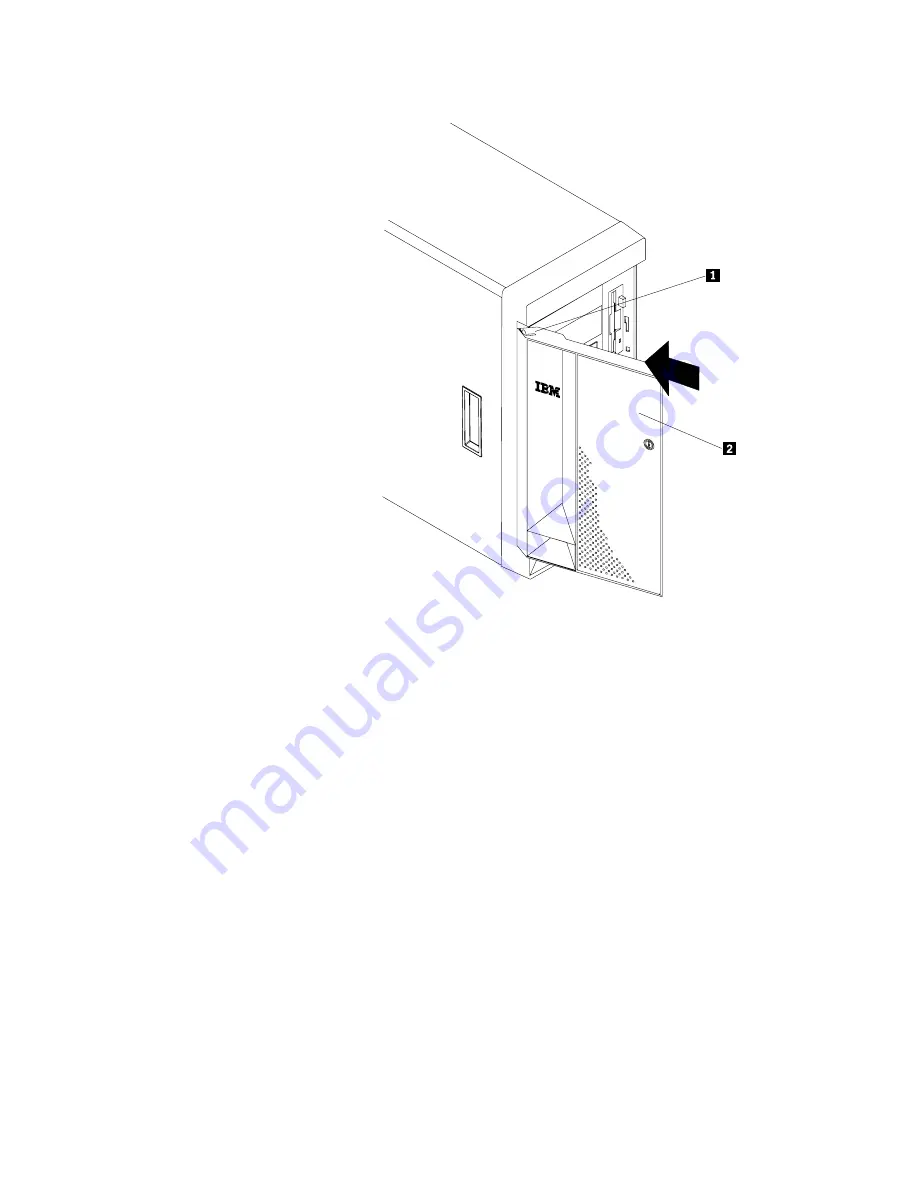
3. Install the server door, if it was removed.
1
Flange
2
Server door
a. Set the door
2
on the bottom hinge.
b. Press the flange
1
downward while pressing the top of the door toward
the server, until the flange connects with the top hinge. Release the flange.
4. Close and lock the server door.
Attention: Be sure to maintain a clearance of at least 127 mm (5 inches) on
the front and rear of the server to allow for air circulation.
5. If you disconnected any cables from the back of the server, reconnect the
cables; then, plug the power cords into properly grounded electrical outlets.
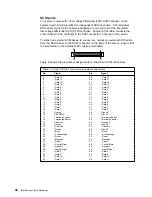
Note: If necessary, see “Input/output connectors and expansion slots” on
page 11 for connector locations.
6. Restart your server.
7. Update device records and reconfigure your server (see “Updating device
records and reconfiguring the server” on page 90).
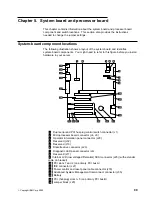
Chapter 4. Installing options
87
Summary of Contents for eServer 240 xSeries
Page 1: ...User s Reference xSeries 240...
Page 26: ...16 IBM xSeries User s Reference...
Page 50: ...40 IBM xSeries User s Reference...
Page 116: ...106 IBM xSeries User s Reference...
Page 170: ...160 IBM xSeries User s Reference...
Page 180: ...170 IBM xSeries User s Reference...
Page 219: ...IBM Part Number 21P9014 Printed in the United States of America 21P9 14...


