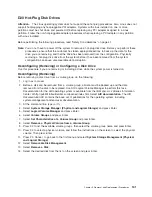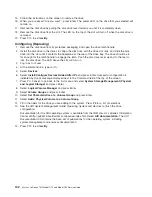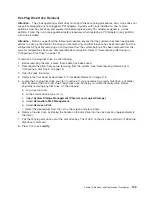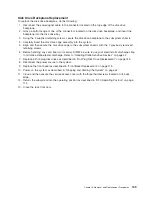
15.
Follow
the
instructions
on
the
screen
to
remove
the
drive.
16.
When
you
are
asked
″
Are
you
sure?
″
,
press
Enter.
The
power
LED
on
the
drive
that
you
selected
will
remain
on.
17.
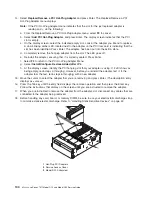
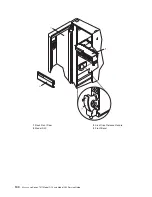
Remove
the
disk
drive
by
pulling
the
disk
drive
lever
toward
you
until
it
is
completely
open.
18.
Remove
the
disk
drive
from
the
slot.
The
LED
on
the
top
of
the
slot
will
turn
off
when
the
disk
drive
is
removed.
19.
Press
F10
to
exit
smitty
.
Configuring
(Replacing)
1.
Remove
the
disk
drive
from
its
protective
packaging,
and
open
the
drive
latch
handle.
2.
Install
the
disk
drive
in
the
drive
slot.
Align
the
disk
drive
with
the
drive
slot
rails,
and
slide
the
disk
drive
into
the
slot
until
it
contacts
the
backplane
at
the
rear
of
the
drive
bay.
The
drive
should
be
in
far
enough
for
the
latch
handle
to
engage
the
latch.
Push
the
disk
drive
lever
up
and
to
the
rear
to
lock
the
disk
drive.
The
LED
above
the
slot
will
turn
on.
3.
Log
in
as
root
user.
4.
At
the
command
line,
type
smitty
.
5.
Select
Devices
.
6.
Select
Install/Configure
Devices
Added
After
IPL
and
press
Enter.
Successful
configuration
is
indicated
by
the
OK
message
displayed
next
to
the
Command
field
at
the
top
of
the
screen
7.
Press
F3,
Cancel,
to
go
back
to
the
first
menu
and
select
System
Storage
Management
(Physical
and
Logical
Storage)
and
press
Enter.
8.
Select
Logical
Volume
Manager
and
press
Enter.
9.
Select
Volume
Groups
and
press
Enter.
10.
Select
Set
Characteristics
of
a
Volume
Group
and
press
Enter.
11.
Select
Add
a
Physical
Volume
to
a
Volume
Group
.
12.
Fill
in
the
fields
for
the
drive
you
are
adding
to
the
system.
Press
F4
for
a
list
of
selections.
13.
See
the
AIX
System
Management
Guide:
Operating
System
and
Devices
to
finish
the
drive
configuration.
Documentation
for
the
AIX
operating
system
is
available
from
the
IBM
Eserver
pSeries
Information
Center
at
http://publib16.boulder.ibm.com/pseries/index.htm.
Select
AIX
documentation
.
The
AIX
Documentation
CD
contains
the
base
set
of
publications
for
the
operating
system,
including
system-management
and
end-user
documentation.
14.
Press
F10
to
exit
smitty
.
142
Eserver
pSeries
7311
Model
D10
and
Model
D20
Service
Guide
Summary of Contents for eserver pSeries 7311 D10
Page 1: ...pSeries 7311 Model D10 and Model D20 Service Guide SA38 0627 01 ERserver...
Page 2: ......
Page 3: ...pSeries 7311 Model D10 and Model D20 Service Guide SA38 0627 01 ERserver...
Page 8: ...vi Eserver pSeries 7311 Model D10 and Model D20 Service Guide...
Page 12: ...x Eserver pSeries 7311 Model D10 and Model D20 Service Guide...
Page 14: ...xii Eserver pSeries 7311 Model D10 and Model D20 Service Guide...
Page 25: ...1 Processor Subsystem 2 I O Subsystem Chapter 1 Reference Information 9...
Page 89: ...Chapter 3 Removal and Replacement Procedures 73...
Page 99: ...2 1 1 Top of Cassette 2 Handle Chapter 3 Removal and Replacement Procedures 83...
Page 179: ...D10 I O Subsystem Parts continued 1 2 3 4 5 6 7 Chapter 4 Parts Information 163...
Page 207: ......

