Installing
a
Hot-Pluggable
PCI
Adapter:
Attention:
The
Linux
operating
system
does
not
support
these
hot-plug
procedures.
Also,
Linux
does
not
support
hot-plugging
any
hot-pluggable
PCI
adapters.
Systems
with
Linux
installed
on
one
or
more
partitions
must
be
shut
down
and
powered
off
before
replacing
any
PCI
adapter
assigned
to
a
Linux
partition.
Follow
the
non-hot-pluggable
adapter
procedures
when
replacing
a
PCI
adapter
in
any
partition
with
Linux
installed.
Note:
Before
installing
a
new
adapter,
ensure
the
device
driver
for
the
adapter
is
installed.
Check
with
the
system
administrator
if
the
device
driver
is
not
already
installed.
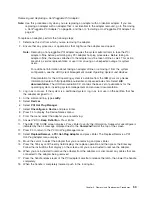
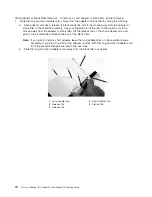
To
install
an
adapter,
perform
the
following
steps:
1.
Install
the
new
adapter
into
a
PCI
adapter
cassette,
see
“PCI
Adapter
or
Blank
Filler
Removal
from
a
Cassette
Assembly”
on
page
62.
2.
Log
in
as
root
user.
If
the
system
is
a
partitioned
system,
log
in
as
root
user
on
the
partition
that
has
the
adapter
assigned
to
it.
3.
At
the
command
line,
type
smitty
.
4.
Select
Devices
.
5.
Select
PCI
Hot
Plug
Manager
.
6.
From
the
PCI
Hot-Plug
Manager
menu,
select
Add
a
PCI
Hot-Plug
Adapter
and
press
Enter.
The
Add
a
Hot-Plug
Adapter
window
displays.
7.
See
the
PCI
Adapter
Placement
Reference
,
order
number
SA38-0538,
for
adapter
placement
information.
Select
an
empty
PCI
slot
for
the
adapter.
8.
Select
the
appropriate
empty
PCI
slot
from
the
ones
listed
on
the
screen,
and
press
Enter.
9.
Follow
the
instructions
on
the
screen
to
install
the
adapter
until
the
visual
indicator
(LED)
for
the
specified
PCI
slot
is
set
to
the
Action
state.
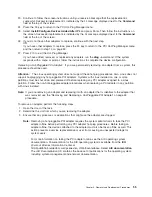
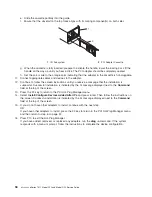
10.
Install
the
new
adapter
in
the
adapter
slot
by
performing
the
following:
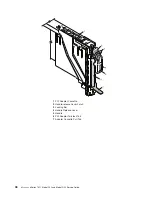
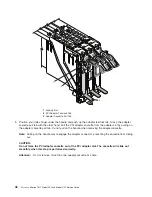
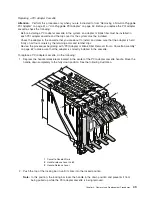
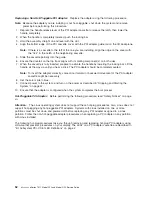
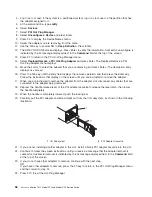
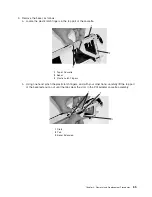
a.
Lower
the
black
handle
completely.
b.
Push
the
locking
bar
until
you
hear
a
clicking
sound.
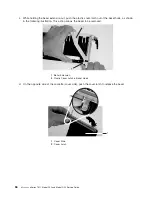
c.
Hold
the
assembly
straight
on
and
level
with
the
slot.
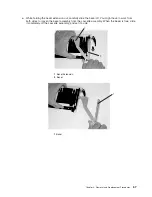
d.
Align
the
bottom
edge
of
the
PCI
cassette
cover
with
the
PCI
adapter
guide
rail
on
the
I/O
backplane.
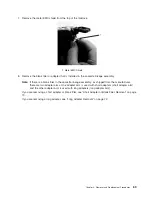
Note:
If
there
is
a
cassette
to
the
left
of
the
one
you
are
installing,
align
the
ridge
on
the
cover
with
the
″
tick
″
in
the
notch
of
the
neighboring
cassette.
Chapter
3.
Removal
and
Replacement
Procedures
57
Summary of Contents for eserver pSeries 7311 D10
Page 1: ...pSeries 7311 Model D10 and Model D20 Service Guide SA38 0627 01 ERserver...
Page 2: ......
Page 3: ...pSeries 7311 Model D10 and Model D20 Service Guide SA38 0627 01 ERserver...
Page 8: ...vi Eserver pSeries 7311 Model D10 and Model D20 Service Guide...
Page 12: ...x Eserver pSeries 7311 Model D10 and Model D20 Service Guide...
Page 14: ...xii Eserver pSeries 7311 Model D10 and Model D20 Service Guide...
Page 25: ...1 Processor Subsystem 2 I O Subsystem Chapter 1 Reference Information 9...
Page 89: ...Chapter 3 Removal and Replacement Procedures 73...
Page 99: ...2 1 1 Top of Cassette 2 Handle Chapter 3 Removal and Replacement Procedures 83...
Page 179: ...D10 I O Subsystem Parts continued 1 2 3 4 5 6 7 Chapter 4 Parts Information 163...
Page 207: ......

