

Installing your IBM xSeries 135 appliance server in the rack
You will need the following items to complete the server installation:
Flat-blade screwdriver
Phillips screwdriver
Mounting brackets and hardware
Cage nuts or clip nuts
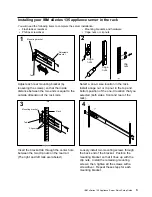
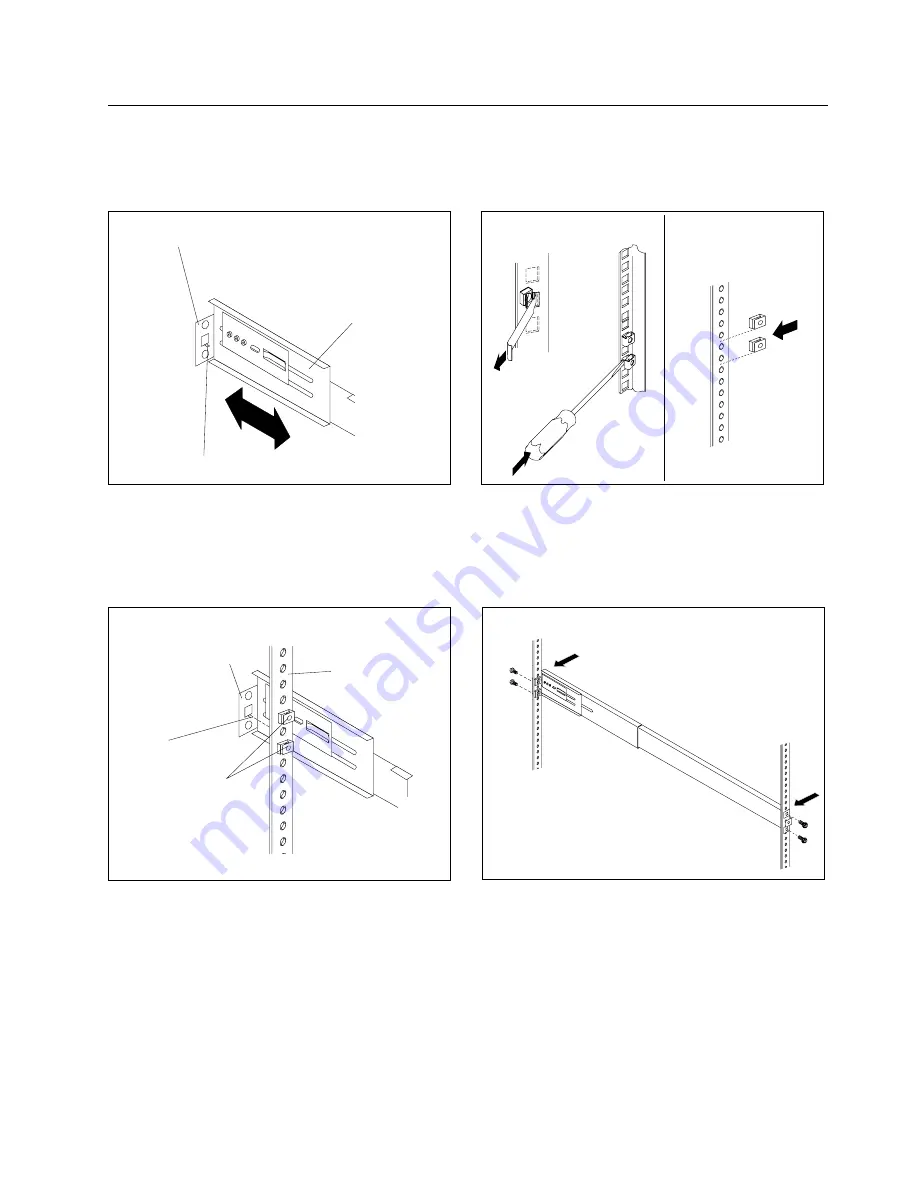
1
Mounting bracket
Tab
Adjustable
bracket
Adjust each rear mounting bracket (by
loosening the screws) so that the inside
distance between the two ends is equal to the
outside dimension of the rack rails.
Cage
nuts
Cage
nuts
Clip
nuts
2
Select a one-U size location in the rack.
Install a cage nut or clip nut in the top and
bottom position of the one-U location that you
selected (both sides, front and rear of the
rack).
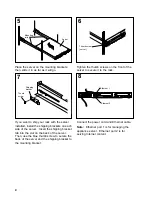
Mounting bracket
Rack
Clip nuts
Tab
3
Insert the bracket tab through the center hole
between the two clip nuts on the rear rail.
(The right and left rails are labeled.)
4
Loosely install two mounting screws through
the back end of the bracket. Position the
mounting bracket so that it lines up with the
clip nuts. Install the remaining mounting
screws; then, tighten all the screws with a
screwdriver. Repeat these steps for each
mounting bracket.
IBM xSeries 135 Appliance Server Quick Setup Guide
3


