


Index
A
adapter
installing
11
PCI-X
bus
10
B
battery
replacement
17
C
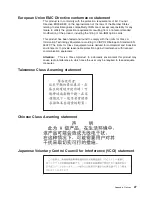
Class
A
electronic
emission
notice
26
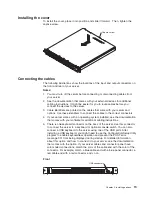
cover
installing
19
removing
9
D
DIMMs
connector
locations
15
E
electronic
emission
Class
A
notice
26
F
fan,
replacing
16
FCC
Class
A
notice
26
H
hard
disk
drive
IDE
13
installing
13
SCSI
13
I
installation
order,
memory
modules
15
installing
adapters
11
battery
17
cover
19
hard
disk
drive
13
internal
connectors
4
J
jumpers
4
M
memory
module
order
of
installation
15
N
notes,
important
24
notices
attention
2
book
2
caution
2
danger
2
electronic
emission
26
FCC,
Class
A
26
important
2
O
order
of
installation,
memory
modules
15
P
power
cords
28
R
related
documentation
1
S
shutting
down
the
server
8
simple-swap
Serial
ATA
hard
disk
drive
13
Standby
mode
8
statements
attention
2
caution
2
danger
2
important
2
stopping
the
server
8
switches
and
jumpers
4
system
board
internal
connectors
4
jumper
blocks
4
switches
and
jumpers
4
T
trademarks
24
turning
off
the
server
8
turning
on
the
server
8
U
United
States
electronic
emission
Class
A
notice
26
United
States
FCC
Class
A
notice
26
©
Copyright
IBM
Corp.
2004
31
Summary of Contents for eServer xSeries 306 Type 8836
Page 1: ...xSeries 306 Type 8836 Option Installation Guide ERserver...
Page 2: ......
Page 3: ...xSeries 306 Type 8836 Option Installation Guide ERserver...
Page 42: ...30 xSeries 306 Type 8836 Option Installation Guide...
Page 44: ...32 xSeries 306 Type 8836 Option Installation Guide...
Page 45: ......
Page 46: ...Part Number 59P6591 Printed in USA 1P P N 59P6591...


