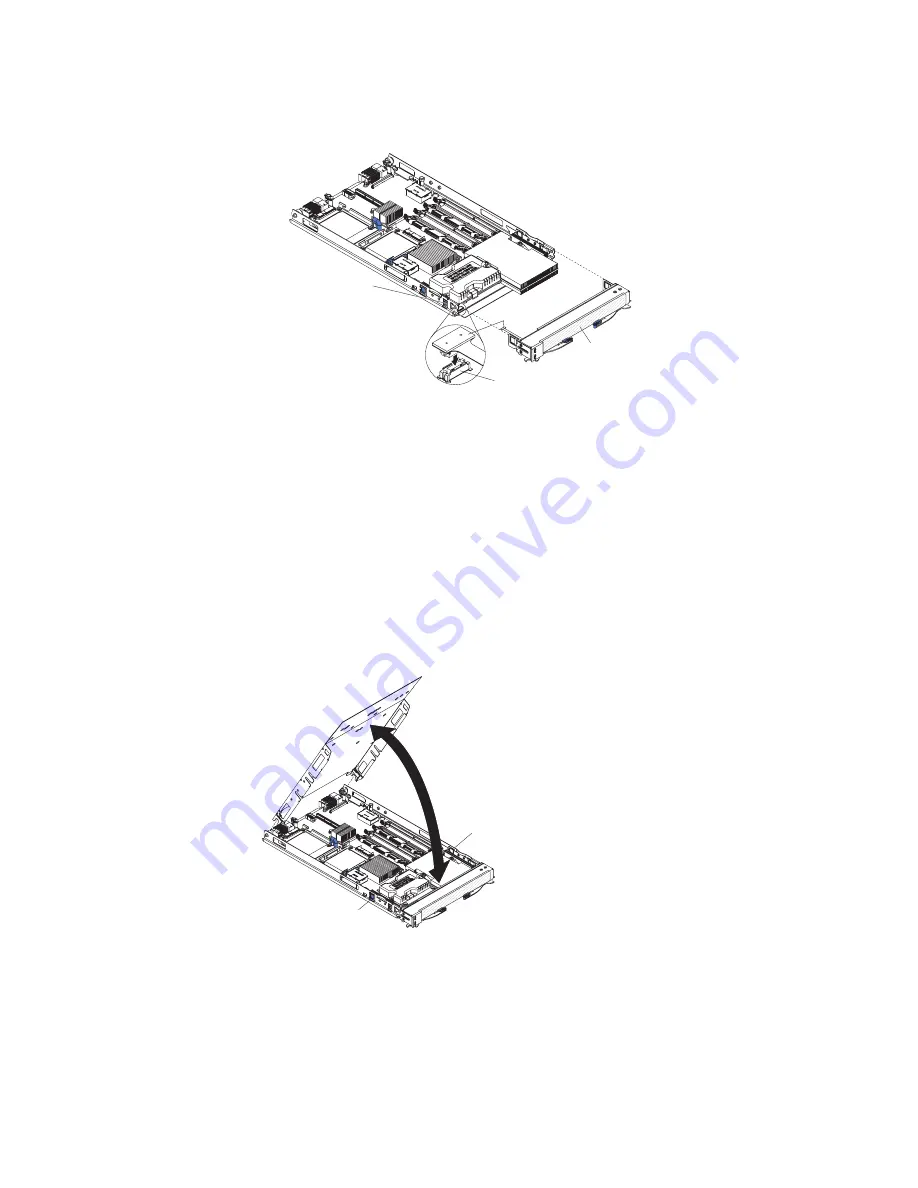
Installing
the
blade
server
bezel
assembly
The
following
illustration
shows
how
to
install
the
bezel
assembly.
Control-panel
connector
Control-panel
cable
Bezel
Bezel-assembly
release (both sides)
To
install
the
blade
server
bezel
assembly,
complete
the
following
steps:
1.
Read
the
safety
information
that
begins
on
page
v
and
“Installation
guidelines”
on
page
15.
2.
Connect
the
control-panel
cable
to
the
control-panel
connector
on
the
system
board.
3.
Carefully
slide
the
bezel
assembly
onto
the
blade
server
until
it
clicks
into
place.
Closing
the
blade
server
cover
Attention:
You
cannot
insert
the
blade
server
into
the
BladeCenter
unit
until
the
cover
is
installed
and
closed
or
an
expansion
unit
is
installed.
Do
not
attempt
to
override
this
protection.
The
following
illustration
shows
how
to
close
the
blade
server
cover.
Blade-cover
release
Blade-cover
release
To
close
the
blade
server
cover,
complete
the
following
steps:
1.
Read
the
safety
information
that
begins
on
page
v
and
“Installation
guidelines”
on
page
15.
2.
If
you
removed
the
blade
bezel
assembly,
replace
it
now
(see
“Installing
the
blade
server
bezel
assembly”
for
instructions).
3.
If
the
blade
server
system
board
is
equipped
with
power
connector
J164
and
a
Memory
and
I/O
Expansion
Blade
is
not
installed
on
the
blade
server,
make
sure
that
the
power
jumper
is
correctly
installed
in
power
connector
J164.
Chapter
3.
Installing
options
35
Summary of Contents for HS21 - BladeCenter - 8853
Page 3: ...BladeCenter HS21 Type 8853 Installation and User s Guide...
Page 60: ...48 BladeCenter HS21 Type 8853 Installation and User s Guide...
Page 78: ...66 BladeCenter HS21 Type 8853 Installation and User s Guide...
Page 79: ......
Page 80: ...Part Number 44W1496 Printed in USA 1P P N 44W1496...


