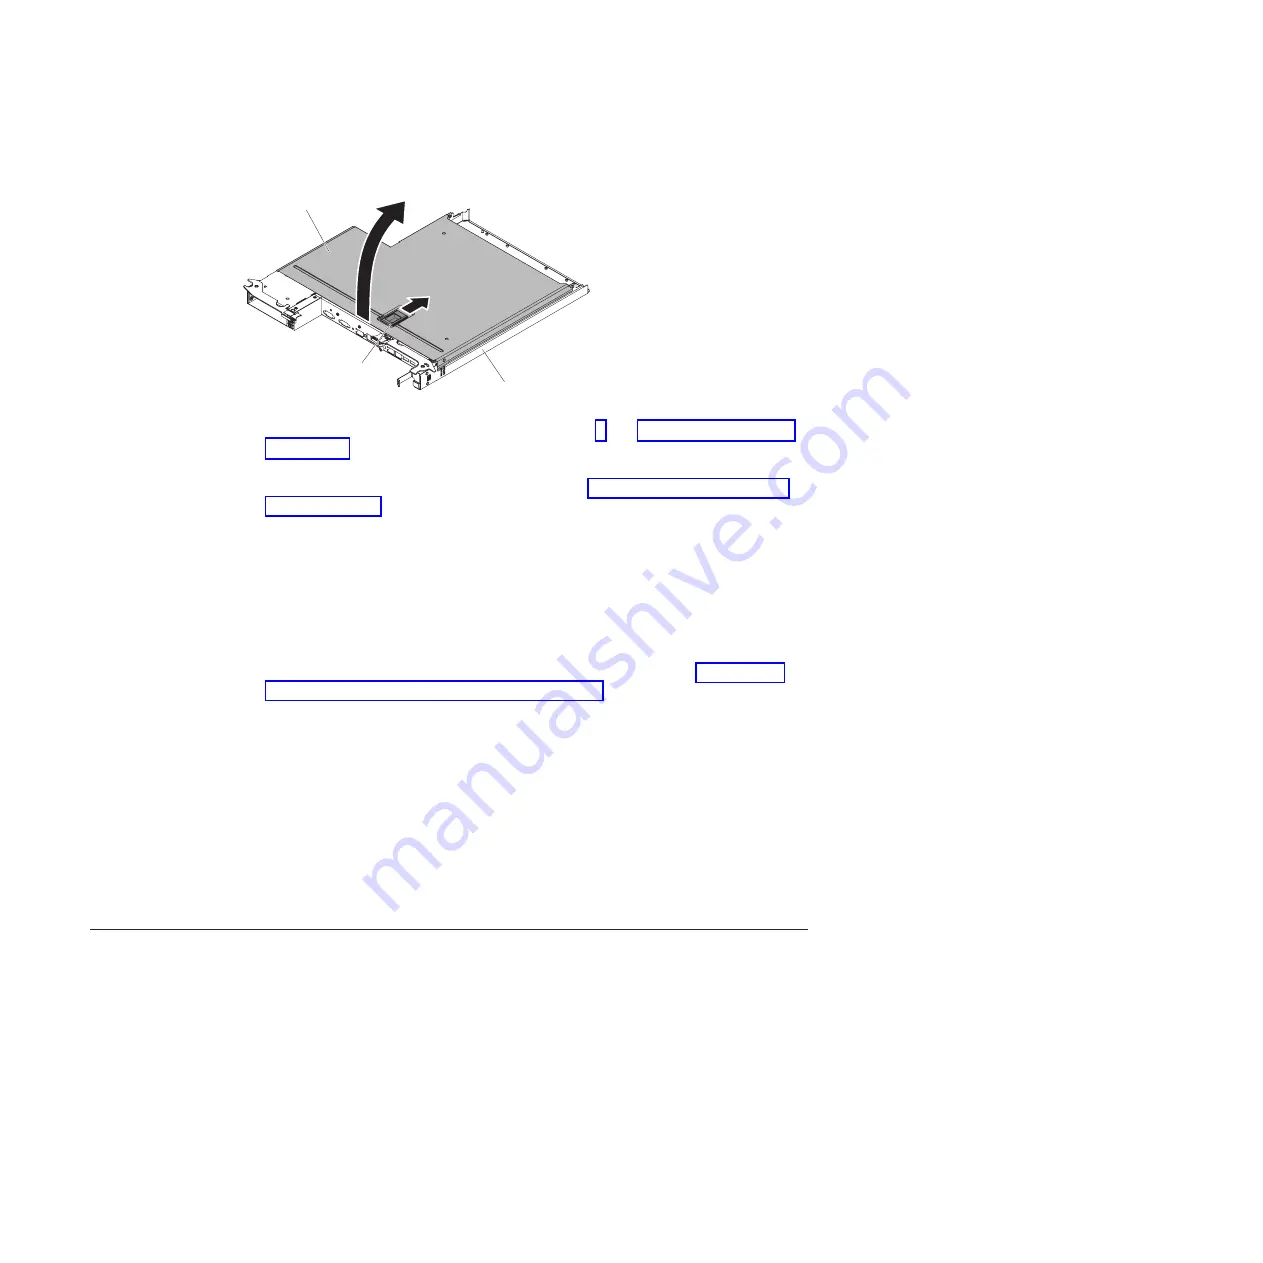
Release
latch
System-board
tray cover
System-board
tray
1. Read the safety information that begins on page v and “Installation guidelines”
2. Turn off the system-board tray and peripheral devices and disconnect the power
cords and all external cables, if necessary (see “Turning off the system-board
tray” on page 21).
Note:
When you disconnect the power source from the system-board tray, you
lose the ability to view the LEDs because the LEDs are not lit when the
power source is removed. Before you disconnect the power source,
make a note of which LEDs are lit, including the LEDs that are lit on the
operation information panel and LEDs inside the system-board tray on
the system board; then, see the
Problem Determination and Service
Guide
for information about how to solve the problem.
3. If the system-board tray is installed in a chassis, remove it (see “Removing a
system-board tray from a 2U chassis” on page 27).
4. Carefully set the system-board tray on a flat, static-protective surface, with the
cover side up.
5. Pull up firmly on the blue latch on the top of the system-board tray; then, lift the
cover open.
6. Lift the cover off the system-board tray and store it for future use.
Note:
If two system-board trays are installed in a 2U chassis, covers must be
installed on both of them.
Attention:
For proper cooling, replace the system-board tray cover before you
turn on the system-board tray.
Removing a simple-swap hard disk drive
You must turn off the server before removing simple-swap drives from the server. To
remove a simple-swap SATA hard disk drive, complete the following steps.
Attention:
v
To avoid damage to the hard disk drive connectors, make sure that the server
cover is in place and fully closed whenever you install or remove a hard disk
drive.
v
To make sure that there is adequate system cooling, do not operate the server
for more than 2 minutes without either a hard disk drive or a filler panel installed
in each bay.
28
System x iDataPlex dx360 M4 Types 7918 and 7919: User’s Guide
Summary of Contents for iDataPlex dx360 M4
Page 1: ...System x iDataPlex dx360 M4 Types 7918 and 7919 User s Guide...
Page 2: ......
Page 3: ...System x iDataPlex dx360 M4 Types 7918 and 7919 User s Guide...
Page 15: ...CAUTION Hazardous moving parts are nearby Safety xiii...
Page 16: ...xiv System x iDataPlex dx360 M4 Types 7918 and 7919 User s Guide...
Page 28: ...12 System x iDataPlex dx360 M4 Types 7918 and 7919 User s Guide...
Page 80: ...64 System x iDataPlex dx360 M4 Types 7918 and 7919 User s Guide...
Page 85: ......
Page 86: ...Part Number 90Y5668 Printed in USA 1P P N 90Y5668...


