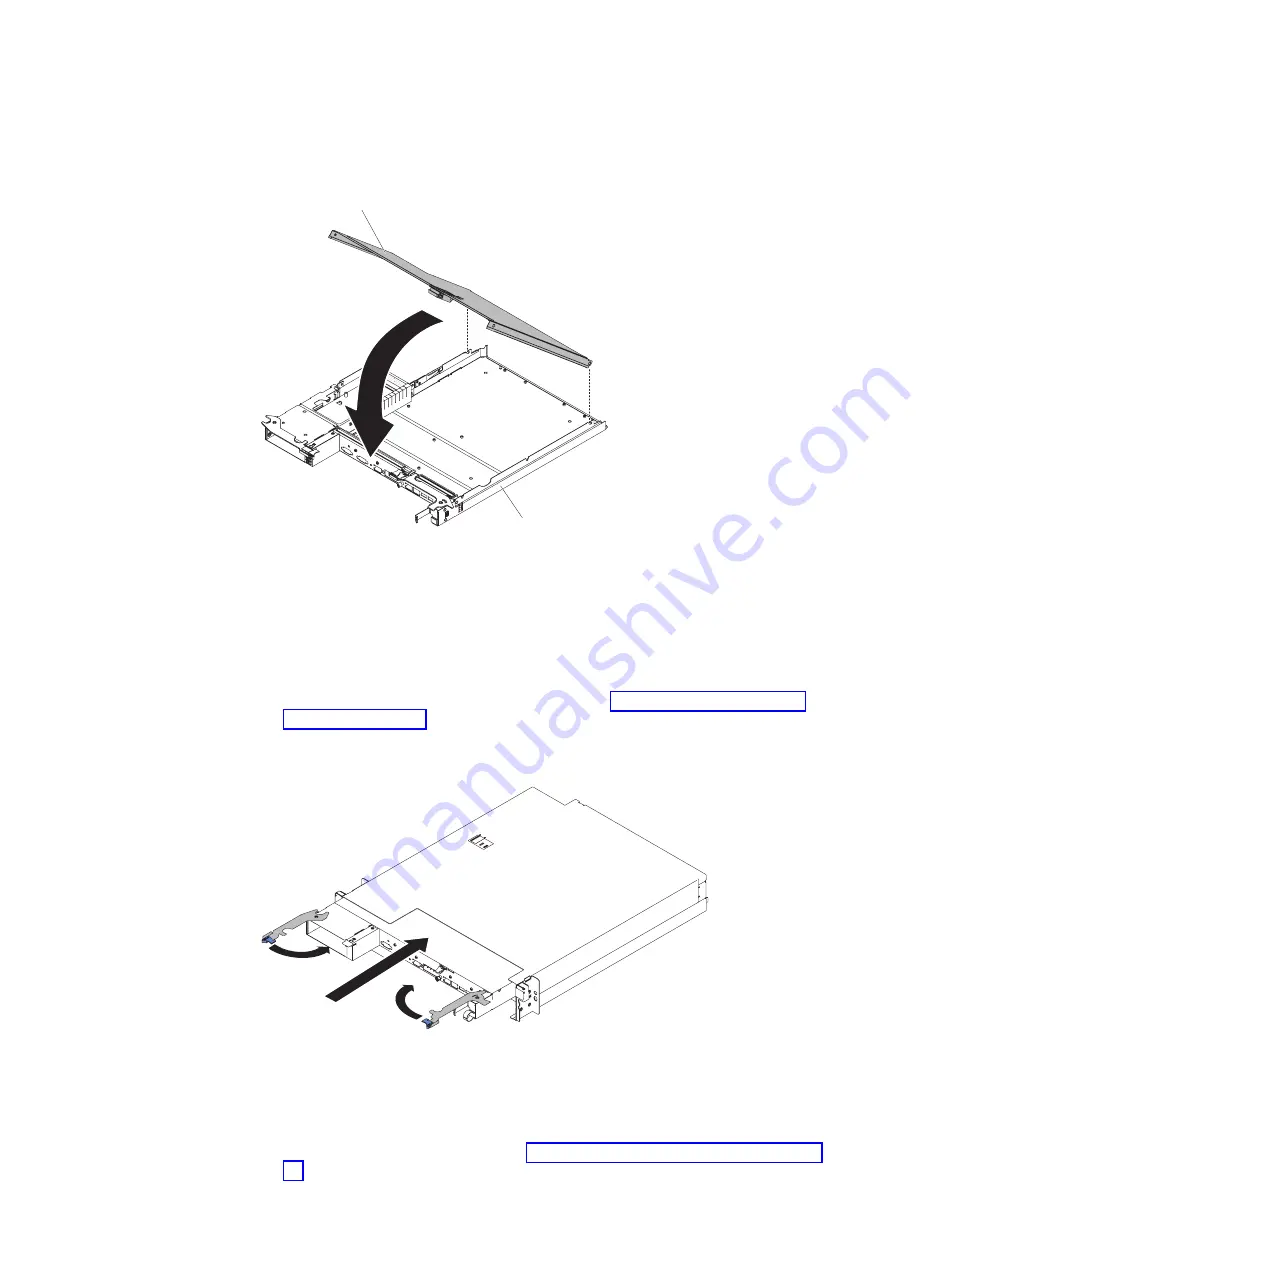
System-board
tray cover
System-board
tray
To reinstall the system-board tray cover, complete the following steps:
1. Lower the cover so that the pins at the rear of the cover slide down into the
slots at the rear of the system-board tray. Before you close the cover, make
sure that all components are installed and seated correctly, all internal cables
are correctly routed, and you have not left loose tools or parts inside the
system-board tray.
2. Pivot the cover to the closed position until it clicks into place.
3. Install the system-board tray in the chassis (see “Reinstalling a system-board
Reinstalling a system-board tray in a 2U chassis
To reinstall a system-board tray in a 2U chassis, complete the following steps:
1. Slide the system-board tray into the chassis until it stops and the release
handles click into place.
2. Close the two release latches inward.
3. Reconnect the cables on the front of the system-board tray.
4. Turn on the system-board tray (see “Turning on the system-board tray” on page
Chapter 3. Installing optional devices
37
Summary of Contents for iDataPlex dx360 M4
Page 1: ...System x iDataPlex dx360 M4 Types 7918 and 7919 User s Guide...
Page 2: ......
Page 3: ...System x iDataPlex dx360 M4 Types 7918 and 7919 User s Guide...
Page 15: ...CAUTION Hazardous moving parts are nearby Safety xiii...
Page 16: ...xiv System x iDataPlex dx360 M4 Types 7918 and 7919 User s Guide...
Page 28: ...12 System x iDataPlex dx360 M4 Types 7918 and 7919 User s Guide...
Page 80: ...64 System x iDataPlex dx360 M4 Types 7918 and 7919 User s Guide...
Page 85: ......
Page 86: ...Part Number 90Y5668 Printed in USA 1P P N 90Y5668...


