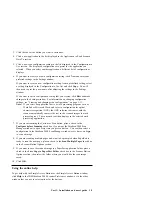
3. Click the tab for the button you want to customize.
4. Click a new application in the list displayed in the Application to Send Scanned
Data To section.
5. Click a new scan configuration setting in the list displayed in the Configuration to
Use section. The displayed configurations are preset for the application you
selected. When you select another application, a different list of configurations
displays.
6. If you want to create your own configuration setting, click New and enter your
preferred settings in the Settings window.
If you want to create a new configuration setting from a predefined setting, select
a setting displayed in the Configuration to Use list and click Copy. You will
then need to provide a new name after adjusting the settings in the Settings
window.
If you want to edit a configuration setting that you created, click Edit and make
changes in the Settings window. For information on changing configuration
settings, see “Creating and changing scan configurations” on page 1-11.
Note: If you select an application that is a word processing program, such as
WordPad or Microsoft Word, and select a configuration for optical
character recognition (OCR), the OCR software that comes with the
scanner automatically converts the text in the scanned images to word
processing text. The converted text then displays in the selected word
processing application.
7. If you are customizing the Custom or Scan button, place a check in the
Configure before Scanning check box if you want the IdeaScan 2000 Scan
Manager window to open every time you press a button. You can then select a
configuration in the IdeaScan 2000 Scan Manager window every time you begin
to scan an image.
8. If you are scanning multiple pages and want to be prompted when PaperPort is
ready to scan the next page, place a check in the Scan Multiple Pages check box
in the Scanner Button Options section.
9. If you want to save the scanned image to a PaperPort application folder, place a
check in the Save Copy to PaperPort Folder check box in the Scanner Button
Options section; then select the folder where you would like the scan image
saved.
10. Click OK.
Using the online help
To get help with the Simple Access Buttons or the Simple Access Button window,
click Help in the IBM IdeaScan 2000 Scanner Preferences window or in the other
windows that you use to select options for the buttons.
Part 1: Installation and user’s guide
1-9
Summary of Contents for IdeaScan 2000
Page 1: ...IdeaScan 2000 Color Flatbed Scanner User s Guide OPTIONS by IBM ...
Page 6: ...vi IdeaScan 2000 Color Flatbed Scanner User s Guide ...
Page 41: ...2 14 IdeaScan 2000 Color Flatbed Scanner User s Guide ...
Page 42: ...Union Europea Normativa EMC Part 2 Appendixes 2 15 ...
Page 43: ...IBM Part Number P00N7787 Printed in U S A P N7787 ...


