background image

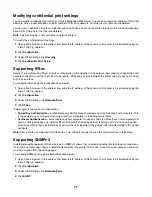
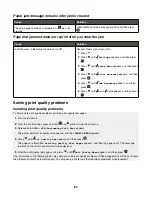
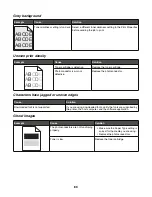
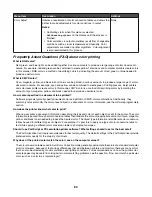
Gray background

Example

Cause

Solution

ABCDE

ABCDE

ABCDE

Toner darkness setting is too dark. Select a different toner darkness setting in the Print Properties

before sending the job to print.

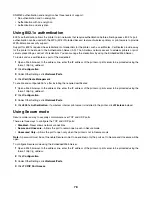
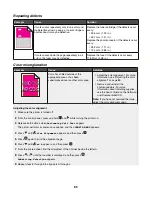
Uneven print density

Example

Cause

Solution

A

B

C

D

E

A

B

C

D

E

A

B

C

D

E

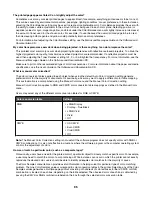
Toner cartridge is defective.

Replace the toner cartridge.

Photoconductor is worn or
defective.

Replace the photoconductor.

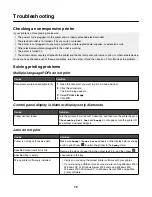
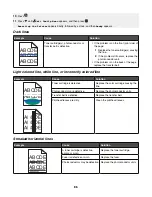
Characters have jagged or uneven edges

Cause

Solution

Downloaded font is not supported.

If you are using downloaded fonts, verify the fonts are supported by
the printer, the host computer, and the software application.

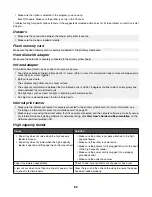
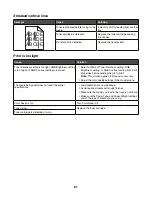
Ghost images

Example

Cause

Solution

The photoconductors are not functioning
properly.

Make sure the Paper Type setting is
correct for the media you are using.

Replace the photoconductors.

Toner is low.

Replace the toner cartridge.


89

Summary of Contents for InfoPrint 1634

Page 1: ...InfoPrint Color 1634 MT 4931 User s Guide S510 6845 00 ...

Page 2: ...issions This symbol indicates the presence of a hot surface or component CAUTION To reduce the risk of injury from a hot component allow the surface to cool before touching CAUTION The printer weighs 25 40 kg 56 lb therefore it requires at least two people to lift it safely Use the handholds on the sides of the printer to lift it and make sure your fingers are not under the printer when you set it...

Page 3: ...erface card 23 Reinstalling the system board access cover 25 Attaching cables 26 Loading paper and specialty media 27 Loading the standard tray 27 Loading the optional 550 sheet tray 29 Loading the multipurpose feeder 30 Using the multipurpose feeder 32 Loading the manual feeder 32 Using the manual feeder 33 Using the standard exit bin 33 Setting the Paper Size and Paper Type 35 Tray linking 36 Pa...

Page 4: ...g a network setup page 49 Printing a font sample list 49 Printing a directory list 49 Printing the print quality test pages 50 Printing a duplex job manually from a Macintosh computer 50 Printing only black text and graphics 50 Configuring the printer for black only printing 51 Removing the color supplies 51 Configuring the printer for color printing and replacing the color supplies 54 Canceling a...

Page 5: ... and other maintenance items 71 Ordering toner cartridges 71 Ordering supplies 71 Moving the printer 71 Before moving the printer 71 Moving the printer to another location 72 Administrative support 73 Adjusting the brightness or contrast of the display 73 Disabling control panel menus 73 Enabling control panel menus 73 Disabling Quick Start mode 74 Restoring factory default settings 74 Adjusting P...

Page 6: ...adapter 82 Internal print server 82 High capacity feeder 82 Memory card 83 USB parallel interface card 83 Solving paper feed problems 83 Paper frequently jams 83 Paper jam message remains after jam is cleared 84 Page that jammed does not reprint after you clear the jam 84 Solving print quality problems 84 Isolating print quality problems 84 Repeating defects 85 Color misregistration 85 Dark lines ...

Page 7: ...s 90 Paper curl 91 Toner specks 91 Toner rubs off 91 Solving color quality problems 91 Quality menu 91 Frequently Asked Questions FAQ about color printing 94 Contacting Customer Support 97 Notices 98 Power consumption 100 Index 102 7 ...

Page 8: ...8 ...

Page 9: ...llowing illustrations show the basic printer models 1 2 3 4 5 1 Standard exit bin 2 Control panel 3 Standard 250 sheet tray Tray 1 4 Manual feeder 5 Tray 1 handhold 6 1 2 3 4 5 1 Standard exit bin 2 Control panel 3 Standard 250 sheet tray Tray 1 4 Tray 1 handhold 9 ...

Page 10: ...n be fully configured by adding an optional 550 sheet drawer Using the security lock feature The printer is equipped with a security lock feature When a lock compatible with most laptop computers is attached the printer is locked Once locked the metal plate and the system board cannot be removed Attach a security lock to the printer in the location shown 10 ...

Page 11: ...hese screens are only available when the printer detects an error code 2 Select Pressing initiates action on a menu item 3 Navigation buttons Press or to scroll through menu lists Press or to scroll through values or text that rolls to another screen 4 Indicator light Indicates the printer status Off The power is off Blinking green The printer is warming up processing data or printing Solid green ...

Page 12: ...nter model or the options installed Supplies Menu Paper Menu Reports Settings Replace Supply Cyan Cartridge Magenta Cartridge Yellow Cartridge Black Cartridge Cyan PC Unit Magenta PC Unit Yellow PC Unit Black PC Unit Fuser Transfer Belt Default Source Paper Size Type Configure MP Substitute Size Paper Texture Paper Weight Paper Loading Custom Types Universal Setup Menu Settings Page Device Statist...

Page 13: ...ob Expiration TCP IP IPv6 Wireless Standard Network Network x Standard USB USB x NetWare AppleTalk LexLink USB Direct Color Quality Print Quality Printing Guide Media Guide Print Defects Menu Map Information Guide Connection Guide Moving Guide 13 ...

Page 14: ...you are installing a 550 sheet drawer after setting up the printer turn the printer off and unplug the power cord before continuing 1 Unpack the 550 sheet drawer and remove any packing material 2 Place the drawer in the location chosen for the printer 3 Align the printer with the 550 sheet drawer and lower the printer into place 4 Set the printer software to recognize the 550 sheet tray a Click St...

Page 15: ...options Note All options may not be available For information on which options are available contact the place where you purchased the printer Memory cards Printer memory Flash memory Fonts Firmware cards Bar Code PrintCryption Note Use a 2 Phillips screwdriver to remove the system board access cover Other internal options The following internal options may be installed on some models Printer hard...

Page 16: ... feature on page 10 and verify there is no security lock on the system board cover 1 Notice the eight screws located on the metal plate Turn the screws counterclockwise until they are loose Do not remove the screws 2 Lift the metal plate up until each screw is in the keyhole 16 ...

Page 17: ...ward to remove it 4 Use the illustration to locate the connector for the card being installed 1 2 3 4 1 Memory card connector 2 Internal print server connector 3 Hard disk connector 4 Firmware and flash memory card connectors 17 ...

Page 18: ...ard has one connector for an optional memory card CAUTION If you are installing a memory card after setting up the printer turn the printer off and unplug the power cord before continuing 1 Access the system board 2 Open both latches on the connector completely 3 Unpack the memory card Note Avoid touching the connection points along the edge of the card 4 Align the notches on the memory card with ...

Page 19: ...1 2 1 Notches 2 Ridges 5 Push the memory card straight into the connector until it snaps into place Make sure each latch fits over the notch located on either side of the memory card 19 ...

Page 20: ...ss cover 7 Set the printer software to recognize the memory card a Click Start Settings Printers b Double click the printer icon c Click File Properties d Click the Install Options tab e Increase the printer memory to the appropriate number f Click OK 20 ...

Page 21: ... printer turn the printer off and unplug the power cord before continuing 1 Access the system board For more information see Accessing the system board to install internal options on page 15 2 Unpack the memory card Note Avoid touching the connection points along the edge of the card 3 Holding the card by its sides align the plastic pins on the card with the holes on the system board This ensures ...

Page 22: ...ry f Click Add g Click OK Installing a printer hard disk Note A 2 Phillips screwdriver is needed to attach the hard disk to the mounting plate Warning Hard disks are easily damaged by static electricity Touch something metal on the printer before touching a disk Note If an option card has been installed you may need to remove it before installing the hard disk 1 Access the system board For more in...

Page 23: ... system board 8 Flip the hard disk over and then press the three posts on the mounting plate into the holes on the system board The hard disk snaps into place 2 1 9 Reinstall the system board access cover For more information see Reinstalling the system board access cover on page 25 Installing an internal print server or port interface card Note A 2 Phillips screwdriver is needed to install an int...

Page 24: ...h the metal plate to the connector slot Remove and save the two screws 4 Remove the metal plate covering the connector slot and save the metal plate 5 Align the connector on the internal print server or port interface card with the connector on the system board The cable connectors on the side of the optional card must fit through the opening in the faceplate Push the internal print server or port...

Page 25: ... system board access cover Note This operation requires a 2 Phillips screwdriver 1 Align and place the eight keyholes on the system board metal plate onto the screws on the system board 2 Slide the metal plate down 25 ...

Page 26: ... computer using a USB cable or an Ethernet cable A USB port requires a USB cable Be sure to match the USB symbol on the cable with the USB symbol on the printer Match the appropriate cable with the connector shown 1 2 3 1 Ethernet connector 2 USB symbol 3 USB connector 26 ...

Page 27: ...obs in Tray 1 Proper paper loading prevents jams and facilitates trouble free printing Do not remove trays while a job prints or while Busy blinks on the display Doing so may cause a jam 1 Grasp the handle and pull the tray out Remove the tray completely 2 Squeeze the width guide tabs together as shown and move the width guide to the side of the tray 3 Squeeze the length guide tabs together as sho...

Page 28: ...traighten the edges on a level surface 5 Load the paper stack with the recommended print side faceup Load the stack toward the back of the tray as shown When loading preprinted letterhead place the header toward the front of the tray 6 Squeeze the width guide tabs and slide the width guide to lightly touch the side of the stack 28 ...

Page 29: ...n the same way that the standard tray is loaded The only differences between the trays are the look of the guide tabs and the location of the paper size indicators as shown in the following illustration When the 550 sheet tray is loaded for the first time or when a new size is loaded remove the tray completely from the support unit 1 2 3 4 1 Width guide tabs 2 Size indicators 3 Length guide tabs 4...

Page 30: ...oading the multipurpose feeder 1 Push the multipurpose feeder latch to the right 2 Pull the multipurpose feeder door down 3 Grasp the extension and then pull it straight out until it is fully extended 30 ...

Page 31: ...the edges on a level surface Note Avoid touching the print side of transparencies Be careful not to scratch them Flex a stack of envelopes back and forth to loosen them and then fan them Straighten the edges on a level surface 5 Locate the stack height limiter and tab Note Do not exceed the maximum stack height by forcing paper under the stack height limiter 1 2 3 4 1 Stack height limiter 2 Size i...

Page 32: ...ose feeder can be closed when not in use From Print Properties set the Paper Size and Paper Type When Load MP Feeder with x appears on the display load the multipurpose feeder with the paper specified and then press Follow these guidelines when using the multipurpose feeder Load paper with the top edge going into the multipurpose feeder first Load preprinted letterhead facedown To achieve the best...

Page 33: ...ng the manual feeder Use the manual feeder to load single sheets not kept in a tray such as letterhead From Print Properties set the Paper Size and Paper Type When Load manual feeder with x appears on the display load a single sheet into the manual feeder and then press Follow these guidelines when using the manual feeder Load only one sheet at a time Load paper with the top edge going into the ma...

Page 34: ...t with the opening on top of the printer and slide it down 2 Press it down into place 1 2 Using the paper stop The standard exit bin has a paper stop which is used to keep paper from sliding off the back of the printer It can be set to two lengths one for shorter paper sizes such as letter and A4 and one for longer sizes such as legal To extend the paper stop for short paper sizes 1 Grasp the flap...

Page 35: ...in 2 Rotate it up and back until it is lies flat 3 Lift up the flap and rotate it back until it stops at a 90 angle To close the paper stop fold the flap forward and down Rotate the paper stop back into its closed position Setting the Paper Size and Paper Type Note Trays with matching Paper Size and Paper Type settings are automatically linked by the printer When a linked tray runs out of paper th...

Page 36: ...8 Press twice to return to the Ready state Tray linking Tray linking enables the automatic linking feature for trays when the same size and type of paper is loaded in multiple sources By linking trays you can create a larger capacity for output When one tray is empty paper feeds from the next linked tray For example if Trays 1 and 2 are linked once Tray 1 is empty the printer will use paper from T...

Page 37: ...ty and the ability of the printer to feed the media correctly Leave media in its original wrapper until it is time to use it This limits the exposure of media to moisture changes that can degrade its performance Condition media before printing by storing it in its original wrapper in the same environment as the printer for 24 to 48 hours before printing Extend the time several days if the storage ...

Page 38: ...etterhead printed using an offset lithographic or engraved printing process Avoid papers with rough or heavily textured surfaces User papers printed with heat resistant inks designed for use in xerographic copiers The ink must be able to withstand temperatures up to 180 C 356 F without melting or releasing hazardous emissions Use inks that are not affected by the resin in toner Inks that are oxida...

Page 39: ...he printer software or MarkVision Professional set the Paper Type to Envelope and select the envelope size For more information see Setting the Paper Size and Paper Type on page 35 Use envelopes designed specifically for laser printers Check with the manufacturer or vendor to ensure the envelopes can withstand temperatures up to 180 C 356 F without sealing wrinkling curling excessively or releasin...

Page 40: ... and texture can significantly impact print quality Print samples on the card stock being considered for use before buying large quantities When printing on card stock From MarkVision Professional the printer software or the control panel 1 Set the Paper Type to Card Stock 2 Set the Paper Weight to Card Stock Weight 3 Set the Card Stock Weight to Normal or Heavy Be aware that preprinting perforati...

Page 41: ... x 4 88 in to 215 9 x 355 6 mm 8 5 x 14 in X X Multipurpose feeder 76 2 x 152 4 mm 3 x 6 in to 215 9 x 355 6 mm 8 5 x 14 in X X Manual feeder 7 3 4 Envelope Monarch 98 4 x 190 5 mm 3 875 x 7 5 in X X Commercial 9 Envelope 98 4 x 225 4 mm 3 875 x 8 9 in X X Commercial 10 Envelope 104 8 x 241 3 mm 4 12 x 9 5 in X X International DL Envelope 110 x 220 mm 4 33 x 8 66 in X X International C5 Envelope 1...

Page 42: ... 8 5 x 14 in for the 250 sheet tray unless the size is specified by the program Measurements apply to simplex one sided printing only For duplex two sided printing the minimum size is 139 7 x 210 mm 5 50 x 8 27 in Support for paper types Paper type Standard 250 sheet tray Tray 1 Optional 550 sheet tray Tray 2 Multipurpose feeder or manual feeder Duplex Paper Card stock X Transparencies X Paper lab...

Page 43: ...Tag 120 g m2 74 lb Cover 135 g m2 50 lb Index Bristol 120 g m2 67 lb Tag 120 g m2 74 lb Cover 135 g m2 50 lb Index Bristol 120 g m2 67 lb Tag 120 g m2 74 lb Cover 135 g m2 50 lb Card stock maximum grain short Index Bristol 163 g m2 90 lb Tag 163 g m2 100 lb Cover 176 g m2 65 lb Index Bristol 163 g m2 90 lb Tag 163 g m2 100 lb Cover 176 g m2 65 lb Index Bristol 163 g m2 90 lb Tag 163 g m2 100 lb Co...

Page 44: ...Paper capacities Paper type Standard 250 sheet tray Tray 1 Optional 550 sheet tray Tray 2 Multipurpose feeder Paper 250 sheets 550 sheets 100 sheets Envelopes X X 10 Based on 75 g m2 20 lb paper 44 ...

Page 45: ...ick File Print 2 Click Properties Preferences Options or Setup 3 Adjust the settings 4 Click OK 5 Click OK or Print Printing a document from a Macintosh computer 1 With a document open choose File Print 2 From the Copies Pages or General pop up menu adjust the settings 3 Click OK or Print Printing confidential and other held jobs Holding jobs in the printer When sending a job to the printer you ca...

Page 46: ...ob and then press 9 For confidential jobs use the numeric keypad to enter your PIN If you enter an invalid PIN the Invalid PIN screen appears To re enter the PIN make sure Try again appears and then press To cancel the PIN press until Cancel appears and then press 10 Press until appears next to the job you want to print and then press Confidential and Verify print jobs are automatically deleted fr...

Page 47: ...vice A USB Direct interface is located on the control panel so you can insert a USB flash memory device and print PDF documents Printing a document from a USB flash memory device is similar to printing a held job Notes USB devices must be compatible with the USB 2 0 standard Hi Speed USB devices must support the Full Speed standard as well Devices only supporting USB low speed capabilities are not...

Page 48: ...ntil appears next to the document you want to print and then press Note Folders found on the flash memory device appear as folders File names are appended by the extension type for example jpg The display prompts you for the number of copies to be printed 4 Press to print only one copy or enter the number of copies using the numeric keypad and then press Note Do not remove the USB flash memory dev...

Page 49: ...that Status is Connected If Status is Not Connected the LAN drop may not be active or the network cable may be malfunctioning Consult a system support person for a solution and then print another network setup page Printing a font sample list To print samples of the fonts currently available for your printer 1 Make sure the printer is on and Ready appears 2 From the control panel press 3 Press unt...

Page 50: ...anually from a Macintosh computer 1 Click File Print 2 From the drop down list choose Paper Handling 3 Make sure Page order is set to Reverse order 4 From the Print options area select Even numbered pages 5 Click Print 6 Remove the pages from the output bin and load them into the paper tray facedown with the top of the page facing you ABC 7 Click File Print 8 From the drop down list choose Paper H...

Page 51: ...hile turning the printer on 3 Release the buttons when the clock appears and wait for CONFIG MENU to appear 4 Press until Color Lock Out appears and then press 5 Press until On appears and then press Submitting Selection appears 6 Press until Exit Config Menu appears and then press 7 Wait until Remove all color supplies appears Removing the color supplies Warning Do not touch the shiny photoconduc...

Page 52: ...nductor release knob and then pull the photoconductor out by the handle Remove all three color photoconductors 4 Wrap each photoconductor in its original packaging or in a sheet of paper Tape the packaging to secure it but do not let the tape touch the shiny photoconductor drums 1 2 5 Place the photoconductors in their original box or in any clean sturdy box 52 ...

Page 53: ...tect the photoconductors from light 7 Lift the small toner cartridge handles slightly and pull straight out Remove all three color toner cartridges 8 Place the toner cartridges in a clean sturdy box 9 Close the lower door 53 ...

Page 54: ...teps 1 Turn the printer off 2 From the control panel hold down and while turning the printer on 3 Release the buttons when the clock appears and wait for CONFIG MENU to appear Locate the color residue on the clear end of each photoconductor Match the residue to the color label on the transfer belt 4 Press until Color Lock Out appears and then press 54 ...

Page 55: ...inting and Cancel a job appears on the first line of the display 1 Press until Cancel appears A list of jobs appears 2 Press until appears next to the job you want to cancel and then press Canceling filename appears Note Once a print job is sent to easily cancel a job press The Stopped screen appears Press until Cancel a job appears and then press Canceling a print job from the Windows taskbar Whe...

Page 56: ...t jobs appears in the printer window 2 Choose a job to cancel 3 Click the trash icon Canceling a print job from Mac OS X 1 Choose Applications Utilities and then double click Print Center or Printer Setup Utility 2 Double click the printer you are printing to 3 From the printer window select the job to cancel 4 From the icon bar at the top of the window click the Delete icon 56 ...

Page 57: ...ual feeder with x to appear Push all trays in firmly after loading media Make sure the guides in the trays are properly positioned and are not pressing too tightly against the paper Make sure all media sizes and media types are set correctly in the control panel menu Make sure all printer cables are attached correctly For more information see the setup documentation Note If a jam occurs clear the ...

Page 58: ...ng table to locate instructions for a particular jam Note To resolve any message all media must be cleared from the entire media path Control panel message Area description See 200 xx Paper Jam Jam at the input sensor Clearing jams just beyond Tray 1 on page 59 Clearing Tray 2 jams on page 60 Clearing jams behind the inner door on page 62 Jams under the photoconductors on page 62 200 xx Paper Jam ...

Page 59: ...Jam in the duplex page turnaround area Jams under the rollers near the fuser on page 65 230 xx Paper Jam Jam in the duplex area Jams in the duplex area on page 65 241 xx Paper Jam Jam in Tray 1 Clearing jams just beyond Tray 1 on page 59 242 xx Paper Jam Jam in Tray 2 Clearing Tray 2 jams on page 60 250 xx Paper Jam Jam in the multipurpose feeder Clearing jams in the multipurpose feeder on page 67...

Page 60: ...he tray 200 xx Paper Jam appears 1 Open Tray 1 2 Remove the jam 3 Reinsert the tray Clearing Tray 2 jams If the paper did not feed from Tray 2 correctly the jam is in the tray 242 xx Paper Jam appears 1 Open Tray 2 2 Remove the jam 3 Reinsert the tray 60 ...

Page 61: ... appear 1 Open Tray 2 2 Grasp the paper on both sides Pull it out gently to avoid tearing it 3 Reinsert the tray If the paper fed from Tray 2 but is caught between Tray 1 and Tray 2 200 xx Paper Jam may appear 1 Open Tray 1 2 Pull the paper up and then out of the tray 3 Reinsert the tray 61 ...

Page 62: ...lower door opens with the inner door 2 Pull the jammed paper up and out 3 Close the lower door and then close the upper door Jams under the photoconductors Follow these instructions to remove jams under the photoconductors If the paper is jammed under the photoconductors 200 xx Paper Jam or 201 xx Paper Jam may appear 1 Open the upper and inner doors The lower door opens with the inner door 2 Pull...

Page 63: ...ON The fuser and the inside of the printer near the fuser may be hot Wait for the fuser to cool before clearing jams from this area Warning To avoid overexposing the photoconductors do not leave the inner door open longer than 10 minutes 1 Open the upper and inner doors The lower door opens with the inner door 2 Determine where the jam is located a If paper is visible under the fuser grasp it on e...

Page 64: ...longer than 10 minutes 1 Open the upper and inner doors The lower door opens with the inner door 2 Pull the paper gently up and to the rear of the printer 3 Close the lower door and then close the upper door Clearing jams between the fuser and the standard exit bin When the jammed paper is visible in the standard exit bin 202 xx Paper Jam appears Grasp the paper and pull it away from the bin Clear...

Page 65: ... is jammed under the rollers near the fuser 203 xx Paper Jam appears 1 Open the upper door 2 Grasp the paper on each side and pull it out gently 3 Close the upper door Jams in the duplex area When paper is jammed between the inner door and the lower door 230 xx Paper Jam appears 65 ...

Page 66: ...r straight up Note For more room to grasp the paper pull the handle to open the lower door 1 2 3 Remove the jam and close the door s When paper jams entering Tray 1 230 xx Paper Jam appears 1 Remove Tray 1 2 Pull the jammed paper down and out 66 ...

Page 67: ...er and lower doors 3 Replace the tray Clearing jams in the multipurpose feeder When paper jams in the multipurpose feeder 250 xx Paper Jam appears Pull the paper down and out Clearing jams in the manual feeder When paper is not placed far enough into the manual feeder the display prompts you to insert paper If the paper is pushed far enough into the manual feeder for the printer to sense it but no...

Page 68: ...In either case push the paper farther into the manual feeder 68 ...

Page 69: ...some settings that you can change from the control panel that will help you to conserve toner and paper For more information see the Supplies menu Quality menu and Finishing menu in the Menus and Messages Guide If you need to print several copies you can conserve supplies by printing the first copy and checking it for accuracy before printing the remaining copies For more information see Printing ...

Page 70: ...an the printhead lenses if you encounter print quality problems Warning To avoid overexposing the photoconductors do not leave the inner door open longer than 10 minutes 1 Open the upper and inner doors 2 Remove all four toner cartridges but do not remove the photoconductors for this procedure 3 Locate the four printhead lenses 1 1 Printhead lenses 4 Clean the lenses using a can of compressed air ...

Page 71: ...e the printed text and graphics remain faded replace the specified toner cartridge For information about the print cartridges available for the printer contact the place where you purchased the printer Ordering supplies To order photoconductors transfer belts or fusers contact the place where you purchased the printer Moving the printer Before moving the printer CAUTION The printer weighs 25 40 kg...

Page 72: ...ns Remove all printer options before moving the printer Any cart used to move the printer must have a surface able to support the full footprint of the printer Any cart used to move the options must have a surface able to support the dimensions of the options Keep the printer in an upright position Avoid severe jarring movements 72 ...

Page 73: ...the control panel menus to keep menu settings from being changed 1 Make sure the printer is turned off 2 From the control panel press and hold and while turning the printer on 3 Release both buttons when Performing Self Test appears The printer performs its power on sequence and then CONFIG MENU appears 4 Press until Panel Menus appears and then press 5 Press until Disable appears and then press S...

Page 74: ...l Setup Menu appears and then press 4 Press until Quick Start appears and then press 5 Press until Off appears and then press Submitting Selection appears followed by Ready Restoring factory default settings Menu settings marked with an asterisk indicate the active settings You can restore the original printer settings often referred to as the factory default settings 1 Make sure the printer is on...

Page 75: ...ot be affected 1 Make sure the printer is turned off 2 From the control panel press and hold and while turning the printer on 3 Release both buttons when Performing Self Test appears The printer performs its power on sequence and then CONFIG MENU appears 4 Press until Disk Encryption appears and then press 5 Press until Enable appears and then press Contents will be lost Continue appears 6 Press u...

Page 76: ...1 Open a Web browser In the address line enter the IP address of the printer or print server to be protected using the format http ip_address 2 Click Configuration 3 Under Other Settings click Security 4 Click Menu Lockout Setup Locking the entire printer You can use the printer lockout functionality to create a PIN that must be entered in order to use the printer When the printer is locked every ...

Page 77: ...otected using the format http ip_address 2 Click Configuration 3 Under Other Settings click Network Ports 4 Click IPSec IPSec supports two types of authentication Shared Key Authentication Authenticates any ASCII phrase shared among all participating host computers This is the easiest way to configure when only a few host computers on the network use IPSec Certificate Authentication Authenticates ...

Page 78: ...onfiguration 3 Under Other Settings click Network Ports 4 Click Certificate Management To enable and configure 802 1x after installing the required certificates 1 Open a Web browser In the address line enter the IP address of the printer or print server to be protected using the format http ip_address 2 Click Configuration 3 Under Other Settings click Network Ports 4 Click 802 1x Authentication If...

Page 79: ... Adobe Acrobat 2 Click the printer icon The Print dialog appears 3 Select Print as image 4 Click OK Control panel display is blank or displays only diamonds Cause Solution Printer self test failed Turn the printer off wait about 10 seconds and then turn the printer back on If Performing Self Test and Ready do not appear turn the printer off and contact Customer Support Jobs do not print Cause Solu...

Page 80: ... Cause Solution Job is too complex Reduce the complexity of your print job by eliminating the number and size of fonts the number and complexity of images and the number of pages in the job Page Protect is set to On Set Page Protect to Off 1 From the control panel press 2 Press until Settings appears and then press 3 Press until Setup Menu appears and then press 4 Press until Page Protect appears ...

Page 81: ...the number and complexity of images and the number of pages in the job Printer does not have enough memory Add printer memory or an optional hard disk Unexpected page breaks occur Cause Solution Job has timed out Set the Print Timeout to a higher value 1 From the control panel press 2 Press until Settings appears and then press 3 Press until Setup Menu appears and then press 4 Press until Timeouts...

Page 82: ...nication No objects are placed between the two infrared ports Internal print server Make sure the internal print server is securely connected to the printer system board For more information see Installing an internal print server or port interface card on page 23 Make sure you are using the correct cable that it is securely connected and the network software is correctly set up For information ab...

Page 83: ...e printer on If the error recurs write down the error number the problem and a detailed description Call for service Memory card Make sure the memory card is securely connected to the printer system board USB parallel interface card Make sure the USB parallel interface card is securely connected to the printer system board Make sure you are using the correct cable and that it is securely connected...

Page 84: ...lems To help isolate print quality problems print the print quality test pages 1 Turn the printer off 2 From the control panel press and hold and while turning the printer on 3 Release both buttons when Performing Self Test appears The printer performs its power on sequence and then CONFIG MENU appears 4 Press until Prt Quality Pgs appears and then press The pages are formatted Printing Quality Te...

Page 85: ...ion see Adjusting the color alignment on page 85 Remove and reinstall the photoconductors For more information about installing supplies see the User s Guide on the Software and Documentation CD Note If you have not resolved the issue adjust the color alignment again Adjusting the color alignment 1 Make sure the printer is turned off 2 From the control panel press and hold and while turning the pr...

Page 86: ...s on the back of the page replace the transfer belt Light colored line white line or incorrectly colored line Example Cause Solution ABCDE ABCDE Toner cartridge is defective Replace the color cartridge causing the line Photoconductors are defective Replace the photoconductor units Transfer belt is defective Replace the transfer belt Printhead lenses are dirty Clean the printhead lenses Streaked ho...

Page 87: ...ct a different Toner Darkness setting RGB Brightness setting or RGB Contrast setting from Print Properties before sending the job to print Note This solution applies to Windows users only Adjust the color quality settings in the Quality menu The media being used does not meet the printer specifications Load media from a new package Avoid textured media with rough finishes Make sure the media you l...

Page 88: ... or RGB Contrast setting from Print Properties before sending the job to print Note This solution applies to Windows users only Toner cartridge is defective Replace the toner cartridge Transparency print quality is poor Cause Solution You are using transparencies that do not meet the printer specifications Use only transparencies recommended by the printer manufacturer Paper Type setting for the t...

Page 89: ...ge Photoconductor is worn or defective Replace the photoconductor Characters have jagged or uneven edges Cause Solution Downloaded font is not supported If you are using downloaded fonts verify the fonts are supported by the printer the host computer and the software application Ghost images Example Cause Solution The photoconductors are not functioning properly Make sure the Paper Type setting is...

Page 90: ...aper Size to A4 Set the Paper Size to match the media in the tray Specify the correct page size in Print Properties or the program Skewed print Cause Solution Guides in the selected tray are not in the correct position for the media size loaded in the tray Move the guides in the tray to the proper positions for the size loaded The media being used does not meet the printer specifications Make sure...

Page 91: ... Paper Texture from Normal to Rough The fuser is worn or defective Replace the fuser Solving color quality problems This section helps answer some basic color related questions and describes how some of the features provided in the Quality menu can be used to solve typical color problems Quality menu Menu item Description Settings Print Mode Specifies whether images are printed in monochrome grays...

Page 92: ...are program with a document open applicable to Windows users click File Print and then click Properties Preferences Options or Setup To set Enhance Fine Lines using the Embedded Web Server type the network printer IP address in a browser window On Off Color Saver Reduces the amount of toner used for graphics and images The amount of toner used for text is not reduced Notes Off is the default setti...

Page 93: ...GB Display sRGB Vivid Display True Black Vivid Off RGB US CMYK Euro CMYK Vivid CMYK Off CMYK Manual Color RGB Image RGB Text RGB Graphics Customizes the RGB color conversions Notes sRGB Display is the default setting This applies a color conversion table that tries to produce output that matches the colors displayed on a computer monitor Vivid applies a color conversion table that produces brighte...

Page 94: ...fy document color using RGB or CMYK color combinations Additionally they commonly let users modify the color of each object in a document For more information see the software program Help section How does the printer know what color to print When a user prints a document information describing the type and color of each object is sent to the printer The color information is passed through color c...

Page 95: ...ection The color conversion tables applied to each object when using the default Auto Color Correction setting generate preferred color for the majority of documents Occasionally a user may want to apply a different color table mapping This customization is accomplished using the Manual Color menu and the Manual Color Correction setting Manual Color Correction applies to RGB and CMYK color convers...

Page 96: ...RGB Graphic Auto SRGB Vivid Manual Manual Color RGB Graphic Setting RGB Image Auto SRGB Display Manual Manual Color RGB Image Setting CMYK Text Auto US CMYK or Euro CMYK Manual Manual Color CMYK Text Setting CMYK Graphic Auto US CMYK Manual Manual Color CMYK Graphic Setting CMYK Image Auto US CMYK Manual Manual Color CMYK Image Setting What are Detailed Color Samples and how do I access them This ...

Page 97: ...upport When you call Customer Support describe the problem you are experiencing the message on the display and the troubleshooting steps you have already taken to find a solution You need to know your printer model type and serial number For more information see the label on the inside top front cover of the printer The serial number is also listed on the menu settings page For customer support co...

Page 98: ...ventions Note A Note identifies something that could help you Warning A Warning identifies something that could damage your product hardware or software Warning This type of Warning indicates that you should not touch the marked area CAUTION A CAUTION identifies something that could cause you harm CAUTION This type of CAUTION indicates a hot surface CAUTION This type of CAUTION indicates a shock h...

Page 99: ...s 89 336 EEC and 73 23 EEC on the approximation and harmonization of the laws of the Member States relating to electromagnetic compatibility and safety of electrical equipmentdesigned for use within certain voltage limits A declaration of conformity with the requirements of the directives has been signed by the Director of Manufacturing and Technical Support Lexmark International Inc S A Boigny Fr...

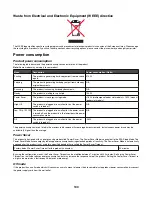
Page 100: ...ch is turned off and the product is in the lowest possible power consumption mode N A Off The product is plugged into a wall outlet but the power switch is turned off 25 W The power consumption levels listed in the previous table represent time averaged measurements Instantaneous power draws may be substantially higher than the average Power Saver This product is designed with an energy saving mod...

Page 101: ...energy usage Since power consumption claims are provided in power units of Watts the power consumption should be multiplied by the time the product spends in each mode in order to calculate energy usage The total product energy usage is the sum of each mode s energy usage 101 ...

Page 102: ...ing IPSec 77 supporting SNMPv3 77 using 802 1x authentication 78 using Secure mode 78 emission notices 98 99 enabling control panel menus 73 encrypting printer hard disk 75 envelopes guidelines 39 loading 30 32 Ethernet connector 26 exit bin attaching 33 using 33 F FAQ about color printing 94 FCC notices 98 firmware card installing 21 flash memory card installing 21 font sample list printing 49 fu...

Page 103: ...ect margins 90 jammed page does not reprint 84 job prints from wrong tray 80 job prints on wrong paper 80 job takes longer than expected 80 jobs do not print 79 large jobs do not collate 81 media frequently jams 83 multiple language PDFs do not print 79 paper curls badly 91 tray linking does not work 81 unexpected page breaks occur 81 printer configurations 9 models 9 moving 71 72 printer option p...

Page 104: ...d page breaks occur 81 troubleshooting print quality blank pages 90 characters have jagged edges 89 clipped images 90 color misregistration 85 dark lines 86 ghost images 89 gray background 89 light colored line white line or incorrectly colored line 86 poor transparency quality 88 print irregularities 88 print is too dark 88 print is too light 87 print quality test pages 84 repeating defects 85 sk...

Page 105: ......

Page 106: ...Printed in USA S510 6845 00 ...

Reviews: