


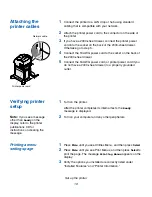

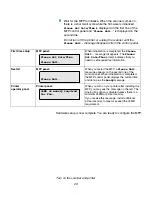

Verifying the IP settings
Note:
On Windows
computers, click
Start
Programs
Command
prompt (or Accessories
Command prompt if using
Windows 2000).
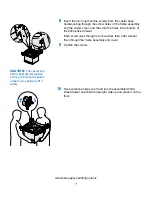
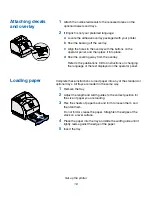
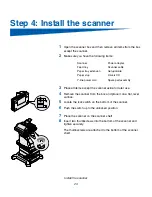
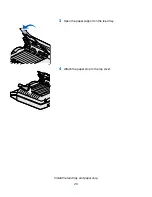
Attaching the
scanner shelf
3
Press
Menu
until you see Std Net Setup (or Network 1 Setup or
Network 2 Setup), and then press
Select
.
4
Press
Menu
until you see TCP/IP, and then press
Select
.
5
Press
Menu
until you see Set IP Address, and then press
Select
.
6
Change the address by pressing
Menu
to increase or decrease
each number. Press
Select
to move to the next segment. Press
Select
when you are finished.
The message
Saved
appears briefly.
7
Press
Menu
until you see Set IP Netmask, and then press
Select
.
8
Repeat step 6 to set the IP Netmask.
9
Press
Menu
until you see Set IP Gateway, and then press
Select
.
10
Repeat step 6 to set the IP Gateway.
11
When you are finished, press
Go
to return the printer to the
Ready state.
1
Print another network setup page. Look under the “TCP/IP”
heading and make sure the IP address, netmask, and gateway
are what you expected.
See “Printing a network setup page” on page 20 if you need
help.
2
Ping the printer and verify that it responds. For example, at a
command prompt on a network computer type
ping
followed
by the new printer IP address (for example, 192.168.0.11):
ping xxx.xxx.x.xx
If the printer is active on the network, you receive a reply.
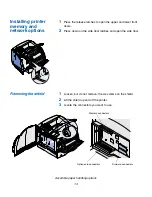
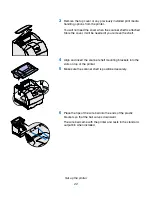
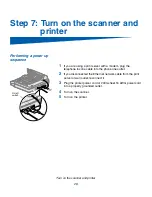
1
Turn the printer off.
2
Unplug the 16 AWG power cord or printer power cord from the
grounded outlet.
Set up the printer
21
Summary of Contents for Infoprint M22 MFP
Page 1: ...IBM Infoprint M22 MFP Option Setup Guide S510 2633 00 IBM ...
Page 2: ......
Page 3: ...IBM Infoprint M22 MFP Option Setup Guide S510 2633 00 IBM ...
Page 6: ...Solve setup problems 42 Maintain your scanner 43 Notices 48 Contents iv ...
Page 58: ......
Page 61: ......
Page 62: ...IBMR Part Number 75P5112 Printed in U S A S510 2633 00 1P P N 75P5112 ...


