background image

Readers’ Comments — We’d Like to Hear from You

S510-2633-00

S510-2633-00

IBMR

Cut or Fold
Along Line

Cut or Fold
Along Line

Fold and Tape

Please do not staple

Fold and Tape

Fold and Tape

Please do not staple

Fold and Tape

NO POSTAGE
NECESSARY
IF MAILED IN THE
UNITED STATES

BUSINESS REPLY MAIL

FIRST-CLASS MAIL

PERMIT NO. 40

ARMONK, NEW YORK

POSTAGE WILL BE PAID BY ADDRESSEE

IBM Corporation
Information Development IBM Printing Systems Depatment H7FE
Building 004M PO Box 1900 Boulder, CO

80301-9817

_ _ _ _ _ _ _ _ _ _ _ _ _ _ _ _ _ _ _ _ _ _ _ _ _ _ _ _ _ _ _ _ _ _ _ _ _ _ _ _ _ _ _ _ _ _ _ _ _ _ _ _ _ _ _ _ _ _ _ _ _ _ _ _ _ _ _ _ _ _ _ _ _ _ _ _ _

_ _ _ _ _ _ _ _ _ _ _ _ _ _ _ _ _ _ _ _ _ _ _ _ _ _ _ _ _ _ _ _ _ _ _ _ _ _ _ _ _ _ _ _ _ _ _ _ _ _ _ _ _ _ _ _ _ _ _ _ _ _ _ _ _ _ _ _ _ _ _ _ _ _ _ _ _

________________________________________________________________________________

_

Summary of Contents for Infoprint M22 MFP

Page 1: ...IBM Infoprint M22 MFP Option Setup Guide S510 2633 00 IBM ...

Page 2: ......

Page 3: ...IBM Infoprint M22 MFP Option Setup Guide S510 2633 00 IBM ...

Page 4: ...instructions to a professional service person This product is designed tested and approved to meet strict global safety standards with the use of specific components installed by the original equipment manufacturer The safety features of some parts may not always be obvious The manufacturer is not responsible for the use of other replacement parts When installing the print server containing the fa...

Page 5: ... 5 Install the feed tray and paper stop 24 Step 6 Attach cables and power cords 26 Step 7 Turn on the scanner and printer 28 Step 8 Change your default copy settings 30 Step 9 Set send and receive fax information 32 Step 10 Set up network scanning 37 Step 11 Verify MFP setup 40 Step 12 Distribute MFP user instructions 41 Contents iii ...

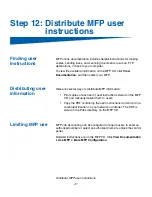
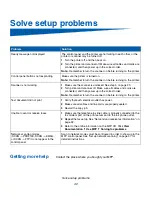
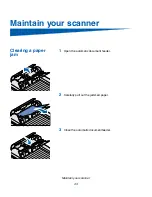
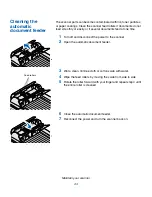
Page 6: ...Solve setup problems 42 Maintain your scanner 43 Notices 48 Contents iv ...

Page 7: ...o the documentation that came with the option or your printer and then return to this guide and continue setup If you encounter a problem while setting up the printer see e setup problems on page 42 Turning off the printer If you are installing a scanner after initial printer setup turn the printer off and unplug the power cord from both the wall outlet and the printer or 2000 sheet drawer If you ...

Page 8: ...he printer trays covers doors and MFP option It is also important to Allow space around the printer for proper ventilation Provide a firm level and stable surface Keep the equipment away from the direct airflow of air conditioners heaters or ventilators Keep the equipment free of sunlight humidity extremes or temperature fluctuations Keep the equipment clean dry and free of dust The space requirem...

Page 9: ...ponents for the configuration you ordered You may want to arrange the boxes in the order the components are assembled You can use the illustrated configurations to help lay out your boxes Printer scanner shelf and scanner Duplex unit printer scanner shelf and scanner Caster base two 500 sheet drawers duplex unit printer scanner shelf and scanner Caster base three 500 sheet drawers duplex unit prin...

Page 10: ...r 500 sheet drawer or a 250 sheet drawer 1 Remove all items from the caster base carton 2 Remove and group the machine screws washers stabilizer screws and posts from the hardware bag 3 Determine which screws you need for your configuration and place the other screws into the bag The six long screws 1 are used with three 500 sheet drawers two with each 500 sheet drawer The six short screws 2 are u...

Page 11: ...eet drawer 8 Installing the duplex unit 11 Positioning the printer 12 Attaching the caster base to the 2000 sheet drawer 1 Remove and inventory all items from the 2000 sheet drawer carton 2000 sheet drawer Decals 16 AWG power cord Jumper cord 2 Place the decals 16 AWG power cord and jumper cord aside for later use 3 Remove the two screws inside the 2000 sheet drawer pockets Use a number 2 Phillips...

Page 12: ...s up Drawer bottom 5 Remove the four screws and rubber feet from the bottom of the 2000 sheet drawer 6 Place the caster cover on the bottom of the 2000 sheet drawer 7 Place the frame assembly inside the caster cover Front Assemble paper handling options 6 ...

Page 13: ...awer Each screw goes through a lock washer then a flat washer then through the frame assembly and cover 9 Tighten the screws CAUTION The caster and 2000 sheet drawer weighs 22 2 kg 49 lb and requires at least two people to lift it safely 10 Have someone help you lift and turn the assembled 2000 sheet drawer and caster base right side up and place it on the floor Assemble paper handling options 7 ...

Page 14: ...a duplex unit go to Installing the duplex unit on page 11 otherwise go to Positioning the printer on page 12 1 Remove the caster cover screws and frame assembly from the caster box and place the bag of screws aside for later use 2 Place the frame assembly on the floor 3 Align and place the caster cover on the frame assembly 4 Place the caster base in the location you have chosen for your MFP Assem...

Page 15: ...move the rubber feet from the bottom of the 500 sheet drawer 5 Place the drawer on the caster base 6 Insert two long stabilizer screws 1 into the pockets of the 500 sheet drawer The screws go through the drawer caster cover and into the caster frame assembly 7 Tighten the screws securely 8 If you have additional 500 or 250 sheet drawers go to Installing additional 500 sheet drawers on page 10 Inst...

Page 16: ... sheet drawer The screws go through the drawer and into the top of the screws of the previously installed drawer 6 Tighten the screws securely 7 Follow steps 1 through 6 to install another 500 sheet drawer 1 Remove a 250 sheet drawer from the carton 2 Remove all packing material and tape from the drawer and paper tray 3 If you are using a table or printer stand then place the 250 sheet drawer in t...

Page 17: ...of the previously installed drawer or into the caster frame assembly 7 Tighten the screws securely Installing the duplex unit 1 Remove the duplex unit from the carton 2 Remove all packing material and tape 3 If you are using a table or printer stand then place the duplex unit in that location and go to Positioning the printer on page 12 otherwise continue to step 4 4 Use a flat tip screwdriver to ...

Page 18: ...8 Tighten the posts securely Positioning the printer 1 Open the printer box and then remove all items from the box 2 Make sure you have the following items Printer Power cord Setup Guide with a publications CD Operator panel language overlays Drivers CD Wire bail Operator panel protector overlay 3 Place all items except the printer aside for later use 4 If you are using a table or printer stand th...

Page 19: ... b Tighten the posts securely CAUTION The printer weighs 20 4 kg 45 lb and requires at least two people to lift it safely 9 Lower the printer onto the duplex unit optional drawer table or printer cabinet 10 Make sure the printer and duplex unit lock together securely 11 If you have memory or network options to install go to Installing printer memory and network options on page 14 otherwise go to R...

Page 20: ...pen the upper and lower front doors 2 Press down on the side door latches and open the side door Removing the shield 1 Loosen but do not remove the six screws on the shield 2 Lift the shield up and off the printer 3 Locate the connectors you want to use Memory connectors Option card connectors Firmware connectors ...

Page 21: ...ns on the card with the holes on the system board 4 Push in until the firmware card is firmly in place 1 Locate the card connectors on the system board If you are installing only one card install it in connector 1 2 Locate the two screws on the back of the printer that attach the metal plate to the slot 3 Remove and save the two screws and then remove and discard the plate 4 Unpack the card 5 Alig...

Page 22: ...ped with the card 7 Tighten the screws to secure the card Reattaching the shield and closing the doors 1 Align the three keyholes on the shield with the screws 2 Place the shield onto the screws and then slide the shield down 3 Tighten all six screws 4 Close the side door 5 Close the upper and lower front doors ...

Page 23: ...ridge packaging 1 Open the printer upper front door 2 Pull the print cartridge up and out 3 Remove the tabs and packaging from the cartridge 4 Reinsert the print cartridge into the printer The print cartridge will drop down and snap into place 5 Close the upper front door ...

Page 24: ...ons on changing the language of the text displayed on the operator panel Loading paper Complete these instructions to load paper into any of the standard or optional trays All trays are loaded in the same way 1 Remove the tray 2 Adjust the length and width guides to the correct position for the size of paper you are loading 3 Flex the sheets of paper back and forth to loosen them and then fan them...

Page 25: ... of the 2000 sheet drawer Otherwise go to step 5 4 Connect the 16 AWG power cord to the socket on the back of the 2000 sheet drawer 5 Connect the 16 AWG power cord or printer power cord if you do not have a 2000 sheet drawer to a properly grounded outlet 1 Turn on the printer After the printer completes its internal tests the Ready message is displayed 2 Turn on your computer and any other periphe...

Page 26: ...enu until you see Utilities Menu and then press Select 2 Press Menu until you see Quick Reference and then press Select 3 Press Menu until you see the topic you want to print and then press Select 4 Repeat steps 1 through 3 to print the other pages If your network is using DHCP an IP address is automatically assigned after you connect the network cable to the printer 1 Look for the address under t...

Page 27: ...sk and then press Select 8 Repeat step 6 to set the IP Netmask 9 Press Menu until you see Set IP Gateway and then press Select 10 Repeat step 6 to set the IP Gateway 11 When you are finished press Go to return the printer to the Ready state 1 Print another network setup page Look under the TCP IP heading and make sure the IP address netmask and gateway are what you expected See Printing a network ...

Page 28: ...eeded if you remove the shelf 4 Align and insert the scanner shelf mounting brackets into the slots on top of the printer 5 Make sure the scanner shelf is positioned securely 6 Place the tips of the wire bail into the ends of the plastic brackets so that the bail curves downward The wire bail came with the printer and rests in the standard output bin when installed Set up the printer 22 ...

Page 29: ...box and place it on a flat level surface 5 Locate the lock switch on the bottom of the scanner 6 Push the switch up to the unlocked position 7 Place the scanner on the scanner shelf 8 Insert two thumbscrews into the bottom of the scanner and tighten securely The thumbscrews are attached to the bottom of the scanner shelf Scanner Power adapter Feed tray Scanner cable Paper tray extension Setup Guid...

Page 30: ...5 Install the feed tray and paper stop 1 Connect the paper extension to the feed tray Paper extension Feed tray 2 Attach the feed tray to the automatic document feeder Install the feed tray and paper stop 24 ...

Page 31: ...3 Open the paper support on the feed tray 4 Attach the paper stop to the top cover Install the feed tray and paper stop 25 ...

Page 32: ...o the telephone line network and MFP 1 Connect the RJ 11 telephone fax line cable into the fax modem port on the back of the print server installed in your printer 2 If you received a telephone adapter specifically designed for use in your country attach the telephone adapter to the telephone fax line cable and plug the fax line cable into the phone line outlet 3 Connect the Ethernet cable into th...

Page 33: ...rd to the power adapter 5 Remove the printer power cord from the printer 6 Connect the Y line power cord to the printer 7 Connect the printer power cord to the Y line cord 8 Connect the printer power cord or the 2000 sheet 16 AWG power cord to a properly grounded outlet but do not turn the power on yet Printer power cord Power adapter bracket Y line power cord Scanner cable Power adapter Printer p...

Page 34: ...plug the telephone fax line cable into the phone line outlet 2 If you disconnected the Ethernet network cable from the print server or wall outlet reconnect it 3 Plug the printer power cord or 2000 sheet 16 AWG power cord into a properly grounded outlet 4 Turn on the scanner 5 Turn on the printer Turn on the scanner and printer 28 ...

Page 35: ...s that you need to set required fax information Restart MFP panel Please Wait When you restart the MFP a Please Wait message appears on the second line of the control panel When initialization is completed the MFP control panel displays the current time and date plus the Ready message Printer operator panel Printer panel 24MB of memory required for Fax When you turn on your printer after installin...

Page 36: ...ormation through the MFP control panel and operator panel 2 using your browser to access the MFP IP address and then entering the Configure menu or 3 using MarkVision Professional to access the MFP IP address and enter the Configure menu Manually changing settings Note You can change the copy settings for individual jobs by changing settings on the control panel but not entering the Copy menu to s...

Page 37: ...the menu item for the setting you want to change 5 Select the new setting and click Submit 6 Repeat steps 1 through 5 to change additional settings Using MarkVision MarkVision Professional is a printer management utility on the Professional Note Instructions for installing MarkVision Professional are in the CD booklet shipped with the drivers CD drivers CD After installing MarkVision Professional ...

Page 38: ...ate and time fax is sent Station name identification of the business other entity or individual sending the message Station number telephone number of the sending fax machine business other entity or individual There are three methods to enter your fax setup information They are 1 manually entering the information through the MFP control panel 2 using your browser to access the MFP IP address and ...

Page 39: ...appear on the display press Return to go to the next menu item If the default date and time appear 2000 01 01 15 35 on the display use the numeric keypad to change the numbers in each field After the date and time are set the next menu item appears 4 When you see Station Name enter your name or company name using the numeric keypad on the panel 5 Press Return when you have finished entering your S...

Page 40: ...your printer 1 Type the IP address of the MFP in the URL field of your browser for example http 192 168 236 24 and then press Enter 2 Click Configuration 3 Under the MFP heading click Fax Setup 4 Click Configuration If you are changing fax modes you must click Submit before you can access the configuration page 5 Enter the required FCC information Current date and time Station name personal name o...

Page 41: ...n Professional Optional settings such as setting up a fax transmission log creating permanent fax destinations and enabling the fax server function can be changed through the MFP control panel your browser or MarkVision Professional The following optional settings are explained using the browser method When you send or receive a fax an entry of the activity is recorded in a file You can print this...

Page 42: ...URL field of your browser and then press Enter The destinations you create here are stored only on this MFP 2 Click Configuration 3 Under the MFP heading click Manage Destinations 4 Click Fax Destinations Setup 5 Enter a unique name for the fax recipient and specify their fax number for example John_Acct 555 1212 6 Assign a shortcut number 1 245 Assigning a shortcut lets you press and then the ass...

Page 43: ... e mail or scanning documents back to your workstation Scan to e mail to a permanent destination Scan to FTP to an FTP server Configure default scan job settings You can configure some default scan job settings that preset the MFP control panel formats for all Scan to e mail and Scan to FTP jobs 1 Type the IP address of the MFP in the URL field of your browser for example http 192 168 236 24 and t...

Page 44: ...ne of the message 5 Enter a subject descriptive name and a generic message suitable for use on all Scan to e mail jobs This information appears on all e mail scanned to permanent e mail destinations 6 To store scanned documents on a Web site and send only a Web link in the e mail complete the Web Link section 7 After entering your choices click Submit Create a separate recipient entry for each des...

Page 45: ...ion is now available for selection from the MFP control panel menu Create a separate recipient entry for each destination and give them unique names easily identified in the destinations list 1 Type the IP address of the MFP in the URL field of your browser and then press Enter 2 Click Configuration 3 Under the MFP heading click Manage Destinations 4 Click FTP Destinations Setup 5 Enter a unique n...

Page 46: ...P control panel not appear 2 Use the numeric keypad on the control panel and enter the phone number of the person receiving the fax 3 Place your original document in the scanner 4 Press Go Send to send a fax Testing scan to Test your scan to network functions by creating Scan Profiles or network scanning to permanent destinations You can only test the scan to network functions that you configured ...

Page 47: ... several ways to distribute MFP information Print copies of each set of user instructions stored on the MFP CD and manually deliver them to users Copy the PDF containing the user instructions and store it in a convenient location on your network or Intranet The PDF is stored in the Pubs directory on the MFP CD MFP Job Accounting can be configured to require users to enter an authorized number or s...

Page 48: ...in the correct order Note Remember to turn the scanner on before turning on the printer Test document did not print 1 Verify that each electrical outlet has power 2 Make sure all cables and line cords are properly seated 3 Restart the copy job Unable to send or receive faxes 1 Make sure the telephone fax line cable is properly connected to the fax modem port on the print server and to the fax phon...

Page 49: ...Maintain your scanner Clearing a paper 1 Open the automatic document feeder jam 2 Carefully pull out the jammed paper 3 Close the automatic document feeder Maintain your scanner 43 ...

Page 50: ...s feed at one time 1 Turn off and disconnect the power to the scanner 2 Open the automatic document feeder 3 Wet a clean lint free cloth or cotton swab with water 4 Wipe the feed rollers by moving the swab from side to side 5 Rotate the roller forward with your finger and repeat step 4 until the entire roller is cleaned 6 Close the automatic document feeder 7 Reconnect the power and turn the scann...

Page 51: ...e document glass 1 Open the document cover 2 Wet a clean lint free cloth or cotton swab with water 3 Wipe the scanner glass and automatic document feeder area by moving the cloth or swab from side to side 4 Close the document cover Glass ...

Page 52: ...ause internal damage 1 Raise the scanner high enough to move the switch down to the locked position Replacing the pad If you experience problems with papers double feeding through the assembly automatic document feeder the pad assembly may be worn To replace the automatic document feeder pad 1 Turn the scanner off 2 Open the automatic document feeder Maintain your scanner 46 ...

Page 53: ...e old automatic document feeder pad assembly by squeezing and pulling out the upper part of the pad clamp 4 Hold the upper part of the new clamp squeeze and place it gently in the pad holder 5 Close the automatic document feeder Pad clamp ...

Page 54: ...erference in which case the user will be required to correct the interference at his own expense The manufacturer is not responsible for any radio or television interference caused by using other than recommended cables or by unauthorized changes or modifications to this equipment Unauthorized changes or modifications could void the user s authority to operate this equipment Industry Canada ICES 0...

Page 55: ...fax Telephone number of the sending machine or such business other entity or individual Industry Canada CS 03 notice Notice This equipment meets the applicable Industry Canada Terminal Equipment Technical Specifications This is confirmed by the registration number The abbreviation IC before the registration number signifies that registration was performed based on a Declaration of Conformity indic...

Page 56: ...nal Equipment Network compatibility notices This equipment has been designed tested and found to be compliant with the essential requirements of European technical standard TBR 21 for Pan European single terminal connection to the Public Switched Telephone Network PSTN This applies to all print servers which bear the following mark This equipment is designed to inter work with PSTN s that accept a...

Page 57: ...lines Contact customer support for ordering information South Africa telecommunications notice This modem must be used in conjunction with an approved surge protection device when connected to the PSTN Notices 51 ...

Page 58: ......

Page 59: ...ry Satisfied Satisfied Neutral Dissatisfied Very Dissatisfied Accurate h h h h h Complete h h h h h Easy to find h h h h h Easy to understand h h h h h Well organized h h h h h Applicable to your tasks h h h h h Please tell us how we can improve this book Thank you for your responses May we contact you h Yes h No When you send comments to IBM you grant IBM a nonexclusive right to use or distribute...

Page 60: ...ation Information Development IBM Printing Systems Depatment H7FE Building 004M PO Box 1900 Boulder CO 80301 9817 _ _ _ _ _ _ _ _ _ _ _ _ _ _ _ _ _ _ _ _ _ _ _ _ _ _ _ _ _ _ _ _ _ _ _ _ _ _ _ _ _ _ _ _ _ _ _ _ _ _ _ _ _ _ _ _ _ _ _ _ _ _ _ _ _ _ _ _ _ _ _ _ _ _ _ _ _ _ _ _ _ _ _ _ _ _ _ _ _ _ _ _ _ _ _ _ _ _ _ _ _ _ _ _ _ _ _ _ _ _ _ _ _ _ _ _ _ _ _ _ _ _ _ _ _ _ _ _ _ _ _ _ _ _ _ _ _ _ _ _ _ _ _ ...

Page 61: ......

Page 62: ...IBMR Part Number 75P5112 Printed in U S A S510 2633 00 1P P N 75P5112 ...

Reviews: