background image

3.5

3.6

If you are not using a modem, skip to step 3.6.

If you are using the integrated HMC modem, connect the telephone cable to
the modem and to the analog jack on the wall. If you are using an external
modem, connect the modem data cable to the external modem and to a serial
port on the HMC. Then connect the telephone cable to the external modem
and to the analog jack on the wall.

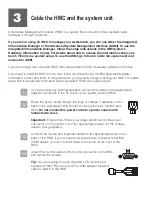
Connect the Ethernet cable to the Ethernet port on the HMC and to the
Ethernet port labeled HMC1 on the system unit.

For a stand-alone HMC, use the integrated Ethernet port. For the 7310-CR2 rack-
mounted HMC, use the bottom-right Ethernet port. For the 7310-CR3 rack-
mounted HMC, use the left port of the two planar board Ethernet ports.

3.7

3.8

If using an external modem, plug the power cord into the modem.

Plug the power cords for the monitor, HMC, and external modem into a power
source. Do not connect the system unit to a power source until instructed to do so.

CAUTION: This product is equipped with a three-wire power cable and plug
for the user's safety. Use this power cable with a properly grounded
electrical outlet to avoid electrical shock.

You have completed the basic setup. Go to task 5

Finish your system setup.

3.9

3.10

3.11

Start and configure the HMC, which includes the Guided Setup Wizard. You can
find the instructions for configuring the HMC in the Hardware Information Center.
For details about how to access the information center, see task 5

.

Finish your

system setup

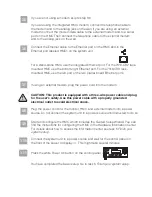
Connect the system unit to a power source and wait for the control panel on
the front of the server to display

. This might take several minutes.

01

Press the white Power On button on the control panel.

Summary of Contents for IntelliStation POWER 285

Page 1: ...Quick start guide for IntelliStation POWER 285 9111 285 IBM Systems...

Page 2: ...ins a caution icon read and understand the caution statement that accompanies it 1 Before you begin Use safe practices when lifting This Quick start guide contains an abbreviated set of setup instruct...

Page 3: ...elope adhered to the outside of your system box You can also obtain order information from your marketing representative or IBM Business Partner If you have incorrect missing or damaged parts contact...

Page 4: ...ystem that connects to the workstation and manages it through a network If you are using a rack mounted HMC these steps assume that it is already installed in the rack If you need to install the HMC i...

Page 5: ...g an external modem plug the power cord into the modem Plug the power cords for the monitor HMC and external modem into a power source Do not connect the system unit to a power source until instructed...

Page 6: ...installed connect an Ethernet cable from the PC to the port labeled HMC1 on the back of the system unit If HMC1 is occupied use the port labeled HMC2 R 4 3 Configure the Ethernet interface on the PC t...

Page 7: ...n the login dialog box is displayed enter either one of the default user IDs and passwords Address When you are prompted change the default password If you are using any optional adapters connect the...

Page 8: ...nformation Initial server setup Create a customized initial server setup checklist You have completed the basic tasks to set up your workstation You can now access the Follow these steps to create a c...

Page 9: ...ms infocenter hardware References in this publication to IBM products or services do not imply that IBM intends to make them available in every country or region IBM the IBM logo IntelliStation and PO...

Reviews: