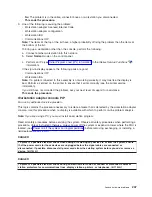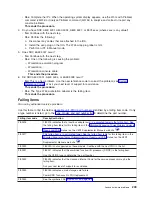
Running
the
self-test:
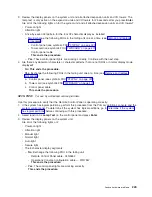
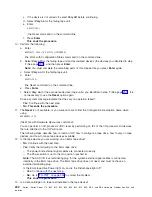
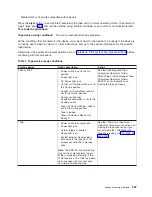
1.
Self-testing
begins
when
a
scratch
data
cartridge
is
inserted
into
the
tape
unit.
The
Ready
(left)
LED
will
flash,
indicating
that
self-testing
is
in
progress.
Note:
A
cartridge
must
be
loaded
within
15
seconds,
otherwise,
the
tape
unit
will
automatically
revert
back
to
normal
operation.
If
necessary,
return
to
step
1
(See
page
to
reenter
diagnostic
mode.
2.
For
fastest
results,
we
recommend
using
an
IBM
SLR100
Test
Tape
(P/N
35L0967)
which
was
originally
provided
with
your
iSeries
server.
Attention:
Use
a
blank
cartridge
that
does
not
contain
customer
data.
During
this
self-test,
the
cartridge
will
be
rewritten
with
a
test
pattern
and
any
customer
data
will
be
destroyed.
Note:
Use
a
cartridge
that
is
not
write-protected.
If
a
write-protected
cartridge
is
inserted
while
the
tape
unit
is
in
diagnostic
mode,
the
cartridge
will
be
ejected,
see
Incorrect
cartridge
(See
page
below.
Self-testing
will
only
be
performed
using
a
write-compatible
cartridge
type,
and
with
a
cartridge
that
is
not
damaged,
see
Incorrect
cartridge
(See
page
below.
If
a
cleaning
cartridge
is
inserted
while
the
tape
unit
is
in
diagnostic
mode,
drive
cleaning
will
occur
and
the
tape
unit
will
then
return
to
normal
operating
mode.
Return
to
step
1
(See
page
to
reenter
diagnostic
mode.
3.
At
any
time,
self-testing
can
be
stopped
by
pressing
the
eject
button.
After
the
current
operation
is
completed,
the
cartridge
will
be
ejected
and
tape
unit
will
return
to
normal
operating
mode.
4.
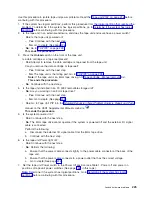
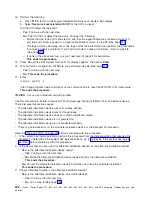
The
Ready
(left)
LED
will
continue
to
flash
during
the
following:
v
The
cartridge
load
sequence
has
a
approximate
duration
of
30
seconds.
The
center
LED
indicates
tape
movement.
v
The
hardware
test
has
an
approximate
duration
of
2
and
1/2
minutes.
During
that
time,
a
static
test
is
performed
on
tape
unit
electrical
components.
No
tape
motion
occurs
during
this
step.
v
The
cartridge
load/unload
test
has
an
approximate
duration
of
1
and
1/2
minutes.
During
that
time,
the
Ready
LED
will
continue
to
flash
while
a
dynamic
test
is
performed
on
tape
unit
mechanical
components.
Two
cartridge
load
cycles
are
included.
v
Duration
of
the
write/read
test
will
vary,
depending
on
what
type
of
cartridge
is
loaded
into
the
tape
unit.
When
an
SLR100
Test
Tape
is
used,
typical
duration
will
be
5
minutes.
Use
of
other
cartridge
types
can
increase
the
write/read
test
duration
to
30-40
minutes.
During
this
test,
the
Ready
LED
will
continue
to
flash.
The
center
LED
indicates
tape
movement.
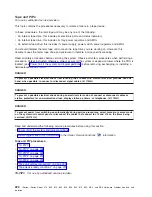
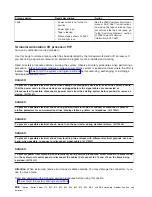
Interpreting
the
results:
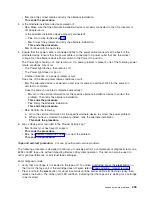
Test
Passed:
When
self-testing
has
completed
successfully,
and
no
problems
are
detected,
the
cartridge
is
unloaded
from
the
tape
unit
and
all
LEDs
are
off.
Proper
function
of
both
the
tape
unit
and
tape
cartridge
have
now
been
verified.
Note:
A
solid
amber
light
indicates
that
self-testing
has
completed
successfully,
but
the
tape
unit
requires
cleaning.
Clean
the
tape
unit
by
inserting
an
IBM
Dry
Process
Cleaning
Cartridge
(P/N
35L0844).
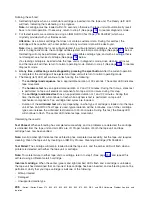
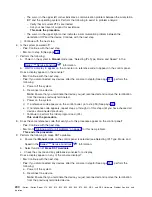
Test
Failed:
The
cartridge
will
remain
loaded
inside
the
tape
unit,
and
the
amber
LED
will
flash
when
a
problem
is
detected
with
either
the
tape
unit
or
cartridge.
Note:
To
isolate
failure
to
either
tape
unit
or
cartridge,
return
to
step
1
(See
page
and
repeat
this
self-test
using
a
different
scratch
cartridge.
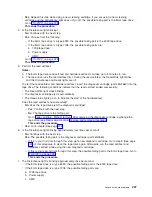
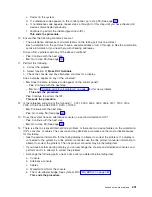
Incorrect
cartridge:
When
the
center
(green)
and
right
(amber)
LEDs
flash
and
a
cartridge
is
unloaded,
the
tape
unit
has
determined
that
an
incorrect
tape
cartridge
has
been
inserted,
and
self-testing
cannot
be
performed.
Verify
that
your
tape
cartridge
is
not
one
of
the
following:
v
Write-protected
v
Damaged
v
Unsupported
media
type
236
iSeries:
iSeries
Server
270,
800,
810,
820,
825,
830,
840,
870,
890,
SB2,
and
SB3
Hardware
Problem
Analysis
and
Isolation


