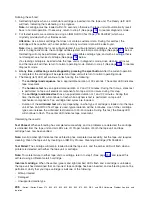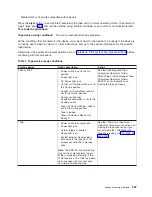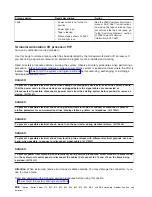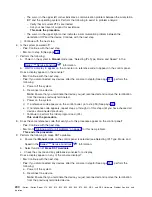
v
No
:
Load
the
correct
media
and
retry
the
alternate
installation.
This
ends
the
procedure.
4.
Is
the
alternate
installation
device
powered
on?
v
Yes
:
Make
sure
that
the
alternate
installation
device
is
properly
connected
to
the
I/O
processor
or
I/O
adapter
card.
Is
the
alternate
installation
device
properly
connected?
–
Yes
:
Go
to
step
6
(See
page
–
No
:
Correct
the
problem
and
retry
the
alternate
installation.
This
ends
the
procedure.
v
No
:
Continue
with
the
next
step.
5.
Ensure
that
the
power
cable
is
connected
tightly
to
the
power
cable
connector
at
the
back
of
the
alternate
device.
Ensure
that
the
power
cable
is
connected
to
a
power
outlet
that
has
the
correct
voltage.
Set
the
alternate
device
Power
switch
to
the
Power
On
position.
The
Power
light
should
go
on
and
remain
on.
If
a
power
problem
is
present,
one
of
the
following
power
failure
conditions
may
occur:
v
The
Power
light
flashes,
then
remains
off.
v
The
Power
light
does
not
go
on.
v
Another
indication
of
a
power
problem
occurs.
Does
one
of
the
above
power
failure
conditions
occur?
v
No
:
The
alternate
device
is
powered
on
and
runs
its
power-on
self-test.
Wait
for
the
power-on
self-test
to
complete.
Does
the
power-on
self-test
complete
successfully?
–
No
:
Go
to
the
service
information
for
the
specific
alternate
installation
device
to
correct
the
problem.
Then
retry
the
alternate
installation.
This
ends
the
procedure.
–
Yes
:
Retry
the
alternate
installation.
This
ends
the
procedure.
v
Yes
:
Perform
the
following:
a.
Go
to
the
service
information
for
the
specific
alternate
device
to
correct
the
power
problem.
b.
When
you
have
corrected
the
power
problem,
retry
the
alternate
installation.
This
ends
the
procedure.
6.
Was
a
device
error
recorded
in
the
Product
Activity
Log?
v
No
:
Contact
your
next
level
of
support.
This
ends
the
procedure.
v
Yes
:
See
to
correct
the
problem.
This
ends
the
procedure.
Tape
unit
self-test
procedure:
For
use
by
authorized
service
providers.
The
following
procedure
is
designed
to
allow
you
to
quickly
perform
a
complete
set
of
diagnostic
tests
on
a
6384
or
6387
tape
unit,
without
impacting
iSeries
400
system
operation.
This
test
can
also
be
used
to
verify
good
performance
of
individual
tape
cartridges.
Enter
diagnostic
mode:
1.
Verify
that
a
cartridge
is
not
loaded
in
the
tape
unit.
To
unload
a
cartridge,
press
the
eject
button
on
the
front
of
the
tape
unit.
If
the
cartridge
does
not
eject,
refer
to
2.
Press
and
hold
the
eject
button
for
about
6
seconds
until
the
amber
LED
starts
flashing
slowly,
then
release
the
button.
The
amber
(left)
LED
will
flash,
indicating
that
the
tape
unit
is
waiting
for
a
cartridge
to
be
inserted.
Analyze
hardware
problems
235

