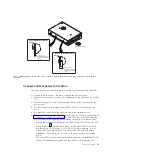
Unpack the drive
Unpack the drive and store the packaging for future moves or shipping.
Attention:
If you return the unit for service, ship it in its original or equivalent
packing material, or the warranty might be invalidated.
Acclimate the drive and media
Acclimation time is required if the temperature of the drive and media when
unpacked is different than the temperature of its operating environment (measured
at the front of the bezel near the air intake area). The recommended acclimation
time is four hours after the drive has been unpacked or one hour after any
condensation that you can see has evaporated, whichever is greater. When
acclimating the drive, apply the following measures:
v
If the drive is colder than its operating environment and the air contains
sufficient humidity, condensation might occur in the drive and damage it. When
the drive has warmed to the operating temperature range (greater than 10°C or
50°F) and no danger of condensation is present (the air is dry), warm the drive
more quickly by powering it on for 30 minutes. Use a diagnostic tape to test the
drive before inserting a tape that contains data.
v
If the drive is hotter than its operating environment, the tape can stick to the
drive head. When the drive has cooled to the operating temperature range (less
than 40°C or 104°F), cool the drive more quickly by applying airflow for 30
minutes. Power-on the drive and use a diagnostic tape to test it before inserting
a tape that contains data.
If you are uncertain about whether the temperature of the drive is within the
recommended operating range or the humidity is sufficient to cause condensation,
acclimate the drive for the full four hours.
Turn off the enclosure
1.
Turn off the enclosure (or the unit that provides power to the drive).
2.
Disconnect the power cord from both the electrical outlet and the enclosure.
Set the feature switches
The tape drive has eight factory-set feature switches by which the drive is
configured for various functions. The feature switches are preset to the off position
at the factory but are described here in case you must change the feature-switch
settings for your application.
The feature switches are on the rear panel of the tape drive. The switches are
labeled 1 through 8 and the on and off positions are marked. The feature switches
are defined in the following table.
Table 5. Feature switch definitions
Switch
On function
Off function
1
Library interface at 9,600 baud /
polled
Library interface at 38,400 baud /
non-polled
2
Library interface uses two stop bits
Library interface uses one stop bit
3
Reserved
Reserved
4
Library interface at 115,000 baud rate Switch 1 active
Chapter 2. Installing
11
Summary of Contents for L5X
Page 2: ......
Page 10: ...viii Half High LTO Gen 5 SAS Tape Drive Installation and User s Guide...
Page 14: ...xii Half High LTO Gen 5 SAS Tape Drive Installation and User s Guide...
Page 16: ...xiv Half High LTO Gen 5 SAS Tape Drive Installation and User s Guide...
Page 58: ...40 Half High LTO Gen 5 SAS Tape Drive Installation and User s Guide...
Page 71: ...Figure 14 RID tag on rear panel Chapter 5 Resolving problems 53...
Page 72: ...54 Half High LTO Gen 5 SAS Tape Drive Installation and User s Guide...
Page 76: ...58 Half High LTO Gen 5 SAS Tape Drive Installation and User s Guide...
Page 90: ...72 Half High LTO Gen 5 SAS Tape Drive Installation and User s Guide...
Page 102: ...84 Half High LTO Gen 5 SAS Tape Drive Installation and User s Guide...
Page 119: ......
Page 120: ...Part Number 60Y1487 Printed in USA 1P P N 60Y1487...


