3.
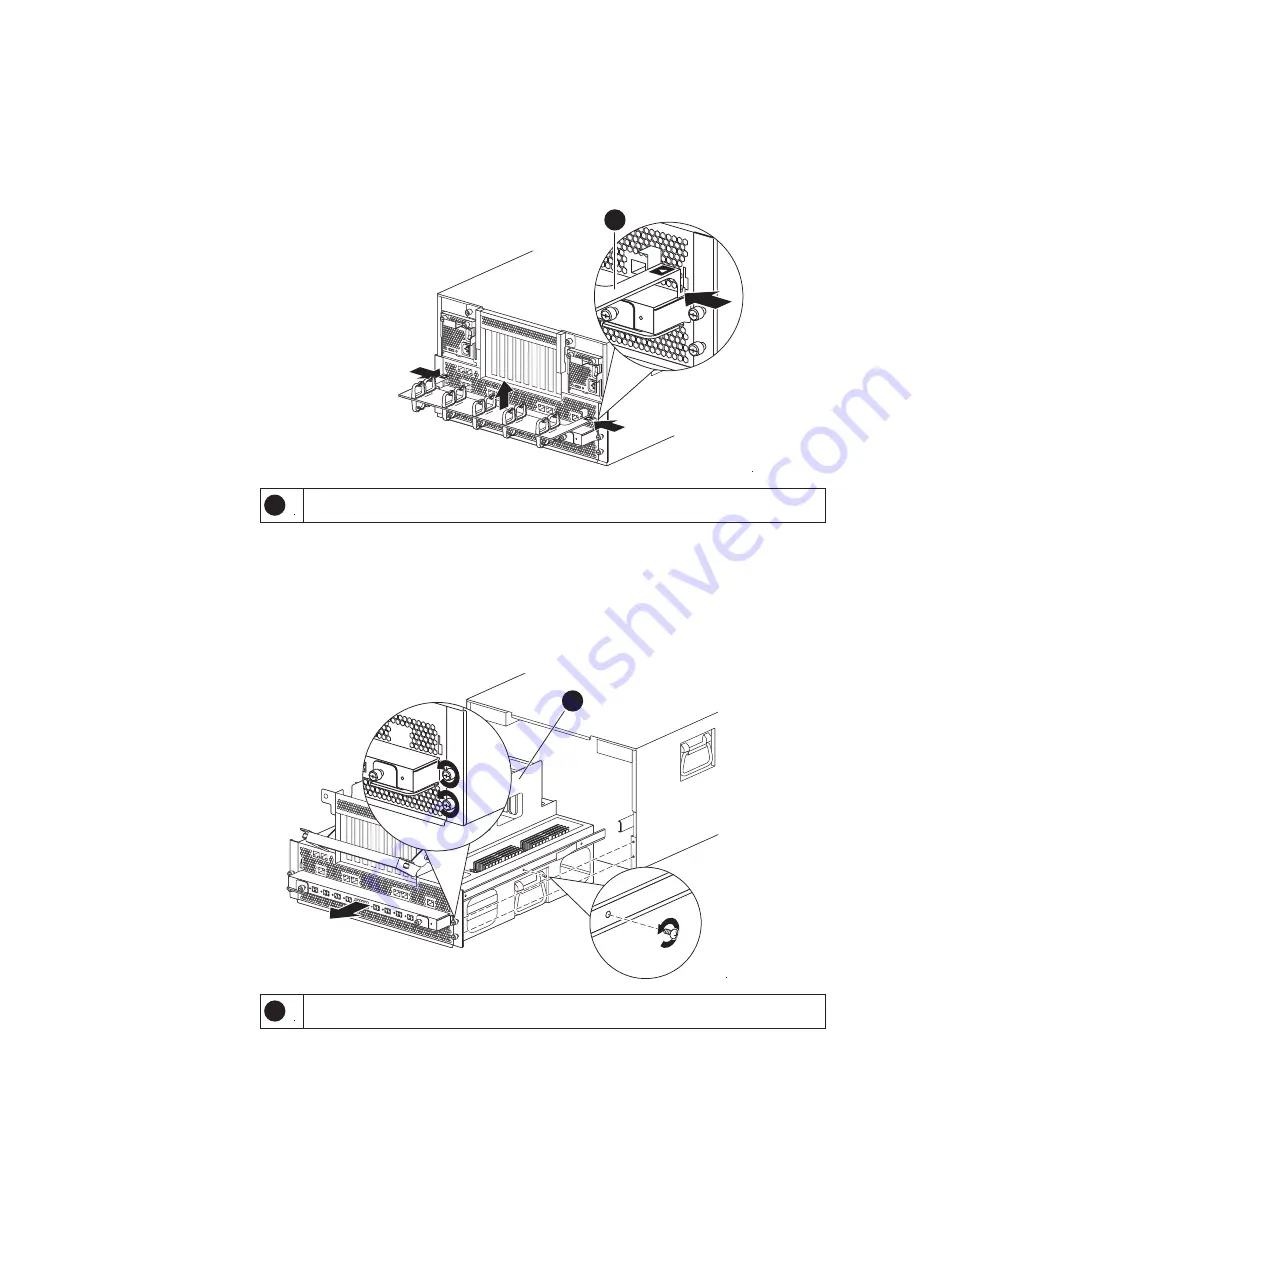
Grasp the cable management tray by the side, gently push on the sides of the
tray to unhook it, and then pull the tray off the back of the motherboard tray
and set it aside.
1
1
Cable management tray
4.
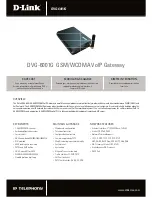
Pull the cam handle downward and slide the motherboard tray out of the
system until it catches.
Attention:
You do not have to remove the motherboard (as described in the
following step) to replace components on the motherboard tray. However, your
system must be on a stable surface where the chassis and motherboard tray are
supported so that your system cannot tip when you pull the motherboard tray
away from the chassis.
1
1
Motherboard tray
5.
Loosen the six thumbscrews that secure the motherboard tray to the chassis.
6.
If you want to remove the motherboard tray, complete the following substeps:
a.
Press the locking tabs on the sides of the motherboard tray, and then gently
pull it out about an inch.
b.
Grasp the handles on the sides of the motherboard tray, slide it out of the
chassis, and set it on a stable, antistatic surface.
Chapter 5. Replacing N7000 series system devices
119
Summary of Contents for N7700
Page 2: ......
Page 12: ...x IBM System Storage N7000 Series Hardware and Service Guide ...
Page 18: ...xvi IBM System Storage N7000 Series Hardware and Service Guide ...
Page 20: ...xviii IBM System Storage N7000 Series Hardware and Service Guide ...
Page 42: ...16 IBM System Storage N7000 Series Hardware and Service Guide ...
Page 46: ...20 IBM System Storage N7000 Series Hardware and Service Guide ...
Page 54: ...28 IBM System Storage N7000 Series Hardware and Service Guide ...
Page 162: ...136 IBM System Storage N7000 Series Hardware and Service Guide ...
Page 164: ...138 IBM System Storage N7000 Series Hardware and Service Guide ...
Page 168: ...142 IBM System Storage N7000 Series Hardware and Service Guide ...
Page 181: ......
Page 182: ... Printed in USA GC26 7953 13 ...


