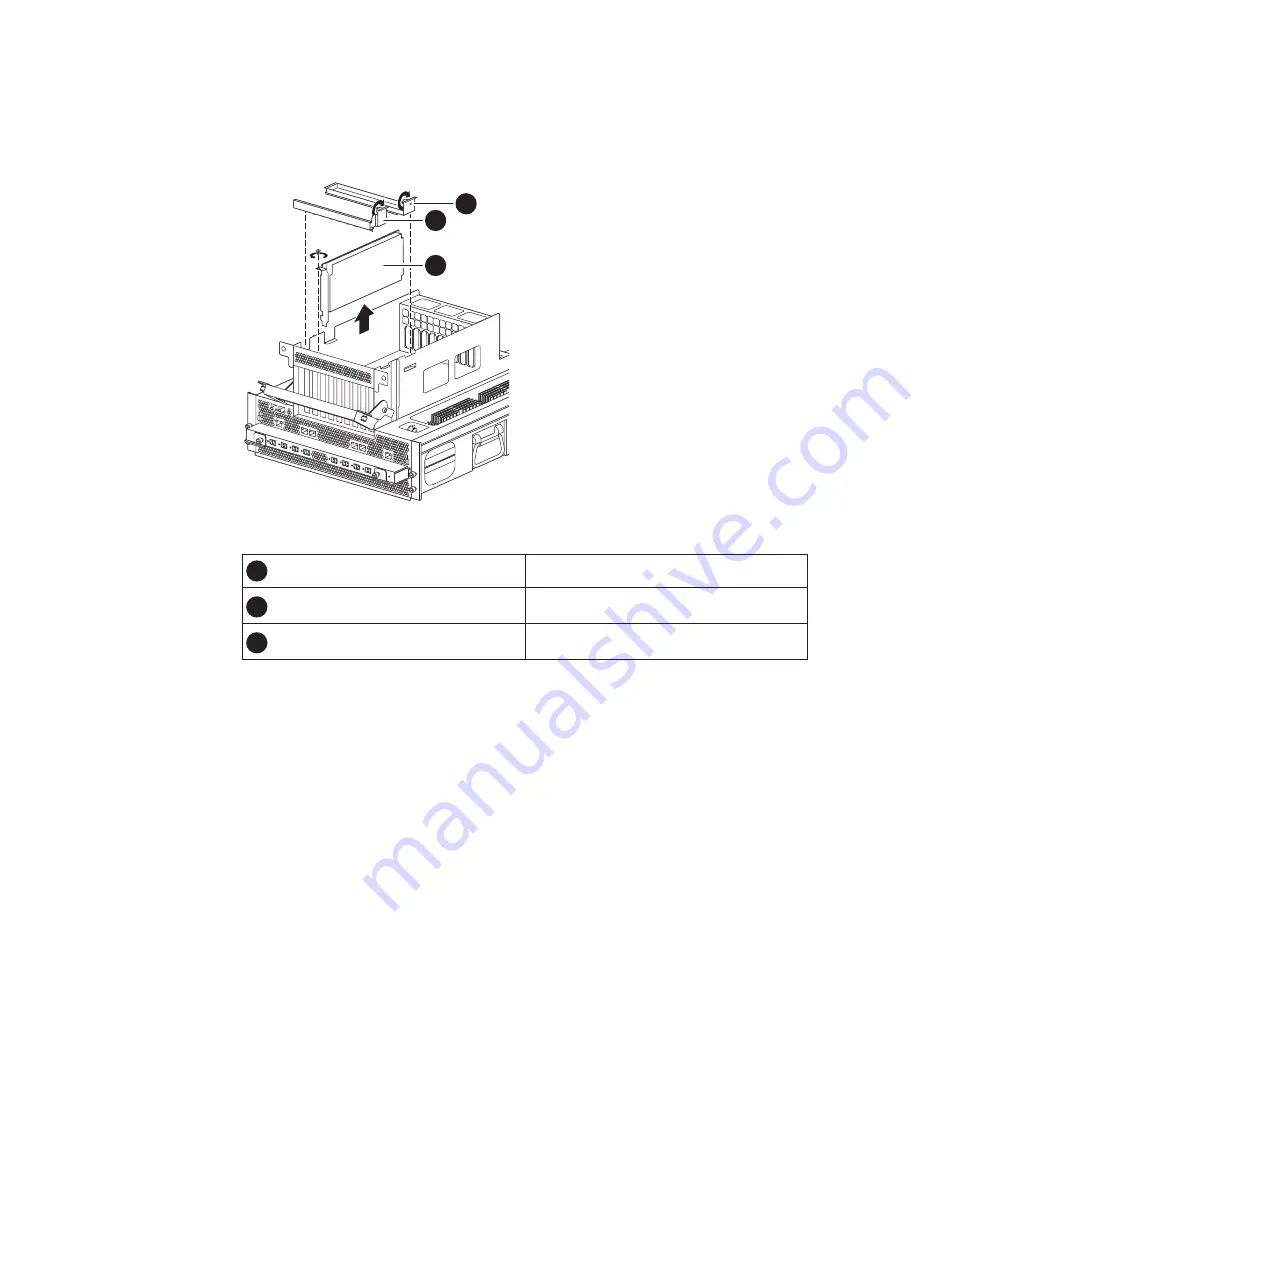
1
PCI card
2
Retaining bracket
3
Retaining bracket
2.
Loosen the thumbscrew on the secondary PCI retaining bracket, located at the
back of the motherboard tray, and then lift the retaining bracket up and off the
chassis frame.
3.
Remove any retaining screws from the PCI adapters and set the screw aside.
4.
Remove the selected PCI adapter by grasping it by the upper corners of the
adapter, and gently rocking it out of the socket. Set it on a stable, antistatic
surface. Make a note of which slot the adapter was in. You need this
information when reinstalling the PCI adapters in the new motherboard tray.
5.
Repeat the above steps as needed.
Moving the DIMMs to the new motherboard tray
You must remove the DIMMs from the motherboard tray, being careful to note
their location so you reinstall them in the correct sockets in the new motherboard
tray.
About this task
Have the new motherboard tray ready so you can move the DIMMs directly from
the old motherboard tray to the corresponding slots in the new one.
Procedure
1.
Locate the DIMMs.
3
2
1
Figure 31. Removing the PCI adapters
88
IBM System Storage: N7000 Series Hardware and Service Guide
Summary of Contents for N7800
Page 2: ......
Page 12: ...x IBM System Storage N7000 Series Hardware and Service Guide...
Page 18: ...xvi IBM System Storage N7000 Series Hardware and Service Guide...
Page 20: ...xviii IBM System Storage N7000 Series Hardware and Service Guide...
Page 42: ...16 IBM System Storage N7000 Series Hardware and Service Guide...
Page 46: ...20 IBM System Storage N7000 Series Hardware and Service Guide...
Page 54: ...28 IBM System Storage N7000 Series Hardware and Service Guide...
Page 162: ...136 IBM System Storage N7000 Series Hardware and Service Guide...
Page 164: ...138 IBM System Storage N7000 Series Hardware and Service Guide...
Page 168: ...142 IBM System Storage N7000 Series Hardware and Service Guide...
Page 181: ......
Page 182: ...Printed in USA GC26 7953 13...


