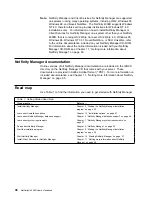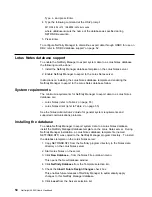
Control or Screen View service and asking whether you want to permit
this user to use this service on your system. You can click Yes or No.
If you do not make a selection within 15 seconds (for example, if you
are not sitting at your system when the access attempt is made),
Netfinity Manager will automatically prevent the remote user from using
the service on your system.
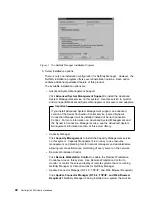
Disable DNS Name Resolution
If the Disable DNS Name Resolution option is enabled, Netfinity
Manager will use only a numeric TCP/IP address (for example,
8.24.67.32) to communicate with remote systems and will not attempt
to resolve the numeric address into an alphanumeric Domain Name
Server (DNS) address (for example, your.system.ibm.com). Select this
option if you are using Netfinity Manager in a WINS networking
environment or if you are using TCP/IP in an environment that does not
have a Domain Name Server.
To implement one or more of the available Netfinity Manager Options:
1) Click Options....
2) Select the Netfinity Manager options to be enabled.
3) Click Save.
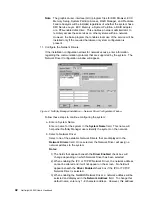
f. Set the Network Timeout Value (optional).
The Network Timeout field shows the number of seconds that Netfinity
Manager will attempt to communicate with a remote system that is not
responding. If Netfinity Manager does not establish contact with the remote
system within this time, it cancels the communication attempt. The
Network Timeout default setting is 15 seconds. This default setting might
not need to be altered.
g. Save the configuration and continue.
Click Save to save the configuration. Then, click Exit to continue.
Note: The configuration can be changed later by double-clicking the
Network Driver Configuration object in the Netfinity folder.
12. After finishing configuring the system for network access, the installation
program displays a list of changes that must be made to the system
configuration files, and asks whether the installation program should make the
changes. For example, if Netfinity Manager for Windows 95 is being installed,
the installation program will display a list of changes that must be made to the
CONFIG.SYS file.
Click either Yes or No.
Note: These changes must be made to the system configuration for Netfinity
Manager to run correctly.
If you click Yes the changes are automatically made to the system
configuration.
If you click No the commands are saved to a file named CONFIG.NEW in
the destination directory (and to AUTOEXEC.NEW, if appropriate) so that
they can be added later.
13. The installation is now complete. Shut down and restart the system for the
system configuration changes to take effect.
44
Netfinity
4000R User's Handbook
Summary of Contents for NETFINITY 4000R
Page 1: ...IBM IBM Netfinity 4000R User s Handbook...
Page 2: ......
Page 3: ...IBM IBM Netfinity 4000R User s Handbook...
Page 12: ...2 Netfinity 4000R User s Handbook...
Page 32: ...22 Netfinity 4000R User s Handbook...
Page 38: ...28 Netfinity 4000R User s Handbook...
Page 48: ...38 Netfinity 4000R User s Handbook...
Page 76: ...66 Netfinity 4000R User s Handbook...
Page 81: ...Section 3 Appendixes Copyright IBM Corp 1999 71...
Page 82: ...72 Netfinity 4000R User s Handbook...
Page 86: ...76 Netfinity 4000R User s Handbook...
Page 88: ...78 Netfinity 4000R User s Handbook...
Page 98: ...88 Netfinity 4000R User s Handbook...
Page 102: ...IBM Part Number 00N9106 Printed in U S A N91 6...

