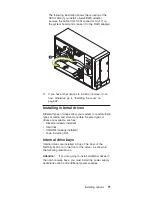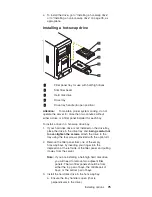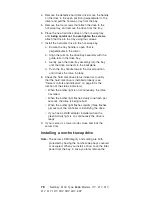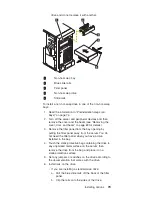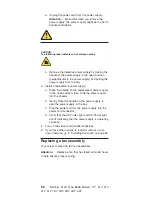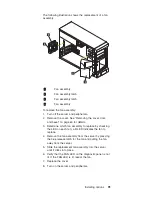
b. Align the rails on the drive/tray assembly with the
guide rails in the drive bay.
c. Gently push the drive/tray assembly into the bay
until the drive connects to the backplane.
d. Push the tray handle toward the closed position
until it locks the drive in place.
4. If you installed a half-high hard disk drive, install a filler
panel in the gap above the drive:
a. Locate the slim filler bezel that is designed for use
with half-high drives. It is stored on the empty tray
of the filler panel that you removed earlier in this
procedure.
b. Pull the slim filler bezel off the filler panel.
c. Gently push the slim filler bezel into place in the
gap above the drive.
5. Check the hard disk drive status indicators to verify
that the hard disk drives are operating properly (see
“Server controls and indicators” on page 8 for the
location of the status indicators).
v
When the amber light is on continuously, the drive
has failed.
v
When the amber light flashes slowly (one flash per
second), the drive is being rebuilt.
v
When the amber light flashes rapidly (three flashes
per second), the controller is identifying the drive.
v
If you have a RAID adapter installed, when the
green Activity light is on continuously the drive is
ready.
Note:
If your server has a RAID adapter installed, refer to
the information provided with the RAID adapter for
information about adding a drive.
Replacing a drive in a hot-swap bay
You do not have to turn off the server to remove or install
the hot-swap drives.
Attention:
1. Before you remove a hot-swap hard disk drive that is
not defective, back up all important data.
2. To avoid damage to a hard disk drive, DO NOT remove
the drive from the hot-swap bay until it has had time to
spin down (approximately 30 seconds). Handle the
drive carefully.
3. Before you hot-swap a drive, make sure it is defective.
If you partially or completely remove a good drive
instead of a defective one, your server might lose
valuable data.
76
: Netfinity 5100 Type 8658 Models 11Y, 21Y, 31Y,
41Y, 51Y, 1RY, 2RY, 3RY, 4RY, 5RY
Summary of Contents for Netfinity 5100 8658 1RY
Page 1: ...Netfinity 5100 Type 8658 Models 11Y 21Y 31Y 41Y 51Y 1RY 2RY 3RY 4RY 5RY S10K 2615 00...
Page 10: ...x Netfinity 5100 Type 8658 Models 11Y 21Y 31Y 41Y 51Y 1RY 2RY 3RY 4RY 5RY...
Page 26: ...16 Netfinity 5100 Type 8658 Models 11Y 21Y 31Y 41Y 51Y 1RY 2RY 3RY 4RY 5RY...
Page 50: ...40 Netfinity 5100 Type 8658 Models 11Y 21Y 31Y 41Y 51Y 1RY 2RY 3RY 4RY 5RY...
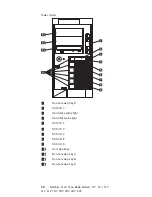
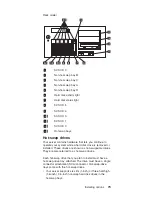
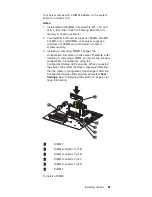
Page 65: ...13 PCI slot 2 32 bit J32 Installing options 55...
Page 195: ...Parts listing Type 8658 Copyright IBM Corp 2000 185...
Page 196: ...186 Netfinity 5100 Type 8658 Models 11Y 21Y 31Y 41Y 51Y 1RY 2RY 3RY 4RY 5RY...
Page 215: ...Related service information 205...
Page 216: ...206 Netfinity 5100 Type 8658 Models 11Y 21Y 31Y 41Y 51Y 1RY 2RY 3RY 4RY 5RY...
Page 217: ...Related service information 207...
Page 218: ...208 Netfinity 5100 Type 8658 Models 11Y 21Y 31Y 41Y 51Y 1RY 2RY 3RY 4RY 5RY...
Page 219: ...Related service information 209...
Page 220: ...210 Netfinity 5100 Type 8658 Models 11Y 21Y 31Y 41Y 51Y 1RY 2RY 3RY 4RY 5RY...
Page 221: ...Related service information 211...
Page 222: ...212 Netfinity 5100 Type 8658 Models 11Y 21Y 31Y 41Y 51Y 1RY 2RY 3RY 4RY 5RY...
Page 235: ...Related service information 225...
Page 236: ...226 Netfinity 5100 Type 8658 Models 11Y 21Y 31Y 41Y 51Y 1RY 2RY 3RY 4RY 5RY...
Page 237: ...Related service information 227...
Page 245: ......
Page 246: ...Part Number 10K2615 Printed in U S A S10K 2615 00 1P P N 10K2615...

