


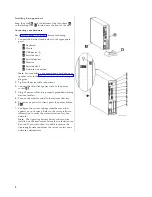


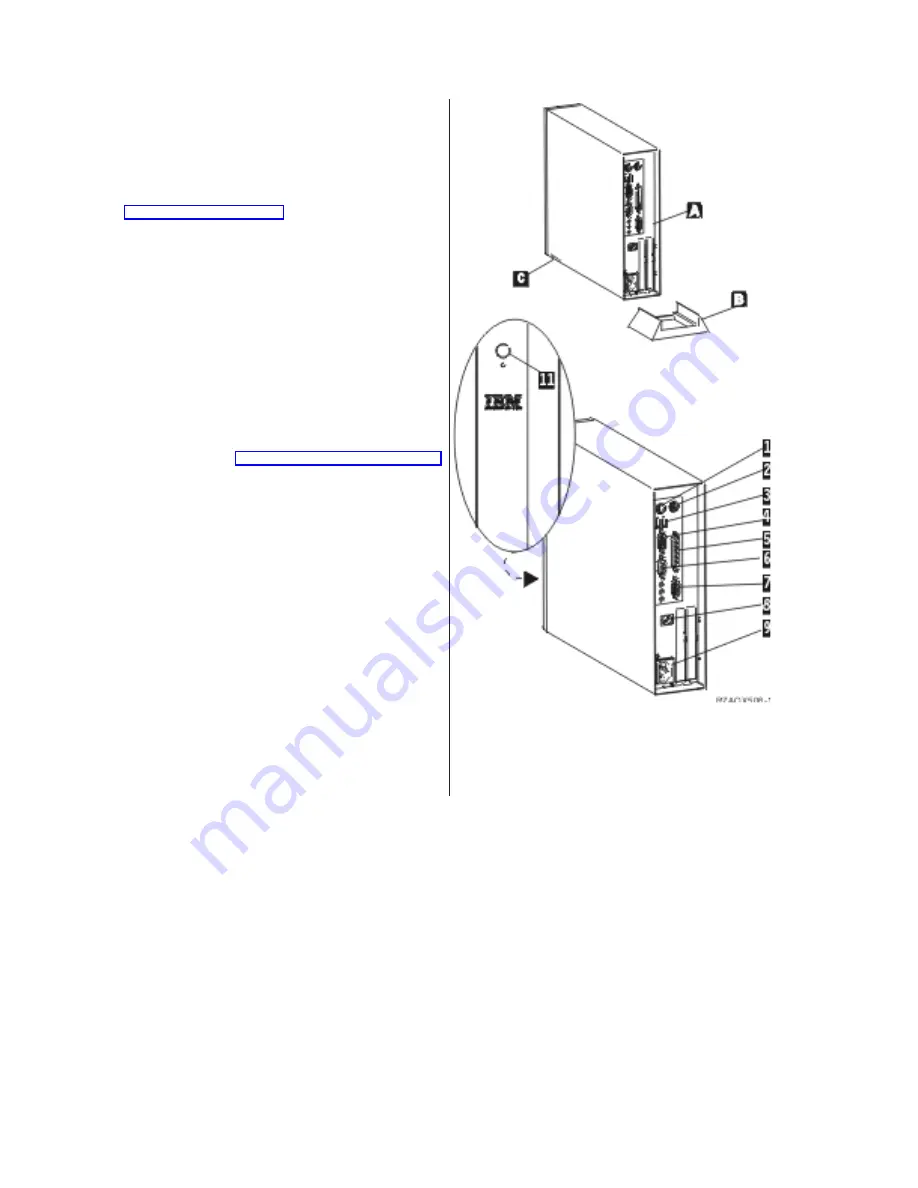
Installing the support base
Snap the base
B
onto the bottom of the thin client
A
,
in the locking slot
C
located near the front of the unit.
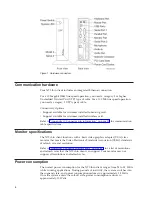
Connecting your hardware
Read “Safety notices” on page v before continuing.
1.
Connect the devices listed below to the appropriate
ports:
1
Keyboard
2
Mouse
3
USB device (2)
4
Serial device 1
5
Parallel devices
6
Monitor
7
Serial device 2
8
Network Connection
Note:
For connecting your microphone, headphone or
speaker, refer to the “Hardware connectors” on page 3
diagram.
2.
Tighten all device cable connections.
3.
Connect the thin client power cable to the power
socket
9
.
4.
Plug all power cables into properly grounded working
electrical outlets.
5.
Turn on the monitor and all other external devices.
6.
To power on your thin client, press the power button
11
.
7.
Configure the system settings from the menu that
appears on your screen. Refer to the server software
information to verify the correct selection for your
network.
Note:
The Operating System Server code must be
installed on the boot server before the workstation can
be used. If your thin client is unable to receive the
Operating System code from the server, contact your
network administrator.
8


